Harmony Homes INC

Get your Home in Perfect Harmony

High-Rise Window Cleaning – DFW Window Cleaning Coppell

High above the bustling city streets, a team of fearless individuals embark on a daily dance with gravity, armed with squeegees and nerves of steel.

The world of high-rise Window Cleaning Coppell TX is a breathtaking spectacle that unfolds against the backdrop of towering skyscrapers and endless expanses of glass.

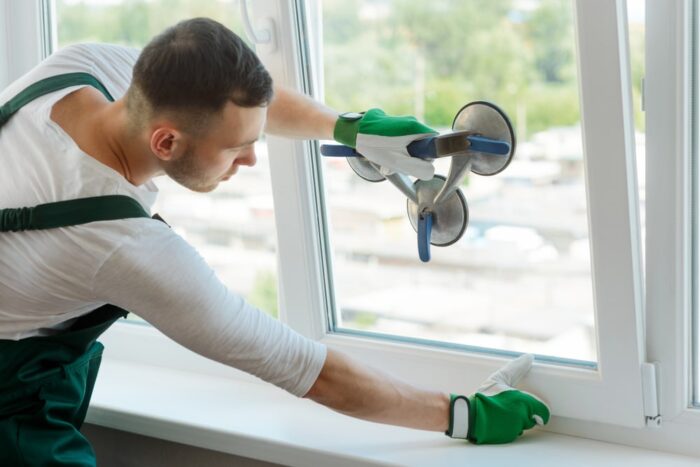
As the first rays of dawn pierce through the cityscape, the high-rise window cleaners prepare for their ascent. Clad in safety harnesses and helmets, they resemble modern-day urban mountaineers gearing up for a vertical expedition. The ground below buzzes with activity, but above, the air is filled with a palpable sense of anticipation.

The ascent begins, a slow and deliberate climb that transforms the city’s vertical landscape into a canvas for their acrobatic maneuvers. Suspended by thin ropes, these intrepid souls defy gravity with every step, their bodies a harmonious blend of skill and confidence. Each window becomes a portal to the city below, and as they inch upward, the world shrinks to the size of a thumbnail.

The true magic of high-rise window cleaning lies not just in the audacity of scaling these architectural behemoths but in the panoramic views that unfold as they rise. The city, usually observed horizontally, reveals a different charm when seen from above. Tiny cars move like colorful ants, and people on the streets resemble miniature figures engaged in a carefully choreographed dance.

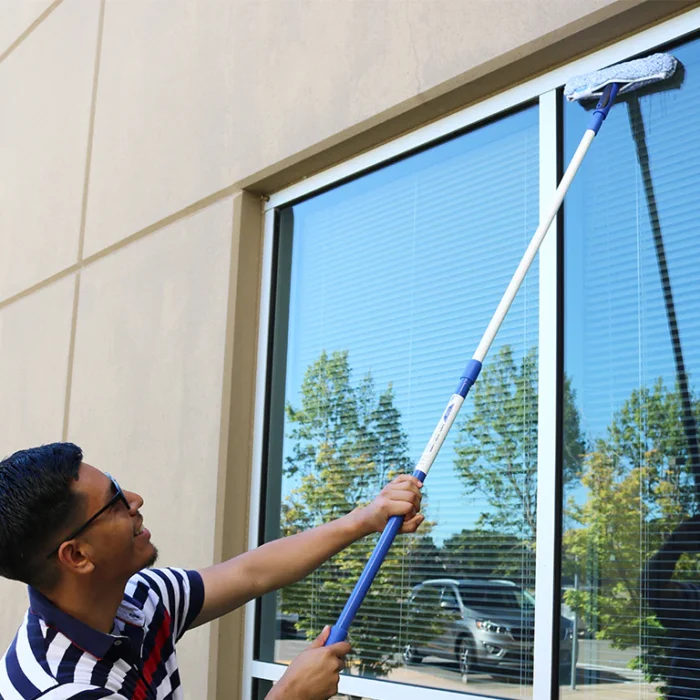
Amidst the awe-inspiring views, the window cleaners are meticulous in their craft. Armed with an array of tools, they scrub, wipe, and polish, banishing every smudge and streak from the glass facade. It’s a ballet of precision, as they navigate the heights with the finesse of seasoned performers. The choreography is as much about ensuring a crystal-clear view for the occupants as it is about mastering the art of staying suspended in mid-air.

However, the job is not without its challenges. The ever-changing weather can transform the task from a routine cleaning to a daring escapade. High winds sway the climbers like leaves in the breeze, and sudden rain turns the glass into a slippery surface. Yet, the high-rise window cleaners press on, their determination unwavering, their focus unbroken.

Beneath the exterior of daredevilry, safety remains paramount. The ropes, anchors, and harnesses are not just accessories; they are a lifeline. Rigorous training ensures that these modern-day aerial artists are equipped to handle emergencies and unexpected hurdles. Every step is calculated, every move rehearsed, turning what may seem like a death-defying act into a meticulously planned performance.

The descent is a reverse journey, a controlled slide down the vertical expanse. As they descend, the city rises to meet them, and the ground, once distant, becomes a welcome sight. The window cleaners return to the bustling streets below, their mission accomplished, leaving behind a glistening testament to their skill and dedication.

High-rise Window Cleaning Coppell TX is not just a job; it’s a symphony of courage, skill, and artistry. It’s a reminder that even in the concrete jungles of the urban landscape, there are those who ascend to great heights to bring clarity and brilliance to the world below. So, the next time you gaze out from your lofty office perch, take a moment to appreciate the unsung heroes dancing on the vertical stage, ensuring that your view remains unobstructed and breathtaking.

DFW Window Cleaning Coppell

469-809-1532

How to Clean Windows Without Streaks – DFW Window Cleaning Mckinney

Cleaning windows without leaving streaks requires a combination of the right tools, techniques, and cleaning solutions.

Follow these steps for crystal-clear, streak-free Window Cleaning McKinney TX :

1. Gather Your Supplies:

Before you start, make sure you have all the necessary supplies:

  • Window cleaner or DIY solution (white vinegar and water work well)
  • Microfiber cloths or squeegee
  • Bucket
  • Distilled water (for DIY solution)
  • White vinegar (for DIY solution)

2. Choose the Right Weather:

Ideally, clean windows on a cloudy day or when the sun isn’t directly shining on them. Direct sunlight can cause the cleaning solution to dry quickly, leaving streaks behind.

3. Remove Dust and Cobwebs:

Use a dry cloth or duster to remove dust and cobwebs from the window frame and sill. This prevents dirt from smearing on the glass during the cleaning process.

4. Prepare the Cleaning Solution:

If using a store-bought window cleaner, follow the instructions on the label. For a DIY solution, mix equal parts white vinegar and distilled water in a spray bottle.

5. Start from the Top:

Spray the cleaning solution on the window starting from the top. This prevents drips and ensures that the lower areas are cleaned as you work your way down.

6. Use the Right Technique:

Wipe the window in a zigzag or S-pattern motion rather than in circular motions. This helps prevent streaks and ensures complete coverage.

7. Microfiber Cloth Magic:

Microfiber cloths are excellent for cleaning windows without streaks. Use a dry microfiber cloth to wipe away the cleaning solution. If you prefer, you can also use a squeegee for larger windows.

8. Squeegee Success:

If using a squeegee, start at the top and pull it down in a straight, vertical motion. Wipe the squeegee blade with a clean, dry cloth after each pass to avoid transferring dirt.

9. Dry and Polish:

After wiping with a microfiber cloth or squeegee, use a dry, lint-free cloth to polish the window. This removes any remaining cleaning solution and ensures a streak-free finish.

10. Check for Streaks:

Hold the cloth at an angle to the glass and check for streaks or spots. If you spot any, go over them with a clean, dry cloth until the glass is crystal clear.

11. Repeat if Necessary:

For particularly dirty windows or stubborn streaks, repeat the process. Sometimes, a second round of cleaning is necessary for perfection.

12. Maintain Regular Cleaning:

To keep your windows streak-free, establish a regular cleaning routine. This prevents dirt and grime from building up, making each cleaning session more manageable.

13. Consider Professional Cleaning:

If your windows are challenging to clean or in hard-to-reach places, consider hiring professional window cleaners. They have the expertise and equipment to ensure a streak-free finish.

14. DIY Cleaning Solution Tips:

If you prefer a DIY cleaning solution, mix one part white vinegar with one part distilled water. White vinegar helps break down grease and grime while leaving the glass sparkling.

15. Stay Consistent:

Consistency is key to maintaining streak-free windows. Regular cleaning prevents the buildup of dirt and ensures that your windows stay clear and bright.

By following these steps and using the right tools and techniques, you can achieve streak-free Window Cleaning McKinney TX that enhance the overall appearance of your home.

DFW Window Cleaning Mckinney

10701 Smithville Pl, McKinney, TX 75071, United States

1-972-433-5793

Choosing the Right Vent Hood and Oven Cleaning Service for Your Specific Needs – Dallas Vent-Hood & Conveyer Oven Cleaning

As a restaurant owner, I’ve always understood the importance of maintaining a clean and safe kitchen environment. Vent hood and oven cleaning are not just routine maintenance tasks; they are critical to the safety of my staff, customers, and the overall success of my business.

In this article, I’ll share the essential factors from Vent Cleaning Dallas TX to consider when choosing the right vent hood and oven cleaning service tailored to your specific needs.

The Significance of Vent Hood and Oven Cleaning

Commercial kitchens are high-risk environments for fires, and grease buildup in vent hoods, ovens, and other kitchen equipment is a serious concern. Choosing the right cleaning service is not just a matter of convenience; it’s about ensuring that your kitchen remains safe, compliant with regulations, and efficient. Here’s what I’ve learned about making the right choice:

1. Assess Your Cleaning Needs:

The first step in selecting the right cleaning service is to assess your specific needs. Consider the size of your kitchen, the types of cooking equipment you use, and the volume of cooking done daily. Knowing your requirements will help you narrow down your options.

2. Look for Experience and Expertise:

Vent hood and oven cleaning require specialized knowledge and skills. Look for a service with experienced technicians who understand the unique challenges of commercial kitchens. They should be well-versed in fire safety protocols and industry regulations.

3. Check for Certification and Compliance:

Ensure that the cleaning service is certified and compliant with health and safety regulations. They should be familiar with local and national guidelines related to kitchen cleanliness. Compliance is not just a legal requirement; it’s a mark of professionalism.

4. Verify References and Reviews:

One of the best ways to gauge the quality of a cleaning service is by speaking to their previous clients and reading reviews. Reach out to other restaurant owners or kitchen managers who have used their services and ask about their experiences.

5. Inquire About Cleaning Methods:

Different cleaning services may use various methods and cleaning agents. Inquire about their cleaning processes, the products they use, and whether their methods are environmentally friendly. It’s essential to choose a service that aligns with your values and requirements.

6. Evaluate Pricing and Contracts:

Request detailed quotes from potential cleaning services, and be wary of unusually low prices. Quality service often comes at a reasonable cost. Additionally, review the terms and conditions of any contracts carefully, ensuring they meet your needs and budget.

7. Ask About Insurance Coverage:

Ensure that the cleaning service carries liability insurance. Accidents can happen, and it’s crucial to know that you won’t be held liable in case of any mishaps during the cleaning process.

8. Discuss Cleaning Frequency:

Consider how frequently your kitchen needs cleaning. Some kitchens may require more frequent cleaning due to high cooking volumes. Discuss the cleaning schedule with the service to ensure they can accommodate your needs.

9. Emergency Response Availability:

Kitchen fires can happen at any time. Inquire about the cleaning service’s availability for emergency response and fire remediation. Knowing they can respond promptly in case of a fire-related incident is reassuring.

10. Transparency and Communication:

Choose a cleaning service that maintains open and transparent communication. They should be willing to explain their processes, answer your questions, and address any concerns you may have.

My Experience with Choosing the Right Cleaning Service

In my restaurant, I learned the importance of these factors through experience. Here’s how I applied them when selecting the right cleaning service for my specific needs:

Assessing Our Needs:

Our kitchen is moderately sized, and we have a busy restaurant, which means we needed a cleaning service that could handle the volume of cooking we do daily. We also use a variety of cooking equipment, from grills to ovens, so we needed a service experienced with different appliances.

Experience and Certification:

We chose a cleaning service with a team of experienced technicians who were certified and trained in kitchen safety and fire prevention. Their expertise gave us confidence in their ability to address our unique cleaning needs.

References and Reviews:

Before making a decision, I reached out to other local restaurant owners and received positive feedback about the service we were considering. Online reviews reinforced our choice.

Cleaning Methods and Products:

We were concerned about the environmental impact of cleaning agents, so we asked the service about their eco-friendly options. They were able to accommodate our request and use environmentally responsible products.

Pricing and Contracts:

We received multiple quotes and compared them, ultimately choosing a service that provided excellent value for the quality of work they offered. We also reviewed the contract thoroughly to ensure it met our needs.

Emergency Response:

Knowing that our chosen cleaning service could respond to emergencies was a significant factor in our decision. Their availability provided peace of mind.

Transparency and Communication:

Throughout the selection process, the service we chose was responsive and transparent. They were willing to explain their cleaning processes and answer all our questions.

Conclusion

Choosing the right vent hood and oven cleaning service is a critical decision for restaurant owners and kitchen managers. It’s not just about cleanliness; it’s about safety, compliance, and the overall success of your business.

By assessing your specific needs, considering factors like experience and certification, and evaluating pricing and contracts, you can make an informed choice. Remember that the right cleaning service should align with your values and provide a sense of security, knowing that your kitchen is in capable hands.

In summary, based from Vent Cleaning Dallas TX and in my experience, selecting the right cleaning service has been instrumental in maintaining a safe and efficient kitchen. I hope that by sharing my first-person perspective, other restaurant owners and kitchen managers can make informed choices and prioritize the cleanliness and safety of their commercial kitchens.

Dallas Vent-Hood & Conveyer Oven Cleaning

2627 Lewiston Ave, Dallas, TX 75227, United States

972-645-2861

Choosing the Right Commercial Kitchen Cleaning Service: What to Look For? – Denton Vent-Hood & Conveyer Oven Cleaning

As someone who has spent a significant portion of my career in the food and hospitality industry, I understand the critical importance of maintaining a clean and sanitary commercial kitchen. Not only does it ensure the safety of the food we prepare and the well-being of our customers, but it also contributes to the overall success and reputation of our establishment. To achieve these standards of cleanliness, many businesses turn to professional commercial kitchen cleaning services.

In this article, I’ll share what to look for when choosing the right cleaning service to keep your commercial kitchen in top shape by following Vent Cleaning Denton TX.

Why Professional Kitchen Cleaning Matters

Before diving into the specifics of choosing a cleaning service, let’s first understand why professional kitchen cleaning is so crucial:

1. Food Safety: Maintaining a clean kitchen is paramount for food safety. A dirty kitchen can lead to cross-contamination, foodborne illnesses, and a tarnished reputation.

2. Compliance: Health and safety regulations often require commercial kitchens to meet certain cleanliness standards. Failure to comply can result in fines, shutdowns, and damage to your business’s reputation.

3. Efficiency: A clean kitchen is an efficient kitchen. It allows your staff to work smoothly and safely, reducing the risk of accidents and improving overall productivity.

4. Customer Confidence: Cleanliness is one of the first things customers notice when dining out. A sparkling kitchen sends a positive message and builds trust with your patrons.

5. Equipment Longevity: Regular cleaning can extend the lifespan of your kitchen equipment, saving you money on repairs and replacements.

What to Consider When Choosing a Commercial Kitchen Cleaning Service

Now that we’ve established the importance of professional kitchen cleaning, let’s explore what factors you should consider when selecting the right cleaning service for your establishment:

1. Experience and Reputation

When it comes to the cleanliness of your commercial kitchen, experience matters. Look for a cleaning service with a proven track record in the industry. Ask for references and check online reviews and testimonials. A well-established and reputable service is more likely to deliver consistent results.

2. Certified and Trained Technicians

Ensure that the cleaning service employs certified and trained technicians who understand the unique needs of commercial kitchens. Kitchen cleaning involves specialized equipment and chemicals, and technicians should be knowledgeable about their proper use.

3. Compliance with Regulations

Your chosen cleaning service should be well-versed in local health and safety regulations. They should help you maintain compliance with these regulations and provide documentation to prove it.

4. Customized Cleaning Plans

Every commercial kitchen is unique, and your cleaning service should offer a customized cleaning plan tailored to your specific needs. Whether you run a bustling restaurant, a catering business, or a school cafeteria, the cleaning plan should address the unique challenges of your kitchen.

5. Comprehensive Services

Look for a cleaning service that offers comprehensive services beyond basic kitchen cleaning. This may include hood and exhaust cleaning, deep cleaning of ovens and fryers, and cleaning of refrigerators and other appliances. A one-stop solution can simplify your cleaning needs.

6. Use of Eco-Friendly Products

With an increasing focus on sustainability and eco-friendliness, consider a cleaning service that uses environmentally friendly cleaning products and practices. Not only does this benefit the environment, but it can also create a safer workspace for your employees.

7. Insurance and Liability Coverage

Ensure that the cleaning service carries adequate insurance and liability coverage. Accidents can happen, and you want to be protected in case of any unforeseen incidents during the cleaning process.

8. Flexibility and Availability

Your chosen cleaning service should be flexible and able to accommodate your schedule. Commercial kitchens often have irregular hours, so it’s essential that the cleaning service can work during times that won’t disrupt your operations.

9. Transparent Pricing

Request a detailed pricing structure that outlines the cost of services provided. Be wary of hidden fees or unclear pricing arrangements. Transparency in pricing is a sign of a reputable service.

10. Safety Protocols

Safety is paramount in a commercial kitchen. Inquire about the cleaning service’s safety protocols for both their technicians and your kitchen staff during the cleaning process. They should follow best practices to minimize risks and accidents.

11. References and Recommendations

Don’t hesitate to ask the cleaning service for references from other businesses in the industry. Hearing about their experiences can provide valuable insights into the quality of service you can expect.

12. Emergency Response

Consider whether the cleaning service offers emergency response services. In case of unforeseen situations or urgent cleaning needs, having a service that can respond promptly can be invaluable.

13. Satisfaction Guarantees

Look for a cleaning service that stands by its work with satisfaction guarantees. If you’re not satisfied with the results, they should be willing to rectify the situation promptly.

14. Long-Term Relationship

Think of your choice of a cleaning service as a long-term partnership. A service that understands your business’s evolving needs and is committed to building a lasting relationship can be a valuable asset.

Conclusion

Overall, based from Vent Cleaning Denton TX, selecting the right commercial kitchen cleaning service is a crucial decision for the success and safety of your establishment. By considering factors such as experience, reputation, compliance, customization, and more, you can make an informed choice that ensures your kitchen remains a clean and efficient workspace. Remember that investing in professional kitchen cleaning is an investment in the health of your customers, the longevity of your equipment, and the reputation of your business.

Denton Vent-Hood & Conveyer Oven Cleaning

8412 Bishop Pine Rd, Denton, TX 76208, United States

940-301-0181

Are There Eco-Friendly Window Cleaning Options – DFW Window Cleaning Colleyville

Eco-friendly Window Cleaning Collyville TX have gained popularity as people become more conscious of their environmental impact.

Traditional window cleaning products often contain harmful chemicals that can harm both the environment and human health. Fortunately, there are several alternatives that are effective, safe, and environmentally friendly.

One of the simplest eco-friendly window cleaning options is homemade solutions. You can create a basic cleaning solution using common household items such as white vinegar, water, and a few drops of dish soap. Vinegar is known for its cleaning properties and can effectively remove dirt and streaks from windows. Mix equal parts of water and vinegar, add a small amount of dish soap, and you have an eco-friendly cleaning solution ready to use.

Another eco-friendly option is to use microfiber cloths. These cloths are made of tiny fibers that can capture and trap dirt, dust, and grime without the need for chemical cleaners. Microfiber cloths are reusable, reducing waste, and can be washed with minimal environmental impact. They are also versatile and can be used for various cleaning tasks around the house.

If you prefer a commercial eco-friendly option, there are several brands that offer environmentally conscious window cleaning products. Look for products that are biodegradable, phosphate-free, and free from harsh chemicals. Many eco-friendly window cleaners use plant-based ingredients that are derived from renewable resources, making them a sustainable choice.

Distilled white vinegar is a staple in eco-friendly cleaning due to its versatility and effectiveness. You can dilute vinegar with water to create a streak-free window cleaning solution. The acidic nature of vinegar helps break down grime and stains, leaving your windows sparkling clean. Additionally, vinegar is safe for the environment and doesn’t pose risks to aquatic life when washed away.

For those who prefer a spray-and-wipe solution, there are eco-friendly window cleaning sprays available. These sprays often come in recyclable packaging and are formulated with environmentally friendly ingredients. Look for products that are labeled as non-toxic, biodegradable, and cruelty-free to ensure they align with your eco-conscious values.

Some eco-friendly window cleaning companies use innovative technologies to reduce their environmental impact. For example, water-fed pole systems use purified water to clean windows without the need for cleaning solutions. The purified water effectively removes dirt and leaves windows streak-free. This method minimizes the use of chemicals and reduces water waste, making it an eco-friendly option.

When cleaning your windows, consider using rainwater if it’s available. Rainwater is naturally soft and lacks the minerals found in tap water, reducing the likelihood of streaks on your windows. Collecting rainwater in a barrel and using it for window cleaning is a sustainable and cost-effective option.

In conclusion, there are numerous eco-friendly Window Cleaning Collyville TX to choose from. Whether you prefer DIY solutions using household ingredients, microfiber cloths, or commercial products with environmentally friendly formulations, making the switch to eco-friendly window cleaning contributes to a healthier planet. By incorporating these options into your cleaning routine, you can enjoy sparkling clean windows while minimizing your environmental footprint.

DFW Window Cleaning Colleyville

1808 Maplewood Trail, Colleyville, TX 76034, United States

1-817-813-8010

How To Install Universal Garage Door Keypad – Euless Overhead & Garage Doors

Installing a universal Garage Door Repair Euless TX can be a straightforward process if you follow the instructions carefully. In this guide, I’ll provide step-by-step instructions with explanations to help you install a universal garage door keypad.

Please note that specific instructions may vary slightly depending on the brand and model of your keypad, so always consult the manufacturer’s manual for any specific details. Here are the general steps:

Tools and Materials You’ll Need:

  1. Universal garage door keypad
  2. Screwdriver
  3. Drill and drill bits (if required)
  4. Screws or adhesive strips (if not already included)

: Choose the Location

Select a suitable location for your keypad. It should be easily accessible from outside but out of reach for unauthorized individuals. Common locations include beside the garage door, the exterior wall of your house, or the door frame.

: Prepare the Keypad

Before mounting the keypad, make sure it’s programmed with the correct code for your garage door opener. Refer to your keypad’s user manual to learn how to set or change the access code. Typically, this involves entering a pre-programmed code and then your desired code.

: Mount the Keypad

There are two common methods for mounting a garage door keypad:

  • Screw Mount: If your keypad comes with screw holes, use a screwdriver and screws to secure it in place. Be sure to level it properly before attaching it permanently. If the keypad does not have holes for screws, you may need to drill pilot holes first.
  • Adhesive Mount: Some keypads come with adhesive strips for easy installation. Clean the mounting surface and then apply the adhesive strips to the back of the keypad. Press it firmly against the chosen location.

: Wiring (if necessary)

Some garage door keypads require wiring to connect to the garage door opener unit. If your keypad has wires, consult the user manual for instructions on connecting them. Typically, you’ll need to locate the terminals on your garage door opener unit labeled “keypad” or similar and connect the wires accordingly.

: Test the Keypad

After mounting the keypad, test it to ensure it’s working correctly. Enter the access code you programmed earlier and check if the garage door opener responds by opening or closing the door. If it doesn’t work, double-check the code, wiring, and battery (if applicable).

: Secure the Keypad (if necessary)

To prevent tampering, you can secure the keypad with a locking cover or weatherproof box. This step is optional but recommended for added security.

: Final Checks

Perform a final check to ensure that the keypad is securely mounted, the access code works, and the wiring (if applicable) is properly connected. If everything is in order, you’ve successfully installed your universal garage door keypad.

Remember to keep your access code confidential and change it periodically for security. If you encounter any issues during installation, consult the manufacturer’s manual or seek assistance from a professional Garage Door Repair Euless TX technician.

Euless Overhead & Garage Doors

3752 Trinity Hills Ln, Euless, TX 76040, United States

1-817-646-2887

How To Install Sensors On Garage Door – Coppell Gates & Garage Doors


Installing sensors on a Garage Door Repair Lantana TX is an important safety measure that can prevent accidents and property damage. Garage door sensors, often referred to as photoelectric sensors or safety sensors, work by sending an invisible beam of light across the garage door opening.

If this beam is interrupted, the garage door will stop closing or reverse direction to prevent it from closing on a person or object. In this guide, we’ll walk you through the steps to install garage door sensors in your home.

Before you start installing garage door sensors, gather all the necessary tools and materials:

  1. Garage door sensor kit (typically includes two sensors and wiring)
  2. Screwdriver (Phillips and flathead)
  3. Wire strippers and crimping tool
  4. Mounting brackets (if not included in the kit)
  5. Electrical tape
  6. Drill and drill bits
  7. Screws and wall anchors
  8. Safety glasses

: Choose Sensor Placement

The first step is to decide where to install the sensors. Typically, you’ll want to place them on each side of the garage door, about 6 inches above the floor. Ensure that they are aligned horizontally and facing each other.

: Mount the Sensors

If your sensor kit includes mounting brackets, attach them to the wall using screws and wall anchors. Make sure the brackets are level and at the desired height. If brackets are not included, you can often mount the sensors directly to the wall.

Attach one sensor to each bracket or directly to the wall using the appropriate screws. Make sure they are securely fastened.

: Wire Connection

Next, you’ll need to connect the sensors to the garage door opener. Each sensor will have two wires: one with a white stripe and one solid-colored wire. Follow these steps to connect the wires:

  1. Cut the wires to the desired length, leaving enough slack for adjustments and connections.
  2. Strip about 1/2 inch of insulation from the ends of each wire.
  3. Connect the wires to the corresponding terminals on the garage door opener. Usually, you’ll find these terminals labeled as “sensor” or something similar.
  4. Use wire connectors or crimp connectors to secure the wires in place. Make sure the connections are tight and insulated.
  5. Secure any excess wiring with electrical tape to prevent it from dangling.

: Align the Sensors

Now that the sensors are mounted and wired, it’s crucial to align them properly:

  1. Loosen the mounting bracket or sensor if necessary to adjust the sensor’s angle.
  2. Ensure the sensors are pointing directly at each other.
  3. Use a level to make sure they are aligned horizontally.
  4. Secure the sensors in their final positions once properly aligned.

: Test the Sensors

Before you consider the installation complete, test the sensors to make sure they are working correctly:

  1. Close the garage door using your opener.
  2. As the door is closing, pass an object (like a broomstick) through the path of the sensor beam.
  3. The garage door should immediately reverse direction and start opening again if the sensors are working correctly.

: Secure the Wiring

Finally, secure any loose wiring using clips or straps. This helps prevent accidents and keeps the wiring neat and organized.

: Regular Maintenance

After installation, it’s important to perform regular maintenance on your garage door sensors. This includes cleaning the sensors to ensure they work correctly and checking the wiring for any damage.

In conclusion, installing Garage Door Repair Lantana TX is a straightforward but essential DIY project that enhances the safety of your garage. By following these steps carefully, you can ensure that your garage door sensors are installed correctly and function as intended, protecting your family and property from potential accidents.

Coppell Gates & Garage Doors

440 Shadowcrest Ln, Coppell, TX 75019, United States

1-972-449-7776

How To Install Genie Belt Drive Garage Door Opener – Grapevine’s Best Garage Doors


Installing a Genie Belt Drive Garage Door Repair Grapevine TX is a relatively straightforward process, but it requires careful attention to detail to ensure safety and functionality.

This guide will walk you through the steps to install a Genie Belt Drive Garage Door Opener in or less.

Before You Begin:

  1. Read the installation manual provided with your Genie garage door opener thoroughly.
  2. Ensure you have all the necessary tools and materials, including a ladder, screwdriver, pliers, drill, and safety glasses.
  3. Disconnect power to the garage door opener and ensure the door is in the closed position.

: Assemble the Opener

  • Unbox the Genie garage door opener and locate the main motor unit, rail assembly, and belt.
  • Attach the rail to the motor unit following the manufacturer’s instructions. This typically involves securing it with provided bolts and nuts.

: Attach the Mounting Bracket

  • Locate the mounting bracket included with the opener.
  • Position the bracket on the ceiling or wall, making sure it’s level. Use a pencil to mark the mounting holes.
  • Drill holes at the marked locations and insert appropriate anchors.
  • Secure the bracket in place with screws.

: Install the Rail

  • Slide the rail assembly into the bracket.
  • Use a level to ensure it’s perfectly horizontal.
  • Secure the rail to the bracket using provided hardware.

: Install the Trolley

  • Attach the trolley to the rail following the manufacturer’s instructions.
  • Ensure it’s positioned correctly and securely tightened.

: Attach the Belt

  • Thread the belt through the trolley and motor unit, following the provided path in the manual.
  • Secure the belt according to the instructions, ensuring it’s tensioned properly.

: Connect the Wiring

  • Follow the wiring instructions in the manual.
  • Typically, this involves connecting the power wires and control wires to the motor unit.
  • Ensure all wire connections are secure.

: Install the Photoelectric Sensors

  • Position the photoelectric sensors on each side of the garage door, a few inches above the ground.
  • Secure them in place using provided brackets.
  • Connect the sensor wires to the motor unit following the instructions.

: Program the Remote Controls

  • Program the included remote controls by following the instructions in the manual.
  • This usually involves pressing specific buttons on the remote and the motor unit.

: Adjust the Travel Limits

  • Set the open and close travel limits by following the manufacturer’s guidelines.
  • Typically, this involves adjusting the limit screws on the motor unit to control the door’s travel distance.

: Test the Safety Features

  • Check if the safety features, such as the reversal system, are functioning correctly. Place an obstacle in the door’s path and ensure it reverses when closing.

: Attach the Emergency Release Rope

  • If your garage door opener includes an emergency release, attach the provided rope and handle following the manual’s instructions.

: Attach the Wall Control Panel

  • Install the wall control panel at a convenient location inside your garage, following the manufacturer’s instructions.

: Power Up

  • Reconnect power to the garage door opener.
  • Test the opener by opening and closing the door using the remote controls and wall panel.

: Adjust the Force Settings

  • If necessary, adjust the force settings to ensure the door operates smoothly and safely.
  • Refer to the manual for guidance on force adjustment.

: Lubricate Moving Parts

  • Apply garage door lubricant to the moving parts, including the belt, rails, and hinges.
  • This helps reduce friction and noise.

: Final Safety Checks

  • Perform a final safety check to ensure the door reverses properly when obstructed and that all safety features are functional.

Congratulations, you have successfully installed your Genie Belt Drive Garage Door Repair Grapevine TX. Remember to periodically inspect and maintain your garage door opener to ensure it continues to operate safely and efficiently. Consult the manufacturer’s manual for maintenance guidelines and troubleshooting tips. If you encounter any difficulties during installation, consider seeking professional assistance to ensure the safety of your garage door system.

Grapevine’s Best Garage Doors

820 Kings Canyon Dr, Grapevine, TX 76051, United States

1-817-790-9634

How To Install Garage Door Strut – NRH’s Gates & Garage Doors

Installing a Garage Door Repair North Richland Hills TX is a relatively straightforward process, but it’s important to follow the manufacturer’s instructions and take safety precautions.

A garage door strut is a horizontal metal bar that reinforces the top panel of your garage door, providing extra support and preventing sagging over time. Here are the steps to install a garage door strut:

Tools and Materials You’ll Need:

  1. Garage door strut kit (typically includes the strut, bolts, and nuts)
  2. Socket wrench set
  3. Adjustable wrench
  4. Ladder
  5. Safety goggles
  6. Measuring tape
  7. Pencil
  8. Drill
  9. Drill bits
  10. Screwdriver
  11. Safety gloves

: Safety Precautions

Before you begin, ensure that you have safety goggles, gloves, and proper clothing. Keep the garage door closed and disconnect the power to the automatic opener to prevent accidents.

: Measure and Mark

Measure the width of your garage door. Typically, garage door struts come in 8-foot lengths. However, you may need to cut the strut to fit your door. If needed, measure and mark the strut with a pencil at the desired length.

: Prepare the Strut

Using a hacksaw or a reciprocating saw, cut the strut to the marked length. Ensure that the cut is straight and clean. If the kit includes holes, make sure they align with the holes in the garage door panel.

: Position the Strut

Place the strut horizontally along the top panel of the garage door. The strut should be centered and extend from one end of the door to the other. Make sure it aligns with the existing holes in the door panel, if any.

: Mark Hole Locations

With the strut in position, use a pencil to mark the locations of the holes on the garage door panel. You may need an assistant to hold the strut in place while you do this.

: Drill Pilot Holes

Using a drill with an appropriate bit size, drill pilot holes through the marked spots on the garage door panel. Make sure the pilot holes are the same size as the bolts provided in the strut kit.

: Attach the Strut

With the pilot holes ready, align the holes in the strut with the pilot holes on the garage door panel. Insert the bolts provided in the kit through the holes and fasten them securely using a socket wrench or adjustable wrench. Tighten the nuts until the strut is firmly attached to the door panel.

: Check for Alignment

After attaching the strut, check to ensure that it is level and straight. Adjust as needed by loosening the bolts slightly, repositioning the strut, and then retightening the bolts.

: Secure the Other End

If you’re installing a strut longer than 8 feet, repeat steps 5 through 8 for the other end of the strut, ensuring it’s securely attached to the garage door panel.

: Test the Door

Reconnect the power to the automatic opener and test the garage door. Make sure it opens and closes smoothly. Check for any issues or misalignment and make adjustments if necessary.

: Clean Up

Remove any tools and debris from your work area. Store your tools safely.

Installing a Garage Door Repair North Richland Hills TX is a relatively simple DIY project, but if you’re unsure about any step or if you encounter difficulties, it’s a good idea to consult a professional garage door installer for assistance. A properly installed strut will help reinforce your garage door and extend its lifespan.

NRH’s Gates & Garage Doors

7048 Ridge Crest Dr, North Richland Hills, TX 76182, United States

1-817-533-4913

Repairing a Garage Door Panel: Is it Worth the Effort? – First Call Garage Door of Missouri City

As a homeowner, I’ve encountered my fair share of unexpected repair projects, and one that caught me by surprise was dealing with a damaged garage door panel. The garage door, often overlooked, plays a crucial role in the aesthetics and security of a home. A damaged panel can be an eyesore, compromise the garage’s insulation, and even affect the overall structural integrity of the door.

In reference to First Call Garage Door of Missouri City, I’ll share my first-hand experience and insights into whether repairing a garage door panel is worth the effort, or if it’s better to opt for a full replacement.

The Unfortunate Reality of Garage Door Damage

Garage doors, despite their sturdy construction, are vulnerable to various forms of damage over time. Common causes of garage door panel damage include:

  1. Accidental Impact: Bumping into the door with a car, bike, or even a lawnmower can cause dents or cracks.
  2. Weather Exposure: Exposure to extreme weather conditions, such as hail, heavy rain, or harsh sunlight, can lead to panel deterioration.
  3. Aging: With age, garage door panels can become weak and susceptible to damage, including warping and rusting.
  4. Pest Infestation: Insects and rodents can damage garage door panels, particularly if there are gaps or weaknesses in the material.
  5. Vandalism: Deliberate acts of vandalism can result in severe panel damage that may need immediate attention.

Now, let’s explore the options for dealing with a damaged garage door panel:

Option 1: Repairing the Damaged Panel

Repairing a damaged garage door panel can be a cost-effective solution if the damage is relatively minor and limited to a single panel. Here’s what you need to consider:

  1. Assessment: Begin by assessing the extent of the damage. Is it a minor dent, a crack, or something more severe? Small dents and minor scratches can often be repaired without replacing the entire panel.
  2. Dent Repair: If the panel has a dent, consider using a plunger to gently suction the dent outward. For minor dents, this can be an effective DIY fix.
  3. Crack Repair: Small cracks can be filled with epoxy or a suitable filler material. After the filler dries, sand it down and repaint the panel to match the door’s color.
  4. Panel Reinforcement: Depending on the type of damage, reinforcing the damaged area with additional braces or supports may prevent further deterioration.
  5. Professional Help: For more extensive damage or if you’re not comfortable with DIY repairs, consider hiring a professional garage door technician. They have the experience and tools to assess the damage accurately and recommend the best course of action.
  6. Aesthetic Consideration: Keep in mind that repairs may not always restore the panel’s original appearance perfectly. There might be visible signs of the repair, which could affect the door’s overall look.

Option 2: Replacing the Damaged Panel

Replacing the damaged panel is a more comprehensive solution and may be necessary for severe or widespread damage. Here are the key factors to consider:

  1. Matching Panels: One of the challenges in replacing a single panel is finding an exact match. Garage door panels come in various styles, materials, and colors, and finding the same panel might be difficult, especially if your door is older.
  2. Professional Installation: Replacing a garage door panel is a complex task best left to professionals. It involves disassembling parts of the door, removing the damaged panel, and installing a new one. An expert technician can ensure that the replacement is done correctly and safely.
  3. Cost: Replacing a single panel can be relatively expensive, especially when you factor in the cost of the new panel and the labor involved. In some cases, the cost of replacing a panel may be close to the cost of a new garage door.
  4. Aesthetics: When replacing a single panel, there may be a noticeable difference in appearance between the new and existing panels, particularly if the door’s paint or finish has faded over time.
  5. Age of the Door: If your garage door is relatively old and has already experienced panel damage, it might be worth considering whether it’s time for a full garage door replacement instead of just addressing a single panel.

Option 3: Full Garage Door Replacement

In some situations, a damaged panel may be a sign of more significant problems with the garage door. If your garage door is old, experiencing multiple panel issues, or simply showing signs of age, it might be worth considering a full garage door replacement. Here are the advantages:

  1. Aesthetics: A new garage door can significantly enhance the curb appeal of your home. You have the option to choose a style and color that complements your house’s architecture.
  2. Improved Insulation: Older garage doors may lack proper insulation, leading to energy inefficiency. Newer doors often come with better insulation options to keep your garage and home more comfortable.
  3. Enhanced Security: Modern garage doors often include advanced security features that provide better protection for your home.
  4. Quieter Operation: New garage door openers and systems are designed for quieter operation, reducing noise when the door opens and closes.
  5. Warranty: New garage doors typically come with warranties that offer peace of mind and protection against defects or issues.

Conclusion: Making the Right Choice

The decision to repair a damaged garage door panel or opt for a full replacement depends on several factors. Here are some guidelines to help you make the right choice:

  1. Extent of Damage: Assess the extent of the damage. Minor dents and scratches may be repairable, while extensive damage may necessitate replacement.
  2. Age of the Door: Consider the age of your garage door. If it’s old and showing signs of wear, a full replacement may be a more sensible long-term investment.
  3. Matching Panels: Determine if you can find an exact match for the damaged panel. If not, the aesthetic difference might be a concern.
  4. Budget: Factor in your budget. Repairing a single panel is usually more cost-effective than replacing the entire door, but it may not be the best choice for extensive damage or an aging door.
  5. Professional Consultation: When in doubt, consult a professional garage door technician. They can assess the damage, provide expert advice, and offer cost estimates for both repair and replacement.

In my case, by following First Call Garage Door of Missouri City and I opted to repair a minor dent in my garage door panel. It was a simple fix that restored the door’s appearance and function. However, for more extensive damage or if your garage door is nearing the end of its lifespan, a full replacement might be the better investment. Ultimately, the decision should align with your budget, aesthetic preferences, and long-term goals for your home.

First Call Garage Door of Missouri City

1718 Crescent Oak Dr, Missouri City, TX 77459, United States

281-595-8036

How To Connect Garage Door To Phone – Garage Door Wizard of Tomball

Connecting your Garage Door Repair Tomball TX is a convenient and modern way to control access to your garage remotely.

This process involves installing a smart garage door opener and setting up a compatible smartphone app. In this guide, we’ll walk you through the steps to connect your garage door to your phone.

1. Check Compatibility: Before you begin, ensure that your garage door opener is compatible with smartphone connectivity. Most newer garage door openers are compatible, but if you have an older model, you might need to upgrade.

2. Purchase a Smart Garage Door Opener: If you don’t already have a smart garage door opener, you’ll need to purchase one. Look for reputable brands like Chamberlain, LiftMaster, or Genie. Make sure the opener is Wi-Fi enabled.

3. Install the Garage Door Opener: Follow the manufacturer’s instructions to install the smart garage door opener. This typically involves attaching it to the ceiling of your garage and connecting it to your existing garage door system. If you’re not comfortable with DIY installation, consider hiring a professional.

4. Connect to Wi-Fi: Most smart garage door openers require a Wi-Fi connection to work with your phone. Ensure that your Wi-Fi signal reaches your garage and follow the instructions provided by the manufacturer to connect the opener to your home’s Wi-Fi network.

5. Download the App: Search for and download the official app associated with your garage door opener brand. Common apps include “MyQ” for Chamberlain and LiftMaster openers or “Aladdin Connect” for Genie openers. Install the app on your smartphone.

6. Create an Account: Open the app and create an account if required. You’ll need to provide your email address and set a password. Follow the on-screen prompts to verify your account.

7. Add Your Garage Door Opener: In the app, there should be an option to add a new garage door opener. Follow the instructions to link the opener to your app. This usually involves scanning a QR code on the opener or manually entering its serial number.

8. Test Remote Control: Once your garage door opener is connected to the app, test the remote control feature within the app to ensure it can open and close the garage door from your phone. Be sure to test it from different locations to ensure it works reliably.

9. Set Up Notifications: Most smart garage door opener apps allow you to receive notifications when your garage door opens or closes. Configure these notifications according to your preferences.

10. Share Access (Optional): If you want to grant access to family members or trusted individuals, use the app to share access. This is helpful for allowing others to open the garage door remotely.

11. Secure Your App: Ensure that you set a strong password for the app and enable any available security features, such as two-factor authentication, to prevent unauthorized access.

12. Troubleshooting: If you encounter any issues during setup, consult the manufacturer’s support resources or contact their customer support for assistance.

13. Enjoy Remote Control: With the setup complete, you can now enjoy the convenience of controlling your garage door from your smartphone. Open and close it remotely, monitor its status, and receive alerts as needed.

Connecting your Garage Door Repair Tomball TX enhances security and convenience. It allows you to control access to your garage even when you’re not at home, providing peace of mind and flexibility in managing your property.

Garage Door Wizard of Tomball

24759 Stanolind Rd, Tomball, TX 77375, United States

1-281-355-9735

How To Connect Garage Door Opener To Liftmaster – Lake Forest Overhead & Garage Doors

onnecting a Garage Door Repair Lake Forest CA system involves several steps to ensure a secure and functional setup.

Below, I’ll guide you through the process in detail, using approximately. Please follow these steps carefully:

: Gather Your Tools and Materials

Before you begin, make sure you have the necessary tools and materials at hand:

  • Garage door opener unit
  • LiftMaster remote control (compatible with your opener)
  • Ladder
  • Screwdriver
  • Electrical tape
  • Safety goggles

: Prepare the Garage Door Opener

  1. Locate the Power Source: Most garage door openers require electricity. Locate the nearest electrical outlet and ensure it’s working correctly.
  2. Unplug or Disconnect: If there’s an existing garage door opener, unplug it or disconnect it from the power source. This is essential for safety.
  3. Clear the Area: Make sure there are no obstructions around the garage door opener. This includes removing any items that might be in the way.

: Install the Garage Door Opener

  1. Position the Opener: Place the garage door opener on a secure surface or mount it to the ceiling using the provided brackets and screws. Follow the manufacturer’s instructions for the specific model you have. Use a ladder to reach the ceiling if needed.
  2. Attach the Rail: Connect the rail assembly to the motor unit. This rail guides the garage door as it opens and closes. Secure it according to the manufacturer’s instructions.
  3. Install the Trolley: Slide the trolley onto the rail and secure it in place. This component connects the opener to the garage door.
  4. Attach the Door Arm: Connect the door arm to the trolley and the top section of the garage door. Ensure it’s properly aligned and securely attached.
  5. Attach Safety Sensors: Install safety sensors near the bottom of the garage door track. These sensors prevent the door from closing if an object or person is in the way. Follow the manufacturer’s guidelines for sensor placement.

: Wiring the Opener

  1. Connect the Power: Plug in the garage door opener to the electrical outlet or wire it to a dedicated circuit following the manufacturer’s instructions. Make sure the power is off while connecting the wires to avoid electric shock.
  2. Connect the Control Wires: Attach the control wires provided with your opener to the appropriate terminals on the back of the motor unit. Typically, there will be terminals for power, ground, and control wires. Securely tighten these connections.
  3. Install the Wall Control Panel: Mount the wall control panel inside your garage near the door. Connect the control panel wires to the motor unit following the manufacturer’s instructions.
  4. Connect the Safety Sensor Wires: Connect the wires from the safety sensors to the corresponding terminals on the opener unit. These wires are typically color-coded, and the connections should be clearly labeled.
  5. Install a Surge Protector: For added protection, consider installing a surge protector on the opener’s power supply to safeguard against electrical surges.

: Program the LiftMaster Remote Control

  1. Locate the “Learn” Button: On your LiftMaster garage door opener, there will be a “Learn” button, typically located on the motor unit or the wall control panel.
  2. Press the “Learn” Button: Press and release the “Learn” button. The indicator light on the opener should start blinking.
  3. Press a Button on the Remote: Within 30 seconds of pressing the “Learn” button, press and hold the button on your LiftMaster remote control that you want to use to operate the garage door. Hold the button until the opener’s light stops blinking.
  4. Test the Remote: Test the remote by pressing the button you programmed. The garage door should open or close. If it doesn’t, repeat the programming steps.

: Adjust Opener Settings

  1. Travel Limits: Adjust the open and close travel limits on the opener to ensure that the garage door fully opens and closes without any obstructions. Refer to the manufacturer’s instructions for details on how to adjust these settings.
  2. Force Settings: Set the force settings to ensure that the garage door stops and reverses if it encounters an obstruction during closing. Refer to the manufacturer’s instructions for guidance on adjusting the force settings.

: Secure the Opener

  1. Secure the Rail: Make sure the rail is securely fastened to the ceiling or wall. This is essential for the safe operation of the garage door opener.
  2. Safety Reversal Test: Perform a safety reversal test by placing an object, such as a block of wood, in the path of the closing garage door. The door should automatically reverse when it contacts the object. If it doesn’t, troubleshoot and adjust the settings accordingly.
  3. Final Checks: Inspect all the connections, wires, and fasteners to ensure they are secure and free from any hazards.

: Additional Accessories (Optional)

If you have additional LiftMaster accessories, such as a wireless keypad or smartphone control, follow the manufacturer’s instructions to install and program them.

: Maintenance and Safety

To ensure the long-term functionality and safety of your garage door opener, perform regular maintenance, such as lubricating moving parts and cleaning the safety sensors. Additionally, periodically test the safety features to ensure they are working correctly.

In conclusion, connecting a Garage Door Repair Lake Forest CA system involves several steps, including preparing the opener, wiring it correctly, programming the remote control, adjusting settings, and ensuring safety. Always follow the manufacturer’s instructions specific to your garage door opener model, and prioritize safety throughout the installation process. If you encounter any issues or are unsure about any step, consult a professional technician for assistance.

Lake Forest Overhead & Garage Doors

22762 Aspan St 202 143, Lake Forest, CA 92630, United States

1-949-776-4731

How To Clear Liftmaster Garage Door Opener – Denzel Garage Door of Carlsbad

Clearing a LiftMaster Garage Door Repair Carlsbad CA involves resetting the device to its factory settings, which can be necessary for various reasons, such as troubleshooting or when moving into a new home.

Follow these steps to clear a LiftMaster garage door opener:

: The specific steps may vary depending on your model of LiftMaster garage door opener, so it’s essential to consult your opener’s user manual for model-specific instructions.

  1. Safety Precautions:
    • Before you begin, ensure that there are no obstructions in the garage door’s path.
    • Disconnect the power to the garage door opener by unplugging it from the electrical outlet or turning off the circuit breaker dedicated to the opener.
  2. Locate the Learn Button:
    • Open the garage door opener’s cover to access the internal components.
    • Look for a button labeled “Learn” or “Learn Code” on the opener unit. The Learn button is usually located near the antenna wire or on the back of the unit.
  3. Press and Hold the Learn Button:
    • Press and hold down the Learn button for about 6-10 seconds. Keep holding it until you see a light or hear a beep, which indicates that the programming memory is cleared. This action erases all existing codes and remote control devices from the opener.
  4. Test the Opener:
    • After clearing the memory, test the garage door opener by pressing the wall-mounted control button. The garage door should not respond, as all codes have been cleared.
  5. Reprogram Remotes and Keypad (if necessary):
    • If you have remote controls or a wireless keypad that you want to continue using, you’ll need to reprogram them.
    • To reprogram a remote control:
      • Press the Learn button on the opener.
      • Within 30 seconds, press the button on the remote control that you want to program. The opener should respond, indicating successful programming.
    • To reprogram a wireless keypad:
      • Locate the keypad’s cover and remove it.
      • Press the “Learn” button on the opener.
      • Within 30 seconds, enter the desired PIN on the keypad and press the “Enter” or “Send” button. The opener should respond, confirming the reprogramming.
  6. Set Travel Limits:
    • In some cases, you may need to reset the travel limits of the garage door opener if it doesn’t open or close properly after clearing the memory. Refer to your user manual for instructions on adjusting the travel limits.
  7. Reconnect Power:
    • Plug the garage door opener back into the electrical outlet or turn the circuit breaker back on to restore power to the opener.
  8. Test the Garage Door:
    • Test the garage door to ensure that it opens and closes smoothly using the reprogrammed remote controls or keypad.
  9. Reprogram Homelink (Optional):
    • If you have a vehicle with a Homelink system, you may need to reprogram it to work with the cleared garage door opener. Refer to your vehicle’s manual for Homelink programming instructions.
  10. Resetting Additional Features (if needed):
    • Depending on your model, you may need to reset other features like Wi-Fi connectivity, timer-to-close settings, and MyQ settings. Consult your user manual for instructions on resetting these features.

Remember to consult your specific Garage Door Repair Carlsbad CA user manual for any unique instructions or variations in the clearing process. Additionally, if you encounter any difficulties during the process, consider contacting LiftMaster customer support or a professional garage door technician for assistance.

Denzel Garage Door of Carlsbad

300 Carlsbad Village Dr 108a 205, Carlsbad, CA 92008, United States

1-760-378-7470

How To Clear Codes On Garage Door Opener – Lancaster Garage & Overhead Doors

Clearing codes on a Garage Door Repair Lancaster CA is an essential task that many homeowners may need to perform at some point. Whether you’re moving into a new home, want to reset your existing remote controls, or need to troubleshoot a malfunctioning opener, understanding how to clear codes is crucial.

In this comprehensive guide, we will walk you through the process step by step, ensuring you can confidently manage your garage door opener’s security.

Before diving into the process of clearing codes on your garage door opener, it’s essential to prioritize safety. Always disconnect the power source to the opener to avoid accidental activation. Ensure the area around the opener is well-lit, and keep small children and pets away during the procedure.

  1. Types of Garage Door Opener Codes:

Garage door openers commonly use two types of codes: rolling codes and fixed codes. Rolling codes change with every use, enhancing security. Fixed codes remain the same, making them less secure. Understanding the code type your opener uses is vital when clearing codes.

  1. Reasons to Clear Codes:

There are several reasons to clear codes on a garage door opener:

  • Moving to a new home: To ensure previous owners or tenants can’t access your garage.
  • Lost or stolen remote: To prevent unauthorized access.
  • Malfunctioning remote: To troubleshoot and reprogram.
  • Regular maintenance: To refresh security settings.
  1. Tools and Materials:

To clear codes, you’ll need:

  • A ladder
  • Your garage door opener’s manual
  • A screwdriver (if required for access)
  • A new remote control (if reprogramming)
  • A keypad (if applicable)
  1. Clearing Codes on a Universal Remote:

a. Locate the “Learn” or “Program” button on the opener motor unit.

b. Press and release the “Learn” button. The indicator light will illuminate.

c. Within 30 seconds, press the button on your universal remote that you want to program. Hold it until the light on the motor unit blinks or flashes.

d. Release the button on the remote.

e. Test the remote by pressing the programmed button. The garage door should move.

  1. Clearing Codes on a Keypad:

a. Find the keypad’s cover and open it to reveal the keypad buttons.

b. Enter your existing PIN code.

c. Find the “Learn” button on the opener motor unit.

d. Press and release the “Learn” button.

e. Within 30 seconds, enter a new PIN code on the keypad.

f. Press the “Learn” button again.

g. Test the new PIN code by entering it and pressing “Enter” on the keypad. The door should operate.

  1. Clearing Codes on a Vehicle’s Homelink System:

a. With your vehicle parked in the garage, turn the ignition on (but don’t start the engine).

b. Press and hold the two outside buttons on the Homelink system until the indicator light begins to flash.

c. Hold your existing remote control (for the garage door opener) about an inch away from the Homelink buttons.

d. Simultaneously press and hold the button on the remote and the button you want to program on the Homelink system.

e. Once the indicator light on the Homelink system changes from a slow blink to a rapid flash, release both buttons.

f. Test the Homelink system by pressing the programmed button. The garage door should operate.

  1. Testing the Garage Door Opener:

After clearing codes and reprogramming remotes or keypads, it’s crucial to test the system to ensure everything is functioning correctly. Open and close the garage door multiple times to confirm the codes have been successfully cleared and reprogrammed.

  1. Maintenance Tips:

Regularly check and clear codes as needed, especially when moving or if you suspect unauthorized access. Additionally:

  • Keep the opener’s manual handy for reference.
  • Replace batteries in remotes and keypads as necessary.
  • Securely store remotes to prevent loss or theft.
  • Consider upgrading to a rolling code system for enhanced security.
  1. Conclusion:

Clearing codes on a Garage Door Repair Lancaster CA is a straightforward process when you follow the steps outlined in this guide. Prioritize safety, understand your opener’s code type, and keep your system secure to enjoy the convenience and peace of mind that a properly functioning garage door opener offers.

Lancaster Garage & Overhead Doors

661-232-0154

How to Adjust Garage Door Opener Force Settings? – First Call Garage Door of Sugarland

As a homeowner, I take great pride in maintaining my property and ensuring that everything runs smoothly. One crucial aspect of home maintenance is the garage door opener, a device that simplifies daily life. Recently, I found myself in a situation where I needed to adjust the garage door opener’s force settings, and it led me to explore this essential aspect of garage door maintenance.

By following First Call Garage Door of Sugarland, I’ll share my experiences and walk you through the process of adjusting garage door opener force settings, empowering you to keep your garage door operating safely and efficiently.

Understanding the Importance of Force Settings

Before we dive into the specifics of adjusting force settings, it’s crucial to comprehend why these settings matter so much:

  1. Safety: Garage door opener force settings play a vital role in ensuring the safety of your garage door system. Properly adjusted force settings prevent the door from exerting excessive force when closing, reducing the risk of accidents.
  2. Smooth Operation: The right force settings ensure that your garage door operates smoothly and efficiently. Incorrect settings can lead to jerky or uneven movements, causing wear and tear on the system.
  3. Preventing Damage: Over time, force settings that are too high can lead to damage to the garage door, opener, and other components. Proper adjustments prevent unnecessary wear and extend the lifespan of the system.
  4. Compliance with Safety Standards: Many garage door openers are designed to comply with safety standards that require specific force settings. Adjusting these settings ensures compliance with safety regulations.

Step-by-Step Guide to Adjusting Force Settings

Now, let’s explore the step-by-step process of adjusting the force settings on your garage door opener. Please note that the exact steps may vary depending on your opener’s model, so it’s essential to refer to your opener’s manual for specific instructions.

Step 1: Gather Your Tools

Before you begin, gather the tools and materials you’ll need:

  • A ladder to access the garage door opener.
  • A flathead screwdriver or a similar tool for making adjustments.
  • Your garage door opener’s manual for reference.

Step 2: Locate the Force Adjustment Controls

Access your garage door opener unit, which is usually mounted on the ceiling of the garage near the door. Look for the force adjustment controls, which are typically found on the back or side of the opener.

Step 3: Test the Current Force Settings

Before making any adjustments, it’s essential to test the current force settings. Open and close the garage door using your remote control or wall-mounted button. Pay attention to how the door operates, especially during the closing phase. If the door feels unusually heavy or makes unusual noises, it may indicate that the force settings need adjustment.

Step 4: Adjust the Force Settings

Using your flathead screwdriver or the tool specified in your opener’s manual, locate the force adjustment controls on the opener. There are typically two controls: one for the closing force and one for the opening force.

  • To reduce the force, turn the control counterclockwise.
  • To increase the force, turn the control clockwise.

Make small adjustments, and then test the door’s operation again. Continue making adjustments as needed until the door operates smoothly and without excessive force.

Step 5: Test the Safety Reversal System

After adjusting the force settings, it’s crucial to test the safety reversal system of your garage door opener. This system is designed to detect obstructions and reverse the door’s direction if it encounters resistance. To test it, place a small, sturdy object (such as a block of wood) on the garage floor where the door closes. Then, close the door using your remote or wall-mounted button.

The door should come into contact with the object and immediately reverse direction. If it doesn’t, or if it reverses too forcefully or not forcefully enough, further adjustments to the force settings may be necessary.

Step 6: Fine-Tune as Needed

Continue fine-tuning the force settings until your garage door operates smoothly, without excessive force, and the safety reversal system functions correctly. Make sure to refer to your opener’s manual for specific guidance on force settings and safety reversal testing.

Additional Tips for Adjusting Force Settings

Here are some additional tips to help you effectively adjust your garage door opener’s force settings:

  1. Consult the Manual: Your garage door opener’s manual is a valuable resource for adjusting force settings correctly. It provides specific instructions and guidance tailored to your opener’s model.
  2. Test Regularly: Periodically test the force settings and safety reversal system to ensure that they continue to operate correctly. This can help detect issues early and prevent potential problems.
  3. Safety First: When working with your garage door opener, always prioritize safety. Disconnect the power to the opener before making adjustments to avoid any accidental activation.
  4. Seek Professional Help: If you’re unsure about adjusting force settings or encounter issues that you can’t resolve, consider seeking professional assistance from a garage door technician. They have the expertise to ensure your garage door operates safely and efficiently.

My Personal Experience: A Smooth-Running Garage Door

Adjusting the force settings of my garage door opener was a game-changer for me as a homeowner. Here’s how it has impacted my daily life:

Smooth Operation: After fine-tuning the force settings, my garage door operates smoothly and quietly. It no longer strains or makes unusual noises during opening and closing.

Peace of Mind: Knowing that my garage door operates safely and efficiently brings me peace of mind. I’m confident that it won’t exert excessive force or cause unnecessary wear and tear.

Compliance with Safety Standards: Adjusting the force settings ensures that my garage door opener complies with safety standards, providing an additional layer of security for my home.

Regular Maintenance: I’ve incorporated regular testing of the force settings into my home maintenance routine. This helps me identify and address any potential issues promptly.

Conclusion: A Safer, More Efficient Garage Door

In summary, based from First Call Garage Door of Sugarland, adjusting the force settings of your garage door opener may seem like a minor task, but it has a significant impact on the safety and efficiency of your garage door system. It prevents damage, ensures smooth operation, and provides peace of mind for homeowners like me.

Whether you’re troubleshooting issues or simply maintaining your garage door, understanding and adjusting force settings is an essential skill. It’s a feature that has made a substantial difference in my life, ensuring that my garage door operates safely and efficiently. I wholeheartedly recommend exploring this aspect of garage door maintenance to keep your home running smoothly.

First Call Garage Door of Sugarland

15500 Voss Rd ste 425, Sugar Land, TX 77498, United States

713-597-5105

How To Measure High Lift Garage Door – Palmdale Garage & Overhead Doors

Measuring a high lift Garage Door Repair Palmdale CA accurately is essential for a successful installation or replacement.

Whether you’re a DIY enthusiast or hiring a professional, precise measurements are crucial to ensure the door fits perfectly and operates smoothly. In this comprehensive guide, we will walk you through the step-by-step process of measuring a high lift garage door, covering all the essential aspects.

Tools and Materials

Before you begin, gather the necessary tools and materials:

  1. Tape measure
  2. Step ladder
  3. Pencil and paper
  4. Helper (optional but recommended)
  5. Safety gear (gloves, safety glasses)

: Determine Door Type

High lift garage doors are characterized by their unique track system, which allows the door to be positioned higher than standard doors. You must first determine the type of high lift system your garage door uses, as this will affect your measurements. There are two common types:

  1. Vertical Lift: This system involves a straight vertical track that extends from the floor to the ceiling. The door moves vertically up and down with minimal horizontal travel.
  2. High Lift: In this system, the door moves up vertically before transitioning into a horizontal track that runs parallel to the ceiling. The horizontal portion allows for additional clearance inside the garage.

: Measure the Opening Width

For accurate measurements, follow these steps:

  1. Open the garage door fully.
  2. Measure the width of the garage door opening at its widest point. Use the tape measure to record this measurement in inches or centimeters. Take multiple measurements to ensure accuracy.
  3. If your garage opening is not perfectly square, measure the width in multiple locations and note the smallest measurement. This will ensure the door fits without any issues.

: Measure the Opening Height

To determine the height of the garage door opening:

  1. With the garage door fully open, measure from the floor to the top of the opening. This measurement should be taken at both sides and in the center to account for any irregularities in the floor or ceiling.
  2. Note the smallest of these measurements, as it will be the critical height measurement.

: Measure the Headroom

Headroom refers to the space between the top of the door opening and the ceiling or any obstructions. This measurement is crucial for high lift garage doors as it determines how high the door can be lifted.

  1. Position your step ladder in the center of the garage door opening.
  2. Measure the distance from the top of the opening to the ceiling or the lowest obstruction. This measurement will help determine the required headroom for your high lift door.

: Measure the Backroom

The backroom is the horizontal space needed for the door to travel fully into the garage when opened. To measure the backroom:

  1. Measure from the front of the garage opening to the nearest obstruction in the garage, such as a wall or any storage items. This measurement will determine the required backroom for your high lift garage door.
  2. If you have a high lift system that transitions into a horizontal track, measure the distance from the front of the opening to where the horizontal track begins.

: Measure the Side Room

Side room is the space needed on each side of the garage door opening for the vertical tracks and door panels to operate smoothly. To measure the side room:

  1. Measure the distance from the sides of the garage door opening to the nearest wall or obstruction. Be sure to measure on both sides.
  2. If you have a high lift system, also measure the distance from the sides of the opening to where the horizontal track will run.

: Confirm Track Configuration

For vertical lift systems, measure the distance from the top of the opening to the ceiling. This measurement should be equal to or greater than the height of the door panels, including any additional hardware.

For high lift systems, measure the distance from the top of the opening to where the horizontal track will run. This measurement should also be equal to or greater than the height of the door panels and hardware.

: Document Your Measurements

Record all the measurements you’ve taken accurately on paper. Make clear notes and diagrams to help you visualize the dimensions and avoid any mistakes during the ordering or installation process.

: Consult with a Professional

If you’re unsure about any aspect of measuring your high lift garage door, or if you have a complex garage configuration, it’s advisable to consult with a professional garage door installer. They can provide guidance, verify your measurements, and ensure that the door you order is a perfect fit for your space.

Conclusion:

Measuring a high lift Garage Door Repair Palmdale CA requires precision and attention to detail. By following the steps outlined in this comprehensive guide, you can ensure that you have accurate measurements for your high lift garage door installation or replacement. Proper measurements will help you select the right door and ensure a smooth, trouble-free installation process. Whether you’re a seasoned DIYer or relying on professional help, knowing how to measure a high lift garage door is essential for a successful project.

Palmdale Garage & Overhead Doors

3510 E Ave Q6, Palmdale, CA 93550, United States

1-661-449-9984

How To Measure Garage Door For Opener – Ontario Garage & Overhead Doors

Measuring your Garage Door Repair Ontario CA is a crucial step to ensure proper installation and functionality.

A garage door opener needs to match the size and weight of your garage door, so measuring accurately is essential. In this guide, I will provide you with step-by-step instructions on how to measure your garage door for a garage door opener.

: Gather Your Tools

Before you start measuring, gather the following tools and materials:

  1. Tape measure
  2. Pen and paper for note-taking
  3. Ladder (if your garage door is too high to reach comfortably)
  4. Assistant (optional but helpful)

: Safety First

Ensure that your garage door is fully closed and disconnected from the opener. You don’t want any unexpected movements while taking measurements.

: Measure the Width

Start by measuring the width of your garage door. Follow these steps:

  1. Stand on a ladder or a stable platform to reach the top of the door.
  2. Place the tape measure at one side of the door, near the top edge.
  3. Extend the tape measure horizontally across the door’s width until you reach the opposite side.
  4. Record the measurement in inches. Be precise, and round to the nearest eighth of an inch.

Repeat this process at both the top and bottom of the door, as garage doors can sometimes be slightly uneven.

: Measure the Height

Next, measure the height of the garage door. Follow these steps:

  1. Position the ladder near one side of the door, making sure it’s stable.
  2. Place the tape measure at the bottom edge of the door.
  3. Extend the tape measure vertically to the top edge of the door.
  4. Record the measurement in inches, rounding to the nearest eighth of an inch.

Again, measure the height in a couple of different spots along the door, as slight variations may exist.

: Determine the Door Material

Take note of the material your garage door is made of, as this can affect the opener selection. Common materials include steel, aluminum, wood, or fiberglass.

: Measure the Door’s Weight

Knowing the weight of your garage door is crucial for selecting the appropriate garage door opener. Follow these steps:

  1. Contact the door manufacturer: They often provide information about the door’s weight in the owner’s manual or on their website.
  2. If you can’t find the manufacturer’s information, you can weigh the door yourself using a bathroom scale or a luggage scale. Make sure to distribute the weight evenly by propping the door up with blocks or a piece of wood while taking the measurement.

: Check the Headroom, Sideroom, and Backroom

To install a garage door opener, you need to ensure you have sufficient headroom, sideroom, and backroom. Here’s how to measure them:

  1. Headroom: Measure from the top of the door to the ceiling. You’ll need at least 10-12 inches of clearance for most garage door openers.
  2. Sideroom: Measure the distance from the sides of the door to the nearest obstruction, such as a wall or a beam. You’ll need a minimum of 3-3.5 inches on each side.
  3. Backroom: Measure from the garage door’s closed position to the nearest obstruction on the ceiling or wall. You’ll typically need about 18-24 inches of backroom.

: Identify the Type of Garage Door Opener

Based on your measurements and the weight of your garage door, you can now choose the appropriate type of garage door opener:

  1. Chain Drive: Suitable for most garage doors but can be noisy.
  2. Belt Drive: Quieter than chain drives, making them a good choice for attached garages.
  3. Screw Drive: Works well in moderate climates and is low maintenance.
  4. Direct Drive (Jackshaft): Ideal for garages with limited overhead space and offers quiet operation.
  5. Wall-Mounted (Jackshaft): Also suitable for low-clearance garages and provides a sleek, space-saving design.

: Consult a Professional

If you’re unsure about your measurements or the type of garage door opener you need, it’s always a good idea to consult a professional garage door installer. They can assess your garage’s specific requirements and recommend the best opener for your situation.

: Installation and Maintenance

Once you have selected the right garage door opener, follow the manufacturer’s installation instructions carefully. Regular maintenance, such as lubricating moving parts and testing safety features, is essential to ensure your opener functions correctly and safely.

In conclusion, measuring your Garage Door Repair Ontario CA accurately is a crucial step in selecting the right garage door opener. By following these steps and consulting a professional if needed, you can ensure a successful and safe installation of your garage door opener. Remember that safety should always be a top priority when working with garage doors and openers.

Ontario Garage & Overhead Doors

1353 E 7th St, Ontario, CA 91764, United States

1-909-442-4206

How To Manually Open An Automatic Garage Door – Victorville Garage & Overhead Doors

Automatic Garage Door Repair Victorville CA are a convenient feature of modern homes, but what happens when they fail to function due to a power outage or a mechanical issue? In such situations, knowing how to manually open an automatic garage door can save the day.

This comprehensive guide will provide you with a step-by-step walkthrough, encompassing all the necessary details to safely and effectively open your automatic garage door manually.

  1. Gather Your Tools Before you begin, it’s essential to gather the following tools and equipment:a. A ladder: Ensure it’s stable and tall enough to reach the garage door opener mechanism. b. A flashlight: If the power is out, adequate lighting is crucial. c. The emergency release cord: This cord is typically red and hangs from the garage door opener system.
  2. Disconnect the Power Safety should be your top priority. To prevent any accidents, make sure to disconnect the power source to your garage door opener. Locate the power cord, usually connected to an electrical outlet near the ceiling.
  3. Locate the Emergency Release Cord The emergency release cord is your key to manually opening the garage door. It’s usually red and hangs from the trolley or carriage of the garage door opener system, which is connected to the door itself. Find this cord and pull it down to disengage the opener from the door.
  4. Unlock the Door Once you’ve disengaged the opener, your garage door is essentially in manual mode. Next, you need to unlock the door. If your garage door has a manual lock, use a key to unlock it. If not, proceed to the next step.
  5. Lift the Door Manually With the opener disconnected and the door unlocked, it’s time to manually lift the garage door. This can be a physically demanding task, especially for larger doors, so be cautious and take your time.a. Position the ladder beneath the door, ensuring it’s stable. b. Stand on the ladder, grasp the handle or edge of the garage door, and lift it slowly. Keep in mind that garage doors are heavy, so use your leg muscles and avoid straining your back. c. Once the door is open, secure it in place using a vise grip or a clamp to prevent it from accidentally closing.
  6. Close the Door Manually After you’ve completed your tasks in the garage, you’ll need to close the door manually.a. Remove the vise grip or clamp, if used. b. Carefully lower the garage door back to the closed position. Make sure it aligns properly with the ground. c. Lock the door manually if it has a lock, or use the emergency release cord to re-engage the opener.
  7. Reconnect the Power Once the door is safely closed, reconnect the power to your garage door opener by plugging it back into the electrical outlet.
  8. Test the Automatic Operation To ensure that your garage door opener is functioning correctly after the manual operation, test it by using the remote control or wall-mounted button. The door should open and close smoothly.

Conclusion:

Knowing how to manually open an automatic Garage Door Repair Victorville CA is a valuable skill that can come in handy during power outages or mechanical failures. By following these step-by-step instructions, you can safely and effectively open and close your garage door manually when needed. Remember to prioritize safety and take your time when performing these tasks, as garage doors can be heavy and potentially dangerous if mishandled.

Victorville Garage & Overhead Doors

12245 Honeybear Ln, Victorville, CA 92392, United States

1-760-592-0365

Garage Door Safety: What Every Homeowner Should Know in 2023 – Temple Overhead & Garage Doors

As a homeowner who takes the safety and security of my family seriously, I’ve always been keenly aware of the importance of a well-maintained and secure garage door. In 2023, with new technological advancements and safety standards emerging, I’ve delved into the world of garage door safety to ensure that my home is equipped with the latest features and knowledge.

In this article, I’ll share essential insights into garage door safety, covering what every homeowner should know to protect their loved ones and property in reference to Garage Door Repair Temple TX.

The Significance of Garage Door Safety

Before we explore the specifics, let’s emphasize why garage door safety is paramount:

1. Preventing Accidents: A garage door is a heavy, moving object that can pose a significant risk if not equipped with adequate safety features. Proper safety measures help prevent accidents, particularly involving children and pets.

2. Property Protection: A malfunctioning garage door can cause significant damage to vehicles, possessions, and the garage itself. Safety mechanisms are designed to minimize the risk of collisions and property damage.

3. Home Security: A secure garage door is a vital component of overall home security. Safety features can deter break-ins and ensure that the garage door remains accessible only to authorized users.

4. Peace of Mind: Knowing that your garage door is equipped with the latest safety features provides peace of mind. It allows you to go about your daily life without worrying about potential hazards.

Now, let’s delve into the key aspects of garage door safety that every homeowner should be aware of in 2023.

1. Automatic Reversal Mechanism

One of the most critical safety features for garage doors is the automatic reversal mechanism. This mechanism employs sensors to detect obstructions in the path of the closing door. If an obstruction is detected, the door should automatically reverse its direction to prevent injury or damage. Regular testing of this feature is essential to ensure it functions correctly.

2. Photoelectric Sensors

Photoelectric sensors, often referred to as “photo eyes,” are integral to the automatic reversal system. These sensors emit an invisible beam of light across the garage door opening. If anything, or anyone, disrupts this beam while the door is closing, it triggers the door to reverse. Ensure these sensors are properly aligned and free from dust or debris for optimal performance.

3. Manual Release

In cases of power outages or malfunctions, a manual release mechanism allows you to open the garage door manually. This feature is crucial for emergency situations, ensuring you can still access or exit your garage when needed.

4. Rolling Code Technology

Security is a vital aspect of garage door safety. Rolling code technology ensures that the access code sent to your garage door opener changes with each use. This prevents unauthorized access by individuals attempting to intercept or replicate the code.

5. Battery Backup

For homeowners in regions prone to power outages or those seeking an extra layer of security, a battery backup system is a valuable addition. It allows your garage door to operate even during power failures, ensuring continued access to your home.

6. Force Sensors

Force sensors are designed to measure resistance when the garage door encounters an obstacle. If the door encounters an excessive amount of resistance, it will stop and reverse its movement to prevent damage or injury. Regular maintenance is essential to ensure these sensors are calibrated correctly.

7. Security Lights

Well-lit surroundings can deter intruders and provide safety for homeowners. Motion-activated security lights that illuminate the garage area when someone approaches can enhance safety and security.

8. Keyless Entry Keypad

A keyless entry keypad mounted outside the garage allows authorized users to enter a code for access. This feature is particularly useful for family members or guests who don’t have a remote or smartphone app.

9. Home Automation Integration

In 2023, many homeowners are opting for smart garage door openers that integrate with home automation systems. This allows you to control and monitor your garage door remotely, receive alerts, and ensure it is closed when you’re away from home.

10. Tamper-Resistant Features

To prevent tampering or unauthorized access to the garage door opener, look for tamper-resistant features such as rolling code technology and secure remote controls.

11. Regular Maintenance

While not a specific feature, regular maintenance is a must for garage door safety. This includes inspecting, lubricating, and testing the door and its safety features to ensure they function correctly. A professional garage door technician can perform a comprehensive safety inspection.

12. Safety Labels and Information

Lastly, don’t overlook the importance of safety labels and information provided by the manufacturer. These labels often contain vital information about proper operation and safety precautions. Ensure that these labels are visible and legible.

Conclusion: Prioritize Garage Door Safety in 2023

In summary, according to Garage Door Repair Temple TX and as a homeowner in 2023, garage door safety should be a top priority. With the right safety features and regular maintenance, you can protect your family, property, and peace of mind. Whether you’re upgrading your existing garage door or installing a new one, make sure it includes the essential safety features outlined in this article. Your home’s safety and security depend on it, and in 2023, there’s no room for compromise when it comes to garage door safety.

Temple Overhead & Garage Doors

1079 Spring Terrace Loop, Temple, TX 76502, United States

817-813-6380

How To Manually Close A Liftmaster Garage Door – Argyle Gates & Garage Doors

A LiftMaster Garage Door Repair Argyle TX is a reliable and convenient device for opening and closing your garage door.

However, there may be situations where you need to close it manually, such as a power outage or a malfunction. In this guide, we will walk you through the step-by-step process of manually closing a LiftMaster garage door, ensuring your safety and the proper functioning of your garage door.

Before You Begin

Before attempting to close your LiftMaster garage door manually, it’s crucial to take some precautions to ensure safety:

  1. Disconnect the Power: Unplug or disconnect the garage door opener from its power source to prevent any accidental activation while you are working on it.
  2. Release the Emergency Cord: Locate the red emergency release cord hanging from the garage door opener rail. This cord disengages the door from the opener mechanism, allowing you to move it manually.
  3. Keep Children and Pets Away: Ensure that children and pets are at a safe distance from the garage door while you perform the manual closure.

The Manual Closing Process

Now that you’ve taken the necessary precautions, follow these steps to manually close your LiftMaster garage door:

  1. Verify the Door Position: Check the current position of your garage door. If it’s fully open, you can proceed to close it manually. If it’s partially open, consider securing it with a brace or similar object to prevent it from falling as you work.
  2. Locate the Emergency Release Handle: The emergency release handle is typically a red cord hanging from the trolley carriage of the garage door opener rail. It’s essential to locate this handle as it will be used to disengage the door from the opener.
  3. Pull Down on the Emergency Release Cord: Firmly grasp the emergency release handle and pull it down towards the floor. This action will release the door from the opener carriage, allowing you to manually control the door’s movement.
  4. Close the Garage Door: Gently and carefully lower the garage door by hand. Use both hands to support and guide the door evenly. Be cautious, as garage doors can be heavy, especially larger ones.
  5. Secure the Door: Once the garage door is fully closed, secure it by engaging the locking mechanism. Most garage doors have a manual lock located near the center of the door. Turn the lock handle to secure the door in the closed position.
  6. Reconnect the Opener: When it’s safe to do so, you can reconnect the garage door opener to its power source. This will allow you to use the opener normally once power is restored or the issue is resolved.

Safety Tips and Precautions

While manually closing a LiftMaster garage door is a straightforward process, it’s essential to prioritize safety throughout:

  1. Never force the door: If you encounter resistance or the door is difficult to move, stop immediately. There may be an issue that requires professional attention.
  2. Keep fingers away from hinges and tracks: Be cautious not to place your fingers near moving parts or pinch points as you manually operate the door.
  3. Use proper lifting technique: Lift with your legs, not your back, to avoid strain or injury.
  4. Avoid standing directly under the door: Position yourself to the side while closing the door to minimize the risk of injury in case it falls unexpectedly.

Conclusion:

Manually closing a LiftMaster Garage Door Repair Argyle TX is a simple and essential skill for any homeowner. By following the steps outlined in this guide and prioritizing safety, you can ensure that your garage door is properly closed during emergencies or when needed. Remember to consult your LiftMaster garage door opener’s manual for specific instructions and always seek professional assistance if you encounter any issues beyond your capabilities.

Argyle Gates & Garage Doors

940-400-3769

Page 4 of 26

Powered by WordPress & Theme by Anders Norén