Get your Home in Perfect Harmony

Tag: garage door repair redlands ca

Professional Strategies for Repairing Garage Door Hinges – Redlands Garage Door & Gates

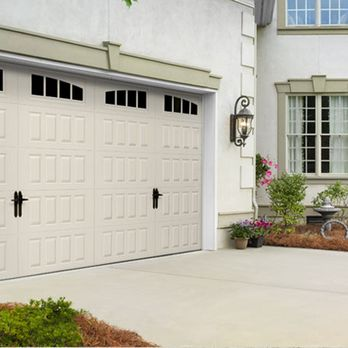
As a homeowner who takes immense pride in the functionality and appearance of my home, I’ve learned firsthand that a well-maintained garage door is essential for both convenience and curb appeal. Among the various components that contribute to a garage door’s smooth operation, hinges play a pivotal role. Over time, these hinges can encounter wear and tear, affecting the door’s movement and stability.

Through my experiences and according to Garage Door Repair, I’ve gained valuable insights into the professional strategies for repairing garage door hinges, and I’m excited to share this knowledge to help fellow homeowners tackle this task with confidence and expertise.

Understanding the Role of Garage Door Hinges

While garage door hinges might not be the most conspicuous parts of the system, they are undeniably vital. These unassuming components allow the garage door to glide effortlessly along its tracks, enabling panels to fold or swing as needed. By supporting the door’s weight and facilitating its movement, hinges ensure that the entire system operates seamlessly. However, with constant usage and exposure to weather conditions, hinges can develop issues over time. Addressing these problems in a timely manner is crucial to prevent further damage and maintain the longevity of the garage door.

Spotting the Telltale Signs of Hinge Issues

Recognizing when garage door hinges are in need of repair requires a keen eye and a proactive approach. Here are some common signs that suggest hinge problems might be at play:

  1. Unusual Noises: If you notice squeaking, grinding, or other unusual noises when operating your garage door, it’s likely that the hinges are experiencing friction-related issues due to wear or misalignment.
  2. Difficult Door Movement: A garage door that’s becoming increasingly difficult to open or close is often a clear indication of hinge problems. Rust or corrosion can contribute to this stiffness.
  3. Misalignment: Misaligned hinges can lead to an uneven or crooked garage door. This not only affects the door’s appearance but also its functionality.
  4. Visible Damage: Inspect the hinges closely for visible signs of damage, such as cracks, breaks, or bent components. Any such damage can compromise the hinge’s ability to perform effectively.

Applying Professional Repair Strategies

Repairing garage door hinges effectively requires a methodical approach and adherence to professional techniques. While some hinge issues can be addressed through DIY methods, complex problems might necessitate the expertise of a professional. Here’s a breakdown of the professional strategies for repairing garage door hinges:

1. Thorough Visual Inspection: Begin by conducting a comprehensive visual inspection of all the hinges on your garage door. Look for any signs of wear, damage, or misalignment. This step helps determine the extent of the problem and which hinges require attention.

2. Proper Lubrication: Adequate lubrication is crucial for resolving minor hinge issues. Utilize a silicone-based lubricant to coat the hinge’s moving parts, pivot points, and other components. Lubrication reduces friction, minimizes wear, and eliminates those annoying squeaks.

3. Tightening Loose Components: Loose bolts and screws can contribute to hinge-related problems. Carefully examine the hinges and tighten any loose hardware using the appropriate tools. Be cautious not to overtighten, as this could lead to further damage.

4. Repair or Replacement: Depending on the severity of the hinge problem, you may need to either repair or replace the hinges. If the hinges are beyond repair due to damage, replacing them with new ones is the optimal solution. For minor issues, hinge repair might involve straightening bent parts or welding cracks.

5. Aligning Misaligned Hinges: Misaligned hinges can lead to operational issues and impact the overall appearance of the garage door. Gently adjust misaligned hinges using a mallet and a wooden block. Make small adjustments, testing the door’s movement after each correction.

6. Removing Rust and Corrosion: Exposure to the elements can cause hinges to develop rust and corrosion, leading to stiffness and reduced functionality. Use a wire brush or sandpaper to remove rust and corrosion, and then apply a rust-inhibiting primer and paint to protect the hinges.

7. Seeking Professional Assistance: If the hinge problems are intricate or if you’re uncertain about your ability to address them, it’s advisable to seek professional help. Garage door technicians possess the knowledge and tools to handle complex hinge repairs and replacements safely and efficiently.

Sustaining Hinge Longevity Through Maintenance

Once you’ve successfully repaired or replaced garage door hinges, consistent maintenance is essential to ensure their extended lifespan and proper functioning. Here are some maintenance tips to keep your hinges in top condition:

  1. Regular Lubrication: Apply lubricant to the hinge components every few months to promote smooth movement and prevent friction-related issues.
  2. Routine Visual Inspections: Regularly inspect the hinges to detect any signs of wear, damage, or misalignment. Addressing minor problems early can prevent them from escalating.
  3. Keeping Clean: Maintain the hinges by keeping them clean and free from debris that could hinder their movement or cause damage over time.
  4. Professional Maintenance: Consider scheduling professional garage door maintenance at least once a year. This provides experts with the opportunity to thoroughly inspect and maintain all components, including the hinges.

In Conclusion: Expert Care for Seamless Operation

Overall, as per Garage Door Repair, repairing garage door hinges requires a combination of expertise, attention to detail, and a commitment to safety. By gaining an understanding of the role of hinges, being vigilant about common hinge problems, and implementing professional repair strategies, homeowners can ensure the continued smooth operation and longevity of their garage doors. Whether tackling minor issues with DIY techniques or seeking professional help for more complex problems, prioritizing hinge maintenance is an investment in both the functionality and aesthetics of your home. As a homeowner who values a well-maintained living space, I’ve grown to appreciate the importance of treating garage door hinge repair with the level of professionalism it demands.

Redlands Garage Door & Gates

1255 Devon Pl #7, Redlands, CA 92374, United States

909-675-1732

How To Improve Garage Door Opener Range – Redlands Garage Door & Gates

A reliable and extended Garage Door Repair Redlands CA opener range is essential for convenient access to your garage, especially from a distance. If you find that your garage door opener’s range is limited or inconsistent, there are several strategies you can employ to improve it.

In this comprehensive guide, we will explore various methods to successfully enhance the range of your garage door opener, ensuring hassle-free entry and exit from your garage.

  1. Understand Garage Door Opener Basics: Before attempting to improve the range, familiarize yourself with how garage door openers work. These devices utilize radio frequency signals to communicate with the garage door motor, instructing it to open or close the door.
  2. Check for Interference: Interference from other electronic devices or structures can impact the range of your garage door opener. Identify potential sources of interference, such as wireless routers, metal objects, and other electronic devices, and try to minimize their impact.
  3. Replace Batteries in the Remote: Weak batteries in the remote control can lead to reduced signal strength and range. Replace the batteries in the remote with fresh ones to ensure optimal performance.
  4. Reposition the Opener Antenna: Locate the antenna on the garage door opener motor unit. Reposition the antenna by adjusting its angle and orientation to improve the signal reception. Ensure that the antenna is fully extended for better performance.
  5. Install an External Antenna: If your garage is located far from the opener, consider installing an external antenna. These antennas can be mounted on the garage ceiling, providing a stronger and more consistent signal.
  6. Upgrade to a Higher-Powered Remote: Some garage door openers offer higher-powered remotes that provide greater range. Consider upgrading to a remote with higher wattage to extend the signal reach.
  7. Upgrade the Opener’s Receiver: If your garage door opener is older, its receiver technology may be outdated. Upgrading to a modern receiver with advanced signal processing capabilities can improve range and performance.
  8. Choose the Right Frequency: Garage door openers operate on different frequencies, such as 315 MHz or 390 MHz. Check your garage door opener’s manual to determine its frequency, and ensure that your remote control is compatible with that frequency.
  9. Remove Obstacles: Clear any obstructions or clutter near the garage door opener, as physical barriers can interfere with the signal transmission. Keep the area around the opener clear for optimal signal reception.
  10. Reduce Wireless Interference: Wireless devices like routers and cordless phones can interfere with the garage door opener’s signal. Place these devices away from the opener or change their frequencies to minimize interference.
  11. Upgrade to a Rolling Code System: Rolling code systems change the access code with every use, enhancing security and preventing signal interception. Consider upgrading to a rolling code system to improve both security and range.
  12. Install a Range Extender: Range extenders, also known as signal repeaters, can amplify the signal between the remote control and the garage door opener. These devices are particularly useful for larger properties.
  13. Check for Antenna Damage: Inspect the remote control’s antenna for any damage or wear. A damaged antenna can significantly impact signal strength. If needed, replace the remote or antenna.
  14. Consult with a Professional: If you’ve tried various methods and are still experiencing limited range, consider consulting a garage door technician. They can perform a thorough assessment and provide expert recommendations.
  15. Regular Maintenance: Maintain your garage door opener by keeping it clean and performing regular maintenance. A well-maintained opener is more likely to provide consistent and reliable performance.

Conclusion:

Improving the range of your Garage Door Repair Redlands CA opener is a valuable endeavor that enhances your convenience and security. By following the strategies outlined in this guide, you can successfully extend the range of your garage door opener and enjoy seamless access to your garage from a greater distance. Whether through repositioning the antenna, upgrading components, reducing interference, or utilizing external devices, each step contributes to a stronger and more reliable signal. With an enhanced garage door opener range, you’ll experience smoother and more convenient daily operations, adding convenience and peace of mind to your home routine.

Redlands Garage Door & Gates

1255 Devon Pl #7, Redlands, CA 92374, United States

1-909-475-0701

Garage Door Opener Brands: Comparing Features and Performance – Redlands Garage Door & Gates

As a homeowner who recently went through the process of selecting a new garage door opener, I understand the importance of choosing the right brand that offers the features and performance I need. With a wide range of options available, it can be overwhelming to decide which garage door opener brand is the best fit for your home.

In this guide I got from Garage Door Repair, I will compare popular garage door opener brands, sharing my insights on their features and performance to help you make an informed decision.

  1. LiftMaster:

I chose LiftMaster as my garage door opener brand, and I am extremely satisfied with its performance. LiftMaster is well-known for its durability, reliability, and advanced features. The MyQ technology, which allows me to control the opener using a smartphone app, has been incredibly convenient. With MyQ, I can monitor and control my garage door from anywhere, providing added security and peace of mind. LiftMaster also offers battery backup options, ensuring that my garage door remains operational even during power outages. The quiet operation of LiftMaster openers, thanks to their belt drive systems, is a significant advantage, especially if you have living spaces adjacent to or above the garage.

  1. Chamberlain:

Chamberlain is another brand that offers a range of reliable and performance-driven garage door openers. The MyQ technology offered by Chamberlain has been a game-changer for many homeowners, including myself. Being able to control and monitor my garage door remotely through the smartphone app has made my life more convenient. Chamberlain provides different drive systems, such as chain drive, belt drive, and wall-mounted options, allowing homeowners to choose the one that suits their needs. The safety features, including rolling code technology to prevent unauthorized access, provide an extra layer of security for my home.

  1. Genie:

Genie is a brand known for its powerful motors and efficient operation. Many Genie openers come equipped with Intellicode technology, which generates a new code each time the door is activated, enhancing the security of my garage. I appreciate the smartphone compatibility and Wi-Fi connectivity options offered by Genie, as they allow me to control and monitor my garage door with ease. The availability of both belt drive and chain drive systems gives homeowners the flexibility to choose the one that aligns with their preferences and requirements.

  1. Craftsman:

Craftsman is a trusted brand that offers a range of garage door openers to suit different needs. The inclusion of MyQ technology in Craftsman openers has been a valuable feature for me, allowing me to control my garage door remotely and receive real-time notifications. The motion-detecting wall console and secure encryption technology provided by Craftsman enhance the safety of my garage. The availability of both chain drive and belt drive systems gives homeowners options to choose based on their preferences and specific requirements.

  1. Sommer:

Sommer is a German brand that stands out for its innovative direct drive systems. I’ve found that Sommer openers offer quieter operation and require less maintenance compared to traditional belt or chain drives. The integrated lighting, rolling code technology, and smartphone compatibility provided by Sommer have added convenience to my garage door operation. The precision engineering and durability associated with the Sommer brand give me confidence in the longevity of my opener.

When comparing garage door opener brands, consider factors such as the drive system, power and performance, noise level, security features, smartphone compatibility, and warranty. It’s also important to consider the specific requirements of your garage door, such as its size and weight, to ensure the opener you choose is suitable. Reading customer reviews and seeking recommendations from professionals can also provide valuable insights into the performance and reliability of different brands.

In conclusion, in reference to Garage Door Repair, selecting the right garage door opener brand is essential for convenience, security, and peace of mind. LiftMaster, Chamberlain, Genie, Craftsman, and Sommer are all reputable brands that offer different features and performance levels. By comparing their features, drive systems, security features, and customer reviews, you can find the brand and model that best suits your needs. Investing in a high-quality garage door opener from a reliable brand will provide convenience, security, and long-term satisfaction for your home.

Redlands Garage Door & Gates

1255 Devon Pl #7, Redlands, CA 92374, United States

909-475-0701

Easy Steps to Pair Your Garage Door Opener – Redlands Garage Door & Gates

As a homeowner who has successfully paired a garage door opener with various remote controls and keypads, I can provide you with a step-by-step guide based on my personal experience. Please note that the specific steps may vary depending on the brand and model of your garage door opener, so it’s always best to refer to the manufacturer’s instructions for accurate information.

Here’s how I typically pair a garage door opener in reference to Garage Door Repair Redlands CA:

  1. Prepare the garage door opener: Before starting the pairing process, ensure that your garage door opener is powered on and in a ready state. Remove any obstructions around the opener to ensure easy access.
  2. Locate the “Learn” button: Look for the “Learn” button on your garage door opener. It is usually located on the motor unit or control panel. The button may be labeled as “Learn” or “Program.” Take note of its position.
  3. Access the programming mode: To access the programming mode, you’ll need to press and release the “Learn” button on the garage door opener. This action initiates the pairing process and activates a specific indicator light or LED on the motor unit. The indicator light may blink or stay steady, depending on the model.
  4. Program the remote control or keypad: Once the opener is in programming mode, you need to program the specific remote control or keypad you want to pair. Each remote control or keypad typically has a unique set of instructions to follow. Here are the general steps:a. On the remote control or keypad, locate the button you want to program. This button is usually labeled with an icon or text related to garage doors.b. Press and hold the desired button until the indicator light on the garage door opener flashes or you hear a beep. This indicates that the pairing process is in progress.c. Release the button and wait for the indicator light on the opener to stop flashing or for another confirmation signal, such as a second beep. This confirms that the remote control or keypad has been successfully paired with the opener.
  5. Test the remote control or keypad: After programming, it’s essential to test the functionality of the remote control or keypad. Stand within range of the opener and press the programmed button. The garage door should respond by opening or closing. If it doesn’t, repeat the programming steps or consult the manufacturer’s instructions for troubleshooting tips.
  6. Repeat for additional remotes or keypads: If you have multiple remotes or keypads that you want to pair with the garage door opener, repeat the programming process for each device. Remember to access the programming mode on the opener and then program the buttons on each remote or keypad individually.
  7. Exit the programming mode: Once you have successfully paired all the desired remotes and keypads, it’s time to exit the programming mode on the garage door opener. This is typically done by pressing the “Learn” button again or waiting for a specific amount of time without any programming activity. The indicator light may turn off or change to a steady state, indicating that the programming mode has been exited.

It’s important to note that some garage door openers may have additional features or steps for programming, such as setting up keypad codes or integrating with a smart home system. Always refer to the manufacturer’s instructions for your specific model to ensure you follow the correct steps.

If you encounter any difficulties or are unsure about the process, I recommend consulting the manufacturer’s instructions or contacting their customer support for further assistance. They will have specific guidance based on your garage door opener model.

In summary, by following these steps from Garage Door Repair Redlands CA and referring to the manufacturer’s instructions, you can successfully pair your garage door opener with remote controls and keypads. This allows you to conveniently operate your garage door with ease and security.

Redlands Garage Door & Gates

1255 Devon Pl #7, Redlands, CA 92374, United States

909-675-1732

How to Replace Battery in Your Garage Door Opener – Redlands Garage Door & Gates

One day, I noticed that my garage door was moving slower than usual and making strange noises. I realized that it had been a while since I replaced the battery in the opener, so I decided to replace it myself.

Here’s what I did as stated in Garage Door Repair Redlands CA:

  1. I turned off the power to the garage door opener by unplugging it from the electrical outlet.
  2. I removed the cover of the garage door opener by unscrewing the screws that held it in place.
  3. I located the battery inside the opener and carefully removed it from its holder. I made sure to note the polarity of the battery so that I could install the new battery correctly.
  4. I purchased a new 9-volt battery from a local hardware store and inserted it into the holder, making sure to match the polarity with the markings on the holder.
  5. I replaced the cover of the garage door opener and secured it in place with screws.
  6. I turned the power back on and tested the garage door opener to make sure it was working properly. To my relief, it was moving smoothly and quietly once again!

Overall, the process of replacing the battery was quick and easy, and I was able to do it myself without any issues. It was important to make sure that I turned off the power before starting and handled the battery carefully to avoid any accidents. By following the steps above and taking proper safety precautions, I was able to replace the battery in my garage door opener and get it working properly again.

In conclusion, based from Garage Door Repair Redlands CA, replacing the battery in your garage door opener is a simple task that can be done by anyone with basic DIY skills. With the right tools and safety precautions, you can replace the battery in just a few minutes and ensure that your garage door opener continues to function properly. If you have any concerns or are unsure about how to replace the battery, it’s always best to seek the help of a professional garage door technician.

Redlands Garage Door & Gates

1255 Devon Pl #7, Redlands, CA 92374, United States

909-675-1732

Powered by WordPress & Theme by Anders Norén