Get your Home in Perfect Harmony

Tag: garage door repair Grapevine TX

How Heavy Is A Garage Door – Grapevine Gates & Garage Doors

Garage Door Repair Grapevine TX, often overlooked in terms of weight, play a substantial role in the functionality and security of a home.

The weight of a garage door depends on various factors, ranging from its size and material to the mechanisms employed for operation.

Let’s start by considering the materials commonly used in garage door construction. Traditional garage doors are often made of wood, which can be quite heavy depending on the type of wood used. More modern options include steel, aluminum, and fiberglass, which are generally lighter than their wooden counterparts. Each material contributes differently to the overall weight of the door.

The size of the garage door is a crucial determinant of its weight. Single-car garage doors are naturally lighter than double-car doors due to their reduced surface area. Standard sizes exist, but customization is prevalent in the garage door industry, allowing homeowners to choose a size that suits their specific needs. The weight of a door increases proportionally with its dimensions.

Now, let’s delve into the mechanisms that facilitate the movement of garage doors. The most common types include manual, sectional, and roller doors, each with its own weight implications. Manual doors, often composed of solid materials like wood, can be particularly heavy, relying on the strength of the person operating them. Sectional doors, on the other hand, are made up of panels that can be more manageable since the weight is distributed. Roller doors, which consist of horizontal slats that roll up, tend to be lighter due to their design.

Spring systems also influence the weight distribution and ease of operation. Torsion spring systems are commonly used in sectional doors and are known for their durability and balance. Extension springs, found in older or cheaper models, might make the door feel heavier due to uneven weight distribution.

Considering all these factors, the weight of a garage door can range from a hundred to several hundred pounds. A standard single-car garage door may weigh between 150 to 250 pounds, while a double-car door can range from 250 to 450 pounds or more. Heavier wooden doors may exceed these estimates.

Installation and maintenance are critical aspects affecting the overall experience with a garage door. Proper installation ensures that the weight is evenly distributed, preventing unnecessary strain on the mechanisms and promoting longevity. Regular maintenance, such as lubricating moving parts and checking spring tension, can contribute to smoother operation and extend the lifespan of the door.

In conclusion, the weight of a Garage Door Repair Grapevine TX is a multifaceted aspect influenced by material, size, and operational mechanisms. Homeowners should consider these factors when selecting a garage door to ensure it aligns with their preferences and practical requirements.

Grapevine Gates & Garage Doors

601 W Wall St, Grapevine, TX 76051

817-790-9634

How To Remove Cover From Liftmaster Garage Door Opener – Grapevine Gates & Garage Doors

In the world of Garage Door Repair Grapevine TX, LiftMaster stands tall as a symbol of durability and efficiency. These devices work tirelessly to ensure your garage door opens and closes seamlessly, but they too need a little TLC.

One crucial aspect of maintaining a LiftMaster garage door opener is the periodic removal of its cover. In this guide, we’ll explore the intricacies of this process, empowering you to take charge of your opener’s well-being.

Safety First:

Before we embark on our journey of uncovering the mysteries within your LiftMaster garage door opener, let’s talk safety. The first step is to power off the opener. Locate the power source and disconnect it to ensure a safe working environment. Remember, your safety is paramount.

Tools You’ll Need

Now that safety measures are in place, let’s gather the tools required for a successful cover removal. You’ll typically need a screwdriver, pliers, and perhaps a flashlight to navigate the internals. If you don’t have these tools, fear not! Your local hardware store or online marketplaces are treasure troves for affordable options.

  1. Unplugging the Garage Door Opener
    • Locate the power cord and disconnect it.
    • Double-check to ensure the opener is completely powered off.
  2. Identifying and Removing Screws
    • Examine the cover for screws.
    • Use the appropriate screwdriver to carefully remove them.
  3. Opening the Cover Without Damaging Components
    • Gently lift the cover, ensuring not to force it.
    • Take note of any resistance and address it cautiously.

: Components Inside

As the cover comes off, you’ll be greeted by a maze of wires, gears, and circuitry. Understanding this layout is crucial for effective maintenance. Familiarize yourself with the major components to navigate this internal landscape confidently.

Common Issues and Solutions

During cover removal, you might encounter issues like stubborn screws or unexpected resistance. Fear not! We’ve compiled a list of common problems and quick fixes to keep you on track.

Cleaning and Maintenance Tips

Now that you’re face to face with the internal workings of your garage door opener, it’s the perfect time for some cleaning. Dust, debris, and the occasional spider web can find their way in. A soft brush or compressed air can do wonders. Additionally, consider lubricating moving parts for smoother operation.

When to Seek Professional Help

While many tasks can be handled through DIY maintenance, there are instances where professional help is necessary. If you notice unusual sounds, persistent issues, or any electrical problems, don’t hesitate to contact LiftMaster support or a certified technician.

Benefits of Regular Cover Removal

Regularly removing the cover might seem like a small task, but the benefits are substantial. It prolongs the lifespan of your garage door opener and can save you from costly repairs down the line.

Troubleshooting Tips

Encountering difficulties during cover removal is not uncommon. Refer to our troubleshooting guide for step-by-step solutions. From stubborn screws to unexpected resistance, we’ve got you covered.

User Experiences

To further emphasize the importance of cover removal, let’s hear from real users. Discover how regular maintenance has saved them from headaches and unexpected garage door malfunctions. Share your experiences to inspire others on this maintenance journey.

Upgrading Your Garage Door Opener

As you become more acquainted with your garage door opener’s internals, you might find yourself considering an upgrade. Explore the latest features and technologies available in the market. Your garage door opener might just evolve alongside your needs.

Conclusion:

In conclusion, removing the cover of your LiftMaster Garage Door Repair Grapevine TX is not just a task; it’s a commitment to its well-being. By following these steps, you’re ensuring a longer, smoother life for your trusty companion. Don’t wait for problems to arise—take proactive measures and enjoy the benefits of a well-maintained garage door opener.

Grapevine Gates & Garage Doors

817-631-6355

How To Program Garage Door Opener To Car – Grapevine’s Maid Pros

Programming your Garage Door Repair Grapevine TX convenient feature that allows you to open and close your garage door with the push of a button from inside your car. Here’s a step-by-step guide on how to program your garage door opener to your car:

Step 1: Read the Car Owner’s Manual

Start by reading your car’s owner’s manual. Look for information on how to program a garage door opener. The manual will provide specific instructions based on the make and model of your car.

Step 2: Identify the Learn Button on the Garage Door Opener

Locate the “Learn” or “Program” button on your garage door opener. This button is usually located on the back or side of the opener motor. The color and shape of the button can vary, so refer to your garage door opener manual for guidance.

Step 3: Choose a Button in Your Car for Programming

In your car, choose a button that you want to use to operate the garage door. This is often a button on the overhead console or the rearview mirror. Consult your car’s manual to determine which button is designated for garage door programming.

Step 4: Clear Existing Programming (if necessary)

If your garage door opener has been previously programmed to another vehicle, you may need to clear the existing programming before proceeding. Consult your garage door opener manual for instructions on how to do this.

Step 5: Press and Release the Learn Button on the Garage Door Opener

Press and release the “Learn” or “Program” button on your garage door opener. You may need a ladder to reach the button. After pressing the button, an indicator light on the opener should start blinking, indicating that it’s ready for programming.

Step 6: Press and Hold the Chosen Button in Your Car

While the indicator light on the garage door opener is blinking, quickly press and hold the chosen button in your car. Hold the button until the indicator light on the garage door opener changes its behavior. This usually takes a few seconds.

Step 7: Test the Garage Door Opener

Test the programming by pressing the button in your car. The garage door should respond by opening or closing. If it doesn’t work, repeat the programming process, ensuring that you follow each step precisely.

Step 8: Repeat for Additional Cars (if necessary)

If you have more than one car, repeat the programming process for each vehicle. Each car can have its own button programmed to the garage door opener.

Step 9: Secure the Garage Door Remote in Your Car

Store the remote control for the garage door opener securely in your car. Some cars have built-in garage door opener buttons, while others may require attaching a separate remote to the visor or dashboard.

Step 10: Consider HomeLink Integration

If your car is equipped with HomeLink, a wireless control system, you can often program it to operate your garage door. Follow the specific instructions for your car model and the HomeLink system.

Step 11: Troubleshoot Issues

If you encounter any issues during the programming process or if the garage door opener doesn’t respond, refer to both your car and garage door opener manuals for troubleshooting tips. Common issues include interference from other devices and incorrect button sequences.

Step 12: Keep Manuals for Future Reference

Keep both your car and garage door opener manuals in a safe place for future reference. This is helpful in case you need to reprogram the garage door opener or if you get a new car.

Conclusion

Programming your Garage Door Repair Grapevine TX convenient feature that enhances the accessibility of your home. By following these step-by-step instructions and consulting your car and garage door opener manuals, you can easily set up the system and enjoy the convenience of opening and closing your garage door with the push of a button from the comfort of your car.

Grapevine’s Maid Pros

1527 W State Hwy 114, Grapevine, TX 76051, United States

1-817-442-2239

How To Attach Foam Board To Garage Door – Grapevine Gates & Garage Doors

Attaching foam board to a  Garage Door Repair Grapevine TX is a practical and creative way to insulate your space or enhance its visual appeal. Foam board, also known as rigid foam insulation, is lightweight and versatile, making it an excellent choice for this purpose. Here’s a detailed guide on how to attach foam board to your garage door effectively.

Step 1: Gather Materials and Tools

Before you start, gather all the necessary materials and tools for the project:

  • Foam board
  • Adhesive suitable for foam board and the garage door material (construction adhesive or adhesive recommended by the foam board manufacturer)
  • Utility knife or foam board cutter
  • Measuring tape
  • Straight edge or ruler
  • Pencil
  • Safety gear (gloves and safety glasses)

: Measure and Cut Foam Board

Measure the dimensions of each garage door panel where you plan to attach the foam board. Use a measuring tape, straight edge, and pencil to mark the dimensions on the foam board. Carefully cut the foam board along these marks using a utility knife or foam board cutter. Ensure that the cuts are clean and straight for a neat installation.

: Clean the Garage Door Surface

Clean the surface of the garage door where you’ll be attaching the foam board. Remove any dirt, dust, or debris using a mild detergent and water solution. This ensures a clean and smooth surface for better adhesion.

: Choose the Right Adhesive

Select an adhesive that is suitable for both the foam board and the material of your garage door. Construction adhesive or an adhesive recommended by the foam board manufacturer is typically a good choice. Ensure that the adhesive is compatible with both surfaces for a strong and durable bond.

: Apply Adhesive to Foam Board

Apply the adhesive to the back of the foam board. Depending on the adhesive type, you may need to spread it evenly or apply it in a zigzag pattern. Be generous with the adhesive, but avoid applying too much, as excess adhesive can squeeze out when you press the foam board onto the garage door.

: Position and Press the Foam Board

Carefully position the foam board on the garage door, aligning it with the marks or edges you previously determined. Press the foam board firmly against the door to ensure good contact with the adhesive. Apply even pressure across the entire surface of the foam board.

: Allow Adhesive to Cure

Follow the recommended curing time for the adhesive before moving or manipulating the foam board. This ensures that the bond between the foam board and the garage door is strong and secure. Curing times may vary depending on the type of adhesive used.

: Repeat for Each Panel

Repeat the process for each garage door panel, measuring, cutting, and attaching the foam board to cover the entire door. Take your time to ensure accurate measurements and a consistent application for a professional-looking result.

: Trim Excess Foam Board

If there are any excess or protruding edges of foam board, use a utility knife or foam board cutter to trim them carefully. This step contributes to a neat and finished appearance.

: Inspect and Make Adjustments

Inspect the attached foam board to ensure that it is securely in place and adhered evenly. If there are any areas where the adhesion seems weak or if the foam board is not aligned properly, make necessary adjustments before the adhesive fully cures.

: Consider Aesthetic Enhancements (Optional)

If you want to enhance the visual appeal of the foam board, consider painting or covering it with a decorative material. Some foam boards come with a foil or reflective surface that can also improve insulation.

: Monitor Performance

After installation, monitor the performance of the foam board. Check for any signs of peeling, warping, or other issues. Address any issues promptly to maintain the effectiveness of the insulation and the overall appearance of the garage door.

In conclusion, attaching foam board to a Garage Door Repair Grapevine TX is a DIY-friendly project that can enhance insulation and transform the look of your garage. With careful measurement, proper adhesive application, and attention to detail, you can achieve a professional and effective result.

Grapevine Gates & Garage Doors

817-631-6355


How To Install Genie Belt Drive Garage Door Opener – Grapevine’s Best Garage Doors


Installing a Genie Belt Drive Garage Door Repair Grapevine TX is a relatively straightforward process, but it requires careful attention to detail to ensure safety and functionality.

This guide will walk you through the steps to install a Genie Belt Drive Garage Door Opener in or less.

Before You Begin:

  1. Read the installation manual provided with your Genie garage door opener thoroughly.
  2. Ensure you have all the necessary tools and materials, including a ladder, screwdriver, pliers, drill, and safety glasses.
  3. Disconnect power to the garage door opener and ensure the door is in the closed position.

: Assemble the Opener

  • Unbox the Genie garage door opener and locate the main motor unit, rail assembly, and belt.
  • Attach the rail to the motor unit following the manufacturer’s instructions. This typically involves securing it with provided bolts and nuts.

: Attach the Mounting Bracket

  • Locate the mounting bracket included with the opener.
  • Position the bracket on the ceiling or wall, making sure it’s level. Use a pencil to mark the mounting holes.
  • Drill holes at the marked locations and insert appropriate anchors.
  • Secure the bracket in place with screws.

: Install the Rail

  • Slide the rail assembly into the bracket.
  • Use a level to ensure it’s perfectly horizontal.
  • Secure the rail to the bracket using provided hardware.

: Install the Trolley

  • Attach the trolley to the rail following the manufacturer’s instructions.
  • Ensure it’s positioned correctly and securely tightened.

: Attach the Belt

  • Thread the belt through the trolley and motor unit, following the provided path in the manual.
  • Secure the belt according to the instructions, ensuring it’s tensioned properly.

: Connect the Wiring

  • Follow the wiring instructions in the manual.
  • Typically, this involves connecting the power wires and control wires to the motor unit.
  • Ensure all wire connections are secure.

: Install the Photoelectric Sensors

  • Position the photoelectric sensors on each side of the garage door, a few inches above the ground.
  • Secure them in place using provided brackets.
  • Connect the sensor wires to the motor unit following the instructions.

: Program the Remote Controls

  • Program the included remote controls by following the instructions in the manual.
  • This usually involves pressing specific buttons on the remote and the motor unit.

: Adjust the Travel Limits

  • Set the open and close travel limits by following the manufacturer’s guidelines.
  • Typically, this involves adjusting the limit screws on the motor unit to control the door’s travel distance.

: Test the Safety Features

  • Check if the safety features, such as the reversal system, are functioning correctly. Place an obstacle in the door’s path and ensure it reverses when closing.

: Attach the Emergency Release Rope

  • If your garage door opener includes an emergency release, attach the provided rope and handle following the manual’s instructions.

: Attach the Wall Control Panel

  • Install the wall control panel at a convenient location inside your garage, following the manufacturer’s instructions.

: Power Up

  • Reconnect power to the garage door opener.
  • Test the opener by opening and closing the door using the remote controls and wall panel.

: Adjust the Force Settings

  • If necessary, adjust the force settings to ensure the door operates smoothly and safely.
  • Refer to the manual for guidance on force adjustment.

: Lubricate Moving Parts

  • Apply garage door lubricant to the moving parts, including the belt, rails, and hinges.
  • This helps reduce friction and noise.

: Final Safety Checks

  • Perform a final safety check to ensure the door reverses properly when obstructed and that all safety features are functional.

Congratulations, you have successfully installed your Genie Belt Drive Garage Door Repair Grapevine TX. Remember to periodically inspect and maintain your garage door opener to ensure it continues to operate safely and efficiently. Consult the manufacturer’s manual for maintenance guidelines and troubleshooting tips. If you encounter any difficulties during installation, consider seeking professional assistance to ensure the safety of your garage door system.

Grapevine’s Best Garage Doors

820 Kings Canyon Dr, Grapevine, TX 76051, United States

1-817-790-9634

Preventing Garage Door Opener Theft – Grapevine Gates & Garage Doors

As a homeowner, I’ve always considered safety and security to be paramount. However, it was a recent incident in my neighborhood that made me realize how vulnerable our homes can be if we don’t take the necessary precautions. It all started when a rash of garage door opener thefts occurred in our area. Intruders were breaking into cars parked in driveways and stealing garage door openers, which they then used to gain access to homes. This unsettling situation prompted me to investigate ways to prevent garage door opener theft and enhance the security of my own home.

In this article, I’ll share my insights and strategies from Grapevine Gates & Garage Doors for safeguarding your garage and, ultimately, your peace of mind.

Understanding the Risk

Garage door opener theft may seem like a relatively minor issue compared to other security concerns, but it can have serious consequences. Once thieves have your garage door opener, they have a direct route into your home, where they can potentially steal valuable possessions, compromise your safety, or even vandalize your property. To protect against this threat, it’s crucial to understand how garage door opener theft occurs and take proactive measures to prevent it.

1. Keep Your Car Secure

The first line of defense against garage door opener theft is ensuring the security of your vehicle. Thieves often break into cars to find garage door openers, as these devices are frequently left inside glove compartments or on the sun visors for convenience. To prevent this, always lock your car doors, even when it’s parked in your own driveway. Additionally, avoid leaving your garage door opener in plain sight. Consider purchasing a small lockable container or pouch specifically designed for storing the opener discreetly.

2. Upgrade to Rolling Code Technology

One of the most effective ways to prevent garage door opener theft is to invest in a modern opener with rolling code technology. This advanced feature generates a new and unique code every time you use the remote to open or close your garage door. Unlike older fixed-code openers, which can be intercepted and duplicated by tech-savvy criminals, rolling code technology makes it nearly impossible for thieves to gain unauthorized access.

Upgrading to a rolling code garage door opener is a smart investment in your home’s security. It provides peace of mind, knowing that even if your opener falls into the wrong hands, it won’t grant access to your garage or home.

3. Consider Keyless Entry

Many modern garage door openers come with keyless entry options. These systems allow you to enter a secure PIN code on a keypad located outside the garage to gain access. By using keyless entry, you can eliminate the need for a physical remote control, reducing the risk of theft. Additionally, keyless entry systems often offer the convenience of temporary PIN codes, which can be given to trusted individuals and revoked when no longer needed.

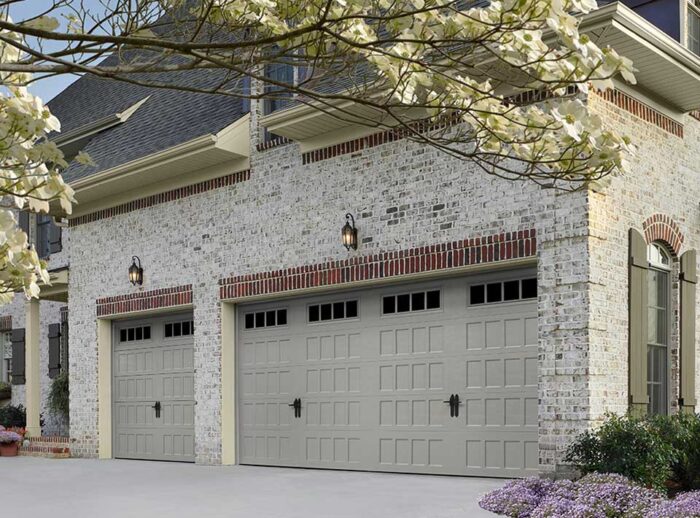
4. Secure Your Garage

Preventing garage door opener theft isn’t just about protecting the remote itself; it also involves securing your garage to deter thieves from attempting a break-in. Here are some essential steps to ensure your garage is a fortress:

  • Install a Solid Door: Choose a sturdy, solid-core door for your garage with a deadbolt lock. Reinforce the door frame to prevent it from being easily kicked in.
  • Upgrade Windows: If your garage has windows, consider reinforcing them with shatterproof film or replacing them with more secure options. This prevents potential burglars from peeking inside to spot your garage door opener.
  • Use Motion-Activated Lights: Install motion-activated lighting around your garage. These lights deter thieves and provide additional security by illuminating the area when motion is detected.
  • Install Security Cameras: Consider installing security cameras both inside and outside your garage. Modern systems can be monitored remotely, giving you real-time access to footage and the ability to respond to potential threats.

5. Educate Your Family

It’s crucial to educate your family members about the importance of garage door opener security. Make sure everyone understands the potential risks associated with leaving the opener in the car or sharing the access code. Teach them how to keep the opener secure and emphasize the need for responsible use.

6. Secure Your Car Interior

In addition to securing your car’s exterior, take steps to protect your vehicle’s interior. Thieves may also target your vehicle for valuables, including your garage door opener. Here are some tips to keep your car interior secure:

  • Use Tinted Windows: Tinted windows can obscure the view into your car’s interior, making it less tempting for thieves.
  • Hide Valuables: Never leave valuables in plain sight inside your car. This includes not only your garage door opener but also electronics, bags, and other items that may attract burglars.
  • Install an Alarm System: An alarm system can deter potential thieves and alert you to any unauthorized access or tampering with your vehicle.

7. Install a Home Security System

A comprehensive home security system can provide an additional layer of protection against garage door opener theft and home invasion. These systems often include door and window sensors, motion detectors, and 24/7 monitoring services. If someone attempts to use a stolen garage door opener to access your home, the security system can trigger an alarm, notify you, and even contact the authorities if necessary.

8. Perform Regular Maintenance

Maintaining your garage door and opener is essential to ensure they function correctly and securely. Regularly inspect the door and its components, including the opener, springs, and sensors. If you notice any issues, address them promptly to prevent vulnerabilities that burglars could exploit.

9. Secure the Emergency Release Cord

The emergency release cord in your garage can be another potential point of entry for thieves. To prevent unauthorized use of this cord, secure it with a zip tie or lock. This simple step ensures that even if someone gains access to your garage, they won’t be able to release the door manually.

10. Be Vigilant and Alert

Finally, staying vigilant and aware of your surroundings is crucial for preventing garage door opener theft. If you notice any suspicious activity in your neighborhood or see unfamiliar individuals lurking around, report it to your local authorities. Timely reporting can help prevent thefts and protect your community.

In conclusion, according to Grapevine Gates & Garage Doors, garage door opener theft is a real threat that can lead to serious security breaches and property damage. However, by taking proactive steps to secure your garage, vehicle, and remote control, you can significantly reduce the risk of falling victim to this type of crime. Investing in modern garage door opener technology, upgrading your garage’s security features, and educating your family are all essential components of a comprehensive approach to preventing garage door opener theft. By implementing these measures, you can safeguard your home, your family, and your peace of mind.

Grapevine Gates & Garage Doors

601 W Wall St, Grapevine, TX 76051, United States

817-631-6355

How to Replace Garage Door Opener – Grapevine Gates & Garage Doors

Replacing a Garage Door Repair Grapevine,TX is a manageable DIY project for many homeowners.

This guide will take you through the process step by step, providing you with valuable insights and tips along the way. Before you begin, make sure you have the necessary tools and a new garage door opener kit ready.

Step 1: Safety First

Safety should always be your top priority when working on any DIY project. Ensure that the power to your garage door opener is disconnected. This typically involves unplugging it from the electrical outlet and turning off the circuit breaker. Additionally, wear safety goggles and work gloves to protect your eyes and hands.

Step 2: Gather Tools and Materials

Here’s a list of tools and materials you’ll need for the project:

  • New garage door opener kit
  • Screwdriver set
  • Adjustable wrench
  • Stepladder
  • Drill with bits
  • Socket and ratchet set
  • Safety goggles
  • Work gloves
  • Wire strippers and connectors
  • Pliers

Step 3: Remove the Old Opener

  1. Locate the power source and disconnect it as mentioned in Step 1.
  2. Unbolt and remove the brackets securing the opener to the ceiling and the wall.
  3. Disconnect the opener from the door by detaching the arm that connects them.
  4. Lower the opener gently to the ground and remove it from your garage.

Step 4: Install the New Opener

Follow the manufacturer’s instructions carefully for your specific garage door opener model. However, here is a general outline:

  1. Assemble the opener components according to the provided instructions.
  2. Attach the rail to the header bracket on the garage door using the supplied hardware.
  3. Install the motor unit to the ceiling, making sure it is level and securely fastened.
  4. Connect the rail to the motor unit, following the manufacturer’s instructions.
  5. Attach the trolley to the chain or belt, and then attach the trolley to the rail.
  6. Install the sensor system according to the manufacturer’s guidelines, ensuring that they are aligned correctly.
  7. Connect the wall control panel and safety sensors to the opener unit.

Step 5: Wiring and Electrical Connections

  1. Follow the wiring instructions in the opener’s manual to connect the power cord to the ceiling outlet.
  2. If necessary, use wire strippers and connectors to make secure electrical connections.
  3. Reconnect the power source to the opener, either by plugging it in or turning the circuit breaker back on.

Step 6: Adjust and Test the Opener

  1. Adjust the opener’s settings according to your garage door’s weight and height, as specified in the manufacturer’s instructions.
  2. Test the opener to ensure it’s functioning correctly. Operate the door using the wall control panel and remote control, if provided.
  3. Make any necessary adjustments to the opener’s settings until the door operates smoothly and safely.

Step 7: Secure the Opener

  1. Fasten the opener securely to the ceiling and the wall using the provided brackets and hardware.
  2. Ensure all cables and wires are neatly secured and out of the way to prevent accidents.

Step 8: Perform a Safety Check

  1. Test the safety features of the opener, such as the auto-reverse mechanism. Place an object in the door’s path, and the door should reverse when it touches the object.
  2. Check the photoelectric sensors to ensure they are aligned correctly and functioning as intended.

Step 9: Final Touches

  1. Organize and secure any excess wiring or cables.
  2. Consider installing a surge protector to protect your opener from power surges.
  3. Program your remote controls and keypad according to the manufacturer’s instructions.
  4. Read and retain the user manual for future reference.

Step 10: Cleanup and Maintenance

Dispose of the old opener and any packaging materials responsibly. Perform routine maintenance on your new garage door opener as recommended in the user manual to ensure it continues to function smoothly and safely.

In conclusion, replacing Garage Door Repair Grapevine, TX can be a rewarding DIY project. By following these steps and heeding safety precautions, you can successfully install a new garage door opener and enjoy the convenience and security it provides for your home. If you’re ever unsure about any aspect of the installation, consult the manufacturer’s instructions or seek professional assistance.

Grapevine Gates & Garage Doors

601 W Wall St, Grapevine, TX 76051, United States

1-817-631-6355

How To Prepare Metal Garage Door For Painting – Grapevine Gates & Garage Doors

Preparing a metal Garage Door Repair Grapevine TX for painting is a crucial step to ensure a smooth and long-lasting paint finish. Proper preparation helps the paint adhere well to the surface and prevents issues such as peeling, flaking, and rust formation.

Here’s a comprehensive guide on how to prep a metal garage door for painting:

Step 1: Gather Your Tools and Materials

Before you begin, gather all the necessary tools and materials:

Tools:

  • Safety glasses
  • Gloves
  • Screwdriver or drill
  • Wire brush or steel wool
  • Sandpaper (medium and fine grit)
  • Paint scraper
  • Tarp or drop cloth
  • Clean cloth or rag
  • Bucket of water with mild detergent
  • Masking tape or painters’ tape
  • Paintbrush or paint roller
  • Paint tray

Materials:

  • Exterior-grade paint stripper (if needed)
  • Rust converter (if rust is present)
  • Metal primer
  • Exterior-grade paint

Step 2: Safety Precautions

  1. Wear Safety Gear: Wear safety glasses and gloves to protect your eyes and hands during the prep process.

Step 3: Protect the Area

  1. Lay Down a Tarp: Place a tarp or drop cloth on the ground below the garage door to catch any debris, paint, or rust particles.

Step 4: Remove Hardware

  1. Remove Hardware: If possible, remove any hardware, handles, hinges, or other attachments from the garage door using a screwdriver or drill.

Step 5: Remove Old Paint

  1. Use Paint Stripper (If Necessary): If the garage door has old paint that’s flaking or peeling, you may need to use an exterior-grade paint stripper to remove it. Follow the manufacturer’s instructions for application and removal.

Step 6: Remove Rust

  1. Address Rust Spots: If you find any rust spots on the garage door, use a wire brush or steel wool to remove the rust particles. If the rust is extensive, consider using a rust converter to treat the affected areas.

Step 7: Sand the Surface

  1. Sand the Door: Use medium-grit sandpaper to sand the entire surface of the garage door. Sanding helps create a smooth surface and promotes paint adhesion.
  2. Smooth Edges: Feather the edges of the sanded area to blend it seamlessly with the surrounding surface.

Step 8: Clean the Surface

  1. Clean with Soapy Water: Mix mild detergent with water in a bucket. Dip a clean cloth or rag into the soapy water and use it to clean the sanded surface, removing dust, debris, and any remaining residue.

Step 9: Apply Primer

  1. Select Metal Primer: Choose a metal primer that is specifically designed for exterior use and is compatible with the type of paint you’ll be using.
  2. Apply Primer: Use a paintbrush or paint roller to apply a thin, even coat of metal primer to the entire surface of the garage door. Follow the manufacturer’s instructions for drying times.

Step 10: Masking

  1. Tape Off Areas: If there are sections of the garage door that you want to keep paint-free (e.g., windows, trim), use masking tape or painters’ tape to protect these areas from paint overspray.

Step 11: Paint the Door

  1. Select Exterior Paint: Choose an exterior-grade paint that is suitable for metal surfaces and matches your desired color.
  2. Apply Paint: Use a paintbrush or paint roller to apply the paint to the primed garage door. Apply thin, even coats, allowing each coat to dry before applying the next.
  3. Follow Drying Times: Follow the paint manufacturer’s instructions for drying times between coats and for the final cure time.

Step 12: Reattach Hardware

  1. Reattach Hardware: Once the paint is fully cured, reattach any hardware, handles, hinges, or other attachments that you removed earlier.

Step 13: Regular Maintenance

  1. Inspect and Clean: Regularly inspect the garage door for signs of wear, chipping, or peeling paint. Clean the surface to remove dirt and debris that could affect the appearance of the paint.

In conclusion, prepping a metal Garage Door Repair Grapevine TX for painting involves removing old paint, addressing rust, sanding the surface, cleaning, applying primer, masking off areas, and painting. By following these steps and taking proper safety precautions, you can ensure a smooth and successful paint application that enhances the appearance and protection of your metal garage door.

Grapevine Gates & Garage Doors

601 W Wall St, Grapevine, TX 76051, United States

1-817-631-6355

How to Winterize Your Garage Door: My Guide to Preparing for Cold Weather – Grapevine Gates & Garage Doors

As the winter season approaches, I’ve learned the importance of getting my home ready to face the challenges of colder temperatures. While focusing on insulating windows and doors, I realized that my garage door deserves equal attention. Winterizing my garage door has become a priority to ensure it remains functional, efficient, and well-maintained during the cold months.

In this guide, I’ll take you through the steps I’ve taken from Garage Door Repair to winterize my garage door, allowing me to enjoy a comfortable and well-protected space throughout winter.

1. Inspect and Seal Gaps

Before the cold weather sets in, I make it a point to inspect my garage door thoroughly. I carefully examine for any gaps, cracks, or openings that could potentially allow chilly air to enter. Paying special attention to the edges and corners, as well as where the door meets the floor, helps me identify areas that need attention. To seal these gaps, I use weatherstripping or rubber seals. This simple step significantly improves the energy efficiency of my garage, making it easier to maintain a comfortable temperature inside.

2. Lubricate Moving Parts

I’ve come to understand that cold temperatures can cause garage door components to become stiff and less responsive. To prevent this, I prioritize lubricating the moving parts of my garage door, such as hinges, rollers, and tracks. Using a recommended garage door lubricant or a silicone-based lubricant helps maintain smooth operation. This regular maintenance not only prevents wear and tear but also reduces the annoying noises that can arise when parts become dry and friction increases.

3. Check and Replace Weatherstripping

One essential aspect of winterizing my garage door is inspecting the weatherstripping. I make sure to replace any worn or damaged sections. Weatherstripping plays a crucial role in keeping the elements out. By preventing cold air, moisture, and debris from entering, it helps maintain a more comfortable and controlled indoor environment. Ensuring that the weatherstripping is in good condition and properly sealed maximizes its effectiveness.

4. Insulate the Garage Door

To keep my garage at a consistent temperature and reduce heat loss, I take the step of insulating my garage door. There are various insulation options available, such as reflective foil insulation, foam board insulation, and garage door insulation kits. By properly insulating my garage door, I not only keep the space warmer but also alleviate the strain on my home’s heating system.

5. Maintain Proper Ventilation

While it’s important to keep my garage warm, I’ve learned that proper ventilation is equally crucial. To prevent moisture buildup, which can lead to mold growth and other issues, I ensure that my garage has adequate ventilation. This might involve occasionally opening windows or using exhaust fans. Maintaining proper ventilation helps create a healthier environment and prevents the accumulation of condensation.

6. Secure Windows and Install Curtains

If your garage has windows, like mine, you might consider enhancing insulation by installing thermal curtains. These curtains help minimize heat loss through the windows and provide extra protection against cold drafts. If the windows are not adequately sealed, I make sure to use weatherstripping or caulking to seal any gaps, preventing cold air from finding its way inside.

7. Adjust Garage Door Opener Settings

I’ve learned that cold weather can affect the performance of a garage door opener. To ensure my garage door functions correctly even in freezing temperatures, I check the owner’s manual for instructions on adjusting the settings. Some garage door openers have a sensitivity adjustment that can be optimized for colder conditions.

8. Clear and Insulate the Garage

Before winter arrives, I find it helpful to declutter my garage and organize my belongings. Removing excess items not only creates more space but also facilitates better airflow and ventilation. Additionally, I consider insulating the walls and ceiling of my garage, especially if it’s an attached garage. Proper insulation helps maintain a more even temperature and prevents cold air from infiltrating my home.

9. Schedule Professional Maintenance

To ensure my garage door is ready for winter, I schedule a pre-winter inspection and maintenance with a professional technician. Their expertise allows them to identify any potential issues, perform necessary adjustments, and ensure my garage door system is in optimal condition. Their guidance helps me properly care for my garage door during the colder months.

10. Keep the Garage Door Clean

Regular cleaning of my garage door is crucial to prevent dirt, debris, and moisture buildup. A clean door not only enhances the overall appearance of my garage but also contributes to its proper functioning. I use a mild detergent and water to clean the door’s surface and wipe down the tracks and rollers to remove any accumulated grime.

In summary, based from Garage Door Repair, by taking the time to winterize my garage door, I’ve discovered that I can create a more comfortable, energy-efficient, and protected space during the winter months. The steps I’ve outlined, from sealing gaps and insulating the door to proper ventilation and professional maintenance, work together to ensure that my garage remains in optimal condition. As the cold weather sets in, I’m confident that my winterized garage door will contribute to a cozier home environment and provide me with peace of mind throughout the winter season.

Grapevine Gates & Garage Doors

601 W Wall St, Grapevine, TX 76051, United States

817-6316355

How to Program Jeep Garage Door Opener-Grapevine Garage Door & Gates

Programming a Jeep Garage Door Repair Grapevine TX opener involves a series of steps to synchronize the opener with your garage door. While the specific process may vary depending on the model of your Jeep and the type of garage door opener you have, the following general guidelines should help you get started.

Please note that it’s always recommended to consult your vehicle’s manual and the opener’s instructions for precise programming instructions.

  1. Determine compatibility: First, ensure that your garage door opener is compatible with the HomeLink system used in Jeep vehicles. Check your opener’s manual or contact the manufacturer to confirm compatibility.
  2. Gather information: Gather the necessary information and materials for programming, including your garage door opener’s instruction manual, the vehicle’s owner’s manual, and a step ladder if needed.
  3. Clear existing codes: If you’re programming a new opener or reprogramming an existing one, it’s important to clear any existing codes from your Jeep’s HomeLink system. To do this, press and hold the first and third buttons on the HomeLink panel located in your vehicle until the indicator light begins to flash rapidly. This usually takes around 20 seconds.
  4. Locate the “learn” button: On your garage door opener unit, locate the “learn” or “program” button. This button is usually located on the back or side of the opener, and its appearance may vary depending on the manufacturer.
  5. Enter programming mode: In your Jeep, press and hold the button you wish to program on the HomeLink panel. Simultaneously, press and hold the “learn” button on the garage door opener unit. Continue holding both buttons until the HomeLink indicator light starts flashing, which may take about 30 seconds.
  6. Train HomeLink: With the HomeLink indicator light flashing, release both buttons. Then, within 30 seconds, press and hold the HomeLink button you want to program, as well as the corresponding button on your garage door opener’s remote control. Keep holding both buttons until the HomeLink light stops flashing and remains solid. This process may take a few seconds.
  7. Test the programming: To ensure successful programming, exit your vehicle and stand within range of your garage door opener. Press the programmed HomeLink button, and the garage door should respond by opening or closing. If it doesn’t, repeat the programming steps or refer to your specific vehicle’s manual for troubleshooting tips.
  8. Repeat for additional buttons: If you have multiple garage doors or other devices to program, repeat steps 5 to 7 for each additional button on the HomeLink panel.
  9. Finalize the process: Once all desired buttons are programmed, test each one individually to confirm proper functionality. It’s also a good idea to double-check the programming steps in your Jeep’s manual to ensure you’ve completed the process correctly.

Remember, these instructions provide a general guideline for programming a Jeep Garage Door Repair Grapevine TX opener. Your specific vehicle and opener model may have slight variations, so always consult the relevant manuals for precise instructions.

Grapevine Garage Door & Gates

Grapevine Doors and Gates
Grapevine, TX

817-809-2507

How to Align Garage Door Sensors? – Grapevine Garage Door & Gates

As a homeowner who recently aligned my garage door sensors, I can share my experience and offer guidance on the process. Aligning the sensors is crucial for the proper operation and safety of the garage door system.

Here is a step-by-step account from Garage Door Repair Grapevine TX of how I aligned my garage door sensors:

  1. Understand Sensor Placement: I began by familiarizing myself with the sensor placement. The sensors are typically located on either side of the garage door, close to the ground. One sensor serves as the transmitting sensor, while the other acts as the receiving sensor. The transmitting sensor emits an infrared beam that must be uninterrupted for the door to close correctly. The receiving sensor detects this beam and communicates with the garage door opener.
  2. Inspect and Clean the Sensors: Before aligning the sensors, I carefully examined them for any dirt, debris, or obstructions that could affect their operation. I used a soft, lint-free cloth and a mild household cleaner to clean the sensor lenses, ensuring they were clear and free from smudges or residue. It is important to clean both the transmitting and receiving sensors.
  3. Verify Power Supply: I checked the indicator lights on the sensors to ensure they were receiving power. The transmitting sensor typically has a green light, while the receiving sensor has a red or orange light. If the lights were not illuminated, I double-checked the power connections and made sure the sensors were properly receiving power.
  4. Adjust Sensor Brackets: The sensors are usually mounted on adjustable brackets, which allow for vertical and horizontal adjustments. I loosened the screws or nuts holding the brackets in place. Then, I gently adjusted the brackets to ensure that the sensors were level and aligned with each other. I used a level to confirm that the sensors were parallel to the ground and vertically aligned.
  5. Maintain Proper Distance: To ensure the proper functioning of the sensors, it was important to maintain the correct distance between them. I referred to the instruction manual provided by the garage door opener manufacturer to determine the recommended distance. Typically, the sensors should be positioned around 4 to 6 inches above the ground. I measured and adjusted the sensors to ensure they were at the appropriate height.
  6. Test Sensor Alignment: After adjusting the sensor brackets and confirming the correct distance, I tested the alignment. I closed the garage door using the wall control or remote control and carefully observed the door’s behavior. If the sensors were aligned correctly, the door closed smoothly without reversing. If the door did not close or reversed its movement, it indicated that the sensors were still misaligned.
  7. Fine-Tune Alignment: If the door did not close or reversed, I made small adjustments to the sensor brackets. I moved them slightly up, down, left, or right to achieve better alignment. It required a few iterations of testing and adjustment to achieve the desired result. I ensured that the sensors were precisely aligned to allow the infrared beam to be properly transmitted and received.
  8. Secure Sensor Brackets: Once I achieved the proper alignment, and the garage door closed smoothly without reversing, I securely tightened the screws or nuts on the sensor brackets. It was important to ensure that the brackets were firmly in place to maintain the alignment during regular operation.
  9. Perform Regular Maintenance: I understood the importance of regular maintenance to keep the sensors functioning optimally. Over time, dust, dirt, or other debris can accumulate on the sensor lenses, hindering their performance. I made it a habit to periodically inspect and clean the lenses, ensuring that they remained clear and unobstructed.

Throughout the process of aligning my garage door sensors, I exercised caution and followed safety guidelines. If at any point I encountered difficulties or felt unsure about the task, I would have sought professionalassistance from a garage door technician. They possess the expertise and knowledge to properly align the sensors and ensure the safe and reliable operation of the garage door system.

Aligning the garage door sensors required attention to detail and patience. By following the steps outlined above and consulting the manufacturer’s instructions, I was able to successfully align my garage door sensors. Regular maintenance and cleaning of the sensors will continue to be a part of my garage door maintenance routine to ensure their optimal performance.

Overall, by following Garage Door Repair Grapevine TX, please note that specific instructions may vary depending on the garage door opener model and manufacturer. Always refer to the provided documentation for your particular system and consult a professional if you encounter any difficulties or uncertainties during the alignment process.

Grapevine Garage Door & Gates

Grapevine, TX

817-809-2507

How to Replace a Liftmaster Garage Door Opener Battery-Grapevine Garage Door & Gates

Replacing the battery in your LiftMaster Garage Door Repair Grapevine TX opener is a simple and straightforward process.

Here are the steps you need to follow to replace the battery in your LiftMaster garage door opener:

Step 1: Identify the type of battery your garage door opener uses. Most LiftMaster garage door openers use a 12-volt battery, but there are some models that use a different voltage. Check your owner’s manual or the label on the back of the motor unit to determine the correct voltage.

Step 2: Locate the battery compartment. The battery compartment is usually located on the back of the motor unit. In some models, it may be located on the side or front of the unit. If you’re having trouble finding the battery compartment, consult your owner’s manual.

Step 3: Disconnect the power to the garage door opener. Before you begin replacing the battery, you need to disconnect the power to the garage door opener. You can do this by unplugging the unit from the electrical outlet or by turning off the circuit breaker that powers the opener.

Step 4: Remove the old battery. Open the battery compartment and remove the old battery. Depending on the model, the battery may be held in place by a clip or a screw. Carefully remove the battery, being sure to note the position of the positive and negative terminals.

Step 5: Install the new battery. Insert the new battery into the compartment, making sure to align the positive and negative terminals correctly. Secure the battery in place with the clip or screw, if necessary.

Step 6: Reconnect the power. Once the new battery is installed, reconnect the power to the garage door opener by plugging it back in or turning the circuit breaker back on.

Step 7: Test the garage door opener. Press the remote or wall button to test the garage door opener. If the opener doesn’t work, check to make sure the battery is installed correctly and that the battery terminals are clean.

Step 8: Dispose of the old battery. Be sure to dispose of the old battery properly. Most hardware stores and recycling centers accept used batteries for recycling.

In conclusion, replacing the battery in your LiftMaster Garage Door Repair Grapevine TX opener is a quick and easy process that can be done in just a few simple steps. By following these instructions, you can ensure that your garage door opener continues to operate smoothly and reliably.

Grapevine Garage Door & Gates

Grapevine Doors and Gates
Grapevine, TX

1-817-809-2507

How Can I Reset My Garage Door Opener – Grapevine Garage Door & Gates

Resetting a Garage Door Repair Grapevine TX opener may seem like a daunting task, but it’s actually quite simple.

Here’s a step-by-step guide to help you reset your garage door opener:

Step 1: Identify the Type of Opener Before you begin resetting your garage door opener, it’s important to identify the type of opener you have. There are three main types of garage door openers: chain-driven, belt-driven, and screw-driven. Each type of opener may have slightly different resetting procedures, so it’s important to know which one you have.

Step 2: Locate the Reset Button Once you’ve identified your garage door opener, the next step is to locate the reset button. The reset button is usually located on the back of the opener, near the motor or on the wall control panel. If you’re having trouble finding the reset button, consult your owner’s manual for guidance.

Step 3: Unplug the Opener To reset your garage door opener, you’ll need to unplug it from the power source. This will help ensure that the reset process is successful and that the opener is not damaged during the process. Simply unplug the opener from the power outlet or turn off the circuit breaker that controls the opener.

Step 4: Wait for 30 Seconds After unplugging the opener, wait for at least 30 seconds before proceeding with the reset process. This will give the opener time to fully power down and reset itself.

Step 5: Press and Hold the Reset Button Once the opener has been powered down for at least 30 seconds, locate the reset button and press and hold it for a few seconds. Depending on the type of opener you have, you may need to use a paperclip or a small tool to press the button. Hold the button until the lights on the opener flash or the motor makes a clicking sound.

Step 6: Test the Opener After pressing and holding the reset button, plug the opener back into the power source or turn the circuit breaker back on. Wait for the opener to fully power up, and then test it to make sure it’s working properly. Use the wall control panel or the remote control to open and close the door, and make sure it’s moving smoothly and without any issues.

Step 7: Reset the Remote Control If your garage door opener uses a remote control, you may need to reset it as well. To do this, locate the reset button on the back of the remote control and press and hold it for a few seconds. The remote should beep or the lights should flash to indicate that it has been reset. Then, reprogram the remote by following the instructions in your owner’s manual.

In conclusion, resetting a Garage Door Repair Grapevine TX opener is a simple process that can be done in just a few steps. By following these instructions, you can reset your garage door opener and ensure that it’s working properly. Remember to always consult your owner’s manual for specific instructions and safety guidelines before attempting any repairs or maintenance on your garage door opener.

Grapevine Garage Door & Gates

1-817-809-2507

Powered by WordPress & Theme by Anders Norén