Get your Home in Perfect Harmony

Tag: garage door repair springtown tx

How Much Does Garage Door Cost – Arlington Overhead & Garage Doors

First and foremost, the cost of a Garage Doors Repair Arlington TX is like a dance between various factors. The material waltzes in, setting the tone. Steel doors are like the reliable tango partner, sturdy and budget-friendly.

Wood, on the other hand, is the elegant waltzed, charming but a tad more expensive. Then there’s the contemporary twist of aluminum and glass doors—modern, sleek, but often pricier.

But wait, the design takes center stage! Basic models perform the humble two-step, while customized doors execute the intricate ballet of personal style. Windows, patterns, and decorative hardware—each step adding to the overall performance, and the price.

Size enters the scene with its own flair. Single doors do the solo, cost-effective act, while double doors command attention and a higher bill. The insulation, a silent partner, influences the energy efficiency, affecting not only the temperature inside but also the cost on the tag.

Now, let’s not forget the opener—the unsung hero. Chain-driven openers are the workhorses, reliable but a bit on the noisier side. Belt-driven ones whisper in the background, smoother but a touch costlier. And then, the jackshaft openers, the wallflower of the group, tucked away but efficient, with a price to match.

Installation swirls into the mix, sometimes a DIY tap dance, reducing costs, or a professional choreography that adds to the final bill. Oh, and the location of your dance floor matters. Urban stages often command higher prices than rural arenas.

Warranty, the safety net, deserves a mention. A robust warranty is like insurance for your garage door—protecting you from unexpected choreography malfunctions and repair costs. It might add a few extra dollars, but the peace of mind is worth the investment.

Maintenance is the ongoing rhythm of this dance. Regular checks and tune-ups are the choreography that keeps everything moving smoothly, potentially saving you from a costly breakdown.

Online retailers, the digital maestros, offer competitive prices, but beware of shipping costs and potential DIY headaches. Local dealers, the community performers, might have higher prices but offer a personal touch and reliable service.

In conclusion, the cost of a Garage Doors Repair Arlington TX is a grand performance, a ballet of materials, designs, sizes, openers, locations, warranties, and maintenance. It’s not just a transaction; it’s a dance with your home, an investment in security, aesthetics, and convenience. So, when you ask about the cost, remember, it’s not just about the numbers—it’s a dance of choices, each step contributing to the grand finale.

Arlington Overhead & Garage Doors

817 – 646 – 2532

How Much Does A Garage Door Weigh – Springtown Gates & Garage Doors

The weight of a Garage Door Repair Springtown TX is a pivotal factor in its installation, maintenance, and overall functionality.

To understand the intricate nuances of garage door weight, we must consider various elements that contribute to this often-overlooked aspect of residential architecture.

Firstly, the material of the garage door plays a substantial role in determining its weight. Common materials include steel, wood, aluminum, and fiberglass, each with its unique properties and weight characteristics. Steel doors, known for their durability and strength, tend to be heavier compared to their counterparts like aluminum, which is lighter but may sacrifice some robustness.

Now, let’s talk about the dimensions. Garage doors come in a multitude of sizes, from single-car to double-car configurations. The larger the door, the more material is required, inevitably adding to its weight. Single garage doors typically range from 9 to 10 feet in width, while double garage doors can extend up to 16 feet or more. The weight discrepancy between these sizes can be quite significant.

Adding insulation to a garage door is another variable that tips the scales. Insulated garage doors are preferred in regions with extreme temperatures, providing better energy efficiency. However, this added layer of insulation, often made of materials like polyurethane or polystyrene, contributes to the overall weight of the door.

Windows, though adding aesthetic appeal and natural light to the garage interior, also impact the weight. The type of glass used and the size of the windows alter the equilibrium. While windows enhance the visual appeal, they necessitate careful consideration to maintain the door’s structural integrity.

Let’s not forget the hardware. Hinges, rollers, springs, and tracks all play vital roles in the garage door’s movement. The weight of the door must be compatible with the springs and other components to ensure smooth operation. Choosing the right springs is crucial, as they counterbalance the weight of the door, preventing it from crashing down or being challenging to lift.

Installation factors into the overall weight consideration as well. A professionally installed garage door ensures that it is balanced correctly, reducing wear and tear on the opener and other components. An improperly balanced door can lead to operational issues and pose safety risks.

When we discuss the weight of garage doors, it’s not merely a number on a scale. It’s a complex interplay of materials, dimensions, insulation, windows, and hardware. Each element contributes to the door’s overall heft, influencing not only its performance but also the choices homeowners must make when selecting, installing, or maintaining their garage doors.

In conclusion, the weight of a Garage Door Repair Springtown TX is not a mere technicality; it’s a critical factor that demands careful consideration. As homeowners embark on the journey of choosing the perfect garage door, understanding the weight dynamics becomes paramount for a seamless blend of functionality, safety, and aesthetic appeal.

Springtown Gates & Garage Doors

104 Adalida Ln, Springtown, TX 76082, United States

1-817-631-1036

How To Program Lift Master Garage Door Opener – Springtown Gates & Garage Doors –

Most LiftMaster Garage Door Repair Springtown TX have a “Learn” button on the motor unit. This button is usually located near the antenna wire. The color of the button can vary (yellow, red, purple, etc.), but it’s typically a large button.

: Clear Existing Codes (if needed)

If you’re reprogramming the opener or it’s a new one, it’s a good idea to clear out existing codes. Press and hold the “Learn” button until the indicator light beside it goes off. This usually takes about 6 seconds.

: Choose a PIN

Decide on a PIN (Personal Identification Number) that you want to use to operate your garage door. The PIN is the code you’ll input into the keypad or remote control.

: Enter the Programming Mode

Press the “Learn” button on the motor unit. The indicator light should turn on, indicating that the opener is ready to learn a new code.

: Input the PIN

Enter your chosen PIN using the keypad or remote control. Press the numbers in sequence and make sure each press is registered by the indicator light blinking.

: Test the Code

After entering the PIN, press the “Open/Close” button on the remote control or keypad. The garage door should respond by moving. If it does, congratulations! You’ve successfully programmed your garage door opener.

: Program Additional Devices (if needed)

If you have multiple remotes or a keypad, repeat the process for each device. You can usually program multiple devices with the same PIN.

: Finalize the Programming

Press the “Learn” button once more to exit the programming mode. The indicator light should go off, indicating that the opener is no longer in programming mode.

: Test Again

Test all programmed devices to ensure they open and close the garage door consistently. This is a crucial step to confirm that everything is working as expected.

Troubleshooting Tips:

  • If the door doesn’t respond, double-check the PIN and reprogram it.
  • Make sure the remote control batteries are fresh.
  • If you have a wall control panel, make sure it’s not locked. Some models have a lock feature that prevents the opener from responding to remotes.
  • Refer to your specific model’s manual for any model-specific instructions or troubleshooting tips.

And there you have it! You’ve successfully programmed your LiftMaster Garage Door Repair Springtown TX If you encounter any issues, don’t hesitate to consult your opener’s manual or contact LiftMaster customer support for assistance.

Springtown Gates & Garage Doors

104 Adalida Ln, Springtown, TX 76082, United States

1-817-631-1036

Garage Door Cable Repair: Why It’s a Dangerous Job for Amateurs? – Springtown Gates & Garage Doors

As a homeowner, I’ve always been a bit of a DIY enthusiast. There’s a certain satisfaction that comes from tackling home improvement projects on my own, from painting walls to fixing leaky faucets. However, through my journey of homeownership, I’ve also learned that not all tasks around the house should be approached with a DIY mindset, especially when it comes to garage door cable repair.

By following Springtown Gates & Garage Doors, I’ll share why garage door cable repair is a dangerous job for amateurs like me.

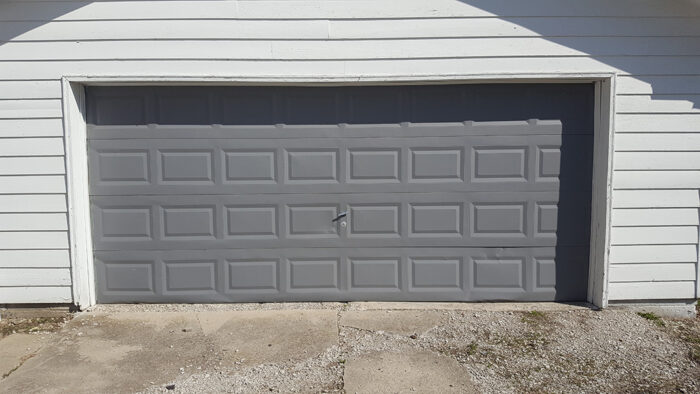
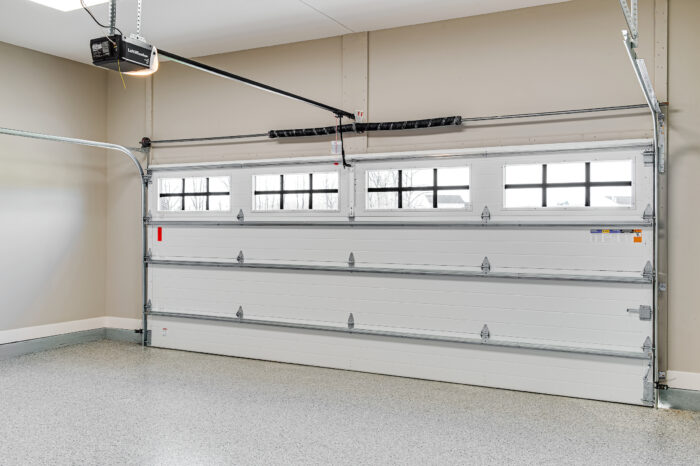
The Crucial Role of Garage Door Cables

Before delving into the reasons behind the risks associated with garage door cable repair, it’s essential to understand the critical role that these cables play in the operation of a garage door. Garage door cables are responsible for supporting the weight of the door and ensuring its smooth and balanced movement.

Most garage doors use either torsion or extension springs in combination with cables. Torsion springs wind and unwind to provide the necessary force for lifting and lowering the door, while extension springs stretch and contract to counterbalance the door’s weight. Garage door cables are attached to these springs and are vital in distributing the tension and weight evenly, allowing for controlled and safe operation.

Reasons Why Garage Door Cable Repair Is Dangerous for Amateurs:

1. High Tension and Force

One of the primary reasons why garage door cable repair is perilous for amateurs is the incredibly high tension and force involved in these systems. Garage door cables are under immense pressure, especially when connected to torsion springs. Attempting to repair or replace cables without the proper knowledge and tools can result in severe injury.

My Experience: Early in my homeownership journey, I attempted to replace a frayed garage door cable without understanding the full extent of the tension involved. The moment I loosened the cable, it snapped with a loud bang, narrowly missing my head. The force was enough to leave a lasting impression of the risks involved.

2. Inadequate Knowledge and Training

Garage door cable systems are complex and require a deep understanding of their mechanics. Amateurs like myself may not have the necessary knowledge to assess the condition of cables accurately, identify potential issues, or perform repairs safely.

My Experience: In my initial attempts at DIY garage door cable repair, I failed to recognize the early signs of cable wear and tension problems. This lack of knowledge led to ineffective repairs and, in some cases, further damage to the cables and springs.

3. Incorrect Cable Installation

Proper cable installation is crucial for the safe and reliable operation of a garage door. Amateurs may struggle with ensuring the cables are correctly positioned, attached, and tensioned. Incorrect installation can result in unbalanced door movement or cable failure, posing significant risks.

My Experience: Once, I attempted to reattach a loose cable without understanding the precise positioning required. My attempts at securing the cable inadequately resulted in the door shifting off balance, which could have led to further damage or accidents.

4. Safety Hazards

Garage door cable repair involves working with heavy components and tools. Amateurs may underestimate the safety hazards associated with handling these materials and may not take the necessary precautions to protect themselves from accidents.

My Experience: I recall a situation where I didn’t secure the ladder properly while attempting a garage door cable repair. The ladder slipped, causing me to lose balance and fall. Fortunately, the fall resulted in minor injuries, but it could have been much worse.

5. Risk of Damaging Other Components

Attempting garage door cable repair without the requisite expertise can lead to unintended consequences. Amateurs may inadvertently damage other critical components of the garage door system, such as the springs, tracks, or rollers, which can result in more extensive and costly repairs.

My Experience: In one instance, my attempts at cable repair led to misalignment of the tracks. This caused the garage door to repeatedly get stuck, requiring professional intervention to correct the issue.

6. Lack of Proper Tools and Equipment

Professional technicians have access to specialized tools and equipment designed for safe and effective garage door cable repair. Amateurs may not possess the required tools or might use inadequate makeshift solutions, increasing the likelihood of accidents.

My Experience: I once attempted to replace a garage door cable using a pair of pliers and a makeshift tool. The lack of proper equipment made the task significantly more challenging and less safe.

7. Insurance and Liability Concerns

In the event of an accident or injury resulting from amateur garage door cable repair, there may be insurance and liability implications. Homeowners may find themselves facing medical bills or property damage costs, which could have been avoided by hiring a professional technician.

My Experience: Fortunately, I never experienced a severe injury while attempting garage door cable repair. However, the potential liability and insurance concerns always loomed in the back of my mind, causing unnecessary stress.

Conclusion

A stated in Springtown Gates & Garage Doors and through my experiences as a homeowner, I’ve learned that garage door cable repair is a dangerous job for amateurs. The high tension and force involved, coupled with the lack of knowledge, inadequate tools, and potential for accidents, make it a task best left to professionals.

While I appreciate the satisfaction that comes from DIY projects around the house, I’ve come to understand that safety should always be a top priority. When it comes to garage door cable repair, I now recognize the value of hiring experienced and trained technicians who have the expertise, knowledge, and proper equipment to perform these tasks safely and effectively. By doing so, I not only protect my own well-being but also ensure the reliable and secure operation of one of the most crucial components of my home.

Springtown Gates & Garage Doors

104 Adalida Ln, Springtown, TX 76082, United States

817-631-1036

How Much is A New Garage Door – Springtown Gates & Garage Doors

A new Garage Door Repair Springtown, TX cost can vary significantly based on several factors, including the type of door, materials, size, design, insulation, and additional features.

To provide a comprehensive guide on garage door prices, I will break down the key factors that influence the cost and provide estimates for different scenarios.

1. Types of Garage Doors

There are several types of garage doors, each with its own price range:

  • Single Panel Garage Door: These are the most basic and affordable type, costing between $400 and $700 on average for the door alone.
  • Sectional Garage Door: These are more common and can range from $700 to $2,500 or more, depending on materials and features.
  • Roll-Up Garage Door: Typically found in commercial settings, roll-up doors can cost between $1,000 and $10,000 or more.

2. Garage Door Materials

The choice of materials significantly impacts the cost:

  • Steel Garage Doors: These are popular for their durability and range from $750 to $3,500 or more.
  • Wooden Garage Doors: They offer a classic look but can be more expensive, ranging from $1,200 to $4,000 or higher.
  • Aluminum Garage Doors: These doors are lightweight and rust-resistant, costing between $800 and $2,500 or more.
  • Fiberglass Garage Doors: These are less common and typically range from $1,000 to $2,500.

3. Size and Design

The size and design of the garage door will also affect the price. Standard single-car garage doors are cheaper than double-car doors or custom designs. Expect to pay more for intricate designs, windows, and decorative hardware. Prices can vary from $500 to $5,000 or more.

4. Insulation

Insulated garage doors help regulate temperature and energy costs. Insulation options include:

  • Single-Layer (Non-insulated): The most affordable option, ranging from $300 to $1,500.
  • Double-Layer (Polystyrene Insulated): Mid-range insulation, typically priced between $600 and $2,500.
  • Triple-Layer (Polyurethane Insulated): High insulation and soundproofing, costing between $800 and $4,000 or more.

5. Additional Features

Additional features like automatic openers, remote controls, and smart home integration can add to the cost. These accessories can range from $100 to $500 or more.

6. Installation Costs

Professional installation is crucial for safety and proper functioning. Installation fees range from $200 to $800, depending on complexity and location.

7. Location and Labor Costs

Labor costs can vary depending on your location and the availability of skilled garage door installers. Expect to pay more in areas with a higher cost of living.

8. Brand and Warranty

Reputable brands often come with higher price tags, but they may also offer better warranties and long-term reliability. Expect to pay a premium for well-known brands like Clopay, Amarr, and Wayne Dalton.

9. DIY vs. Professional Installation

While some homeowners opt for DIY installation to save money, it’s essential to consider the complexity and safety aspects. A professional installation ensures the door operates correctly and safely.

10. Maintenance Costs

Factor in ongoing maintenance costs, such as lubrication, periodic inspections, and potential repairs, to ensure the longevity of your garage door.

In conclusion, the cost of a new Garage Door Repair Springtown, TX can range from a few hundred dollars to several thousand dollars or more, depending on the factors mentioned above. On average, you can expect to spend between $700 and $3,000 for a standard sectional garage door with moderate insulation and features. However, for a more accurate estimate, it’s recommended to consult with local garage door dealers or contractors who can provide quotes based on your specific requirements.

Springtown Gates & Garage Doors

104 Adalida Ln, Springtown, TX 76082, United States

1-817-631-1036

How To Attach Garage Door Opener To Visor – Springtown Gates & Garage Doors

Attaching a Springtown Gates & Garage Doors opener remote to your car’s visor is a convenient way to keep the remote easily accessible while you’re inside the vehicle. Properly securing the remote helps ensure that it doesn’t fall off or get in the way while driving.

Here’s a step-by-step guide to help you understand how to attach a garage door opener to your car’s visor:

Materials You’ll Need:

  • Garage door opener remote
  • Velcro strips or adhesive strips (with hook and loop sides)
  • Rubbing alcohol
  • Clean cloth
  • Scissors (if needed)

Step-by-Step Guide to Attaching a Garage Door Opener to Your Car’s Visor:

1. Choose the Location:
Determine the best location on your car’s visor to attach the garage door opener remote. Choose a spot that is easily reachable for you while you’re seated in the driver’s seat.

2. Prepare the Visor:
Follow these steps to prepare the visor for attaching the remote:

  • Clean the area of the visor where you plan to attach the remote. Use rubbing alcohol and a clean cloth to remove any dirt, dust, or residue that might interfere with adhesion.

3. Prepare the Remote:
Check the back of the garage door opener remote to see if it has a hole or slot for attaching a keyring or clip. If not, you can attach adhesive strips directly to the back of the remote.

4. Apply Adhesive Strips:
If the remote has a hole or slot, you can use a small keyring or clip to attach it to the visor. If not, follow these steps to attach adhesive strips:

  • Cut small sections of adhesive strips (both hook and loop sides) to fit the back of the remote.
  • Peel off the backing from one side of an adhesive strip and firmly press it onto the back of the remote.
  • Peel off the backing from the other side of the adhesive strip and press the remote onto the prepared area of the visor. Press down firmly to ensure good adhesion.

5. Test the Attachment:
Gently tug on the remote to ensure that it is securely attached to the visor and won’t come loose during driving or use.

6. Organize the Visor:
If your visor has a built-in clip for holding items, you can use it to secure the remote. Alternatively, you can place the remote in a position that allows it to hang freely from the visor.

7. Test Accessibility:
Sit in the driver’s seat and test the accessibility of the remote. Make sure it’s easy to reach and use while driving.

Additional Tips:

  • Velcro Strips: Using Velcro or adhesive strips with hook and loop sides offers flexibility, as you can easily remove the remote when needed.
  • Secure Placement: Make sure the remote is securely attached to the visor to prevent it from falling while driving or obstructing your view.
  • Avoid Blocking Vision: Place the remote in a location that doesn’t obstruct your view of the road or interfere with your driving.
  • Clean Regularly: Periodically clean the adhesive area of the visor and the back of the remote to maintain adhesion.
  • Consider Remote Clips: Some garage door opener remotes come with clips that are designed to attach to the car’s visor. Check if your remote has this feature.

Conclusion:

Attaching a Springtown Gates & Garage Doors opener remote to your car’s visor provides easy access and convenience while driving. By following the steps outlined in this guide and using adhesive strips or Velcro, you can securely attach the remote to the visor without damaging either the remote or the vehicle’s interior. Always ensure that the remote is positioned in a way that doesn’t obstruct your view or interfere with safe driving.

Springtown Gates & Garage Doors

104 Adalida Ln, Springtown, TX 76082, United States

1-817-631-1036

Multi-Functional Garage Doors: Space Optimization and Versatility – Springtown Gates & Garage Doors

Being a homeowner who loves finding innovative ways to make the most of my living space, I recently stumbled upon a game-changer that has completely transformed the way I view my garage. Gone are the days when the garage was merely a place to park vehicles and store clutter. The concept of multi-functional garage doors has opened up a world of possibilities, turning this often-underutilized space into a versatile oasis of creativity and functionality.

In this guide I got from Garage Door Repair, I’m excited to share my journey into the realm of multi-functional garage doors, highlighting the advantages, applications, and the remarkable impact they can have on your home.

Rethinking Garage Spaces

In my quest for a more functional and aesthetically pleasing home environment, I realized that the garage held untapped potential. Multi-functional garage doors have redefined the way we look at this space, encouraging us to view it as an extension of our living area. No longer confined to a single purpose, the garage can seamlessly transition from one role to another, catering to a variety of needs and activities.

These doors effortlessly blur the boundaries between indoor and outdoor spaces, creating a sense of unity that adds a refreshing dimension to the home. Whether you’re looking to create an entertainment hub, a serene home office, a vibrant art studio, or a cozy family hangout, multi-functional garage doors provide the canvas for your vision.

Embracing the Benefits

The decision to embrace multi-functional garage doors was driven by the numerous advantages they offer:

  1. Space Optimization: As someone who values efficient use of space, the idea of extending my living area by opening up the garage was incredibly appealing. These doors can be partially or fully opened, effectively extending the usable space and allowing for a seamless transition between the indoors and outdoors.
  2. Versatility at Its Best: The versatility of multi-functional garage doors is truly remarkable. I’ve experienced the joy of effortlessly transforming my garage into different settings – from an open-air fitness zone to a tranquil reading nook. The doors adapt to my needs, enhancing the flow of activities in and around my home.
  3. Natural Light and Fresh Air: The large windows and panels on these doors flood the interior with natural light, reducing the need for artificial lighting during the day. Additionally, opening the doors allows for excellent cross-ventilation, creating a pleasant and energy-efficient environment.
  4. Aesthetic Enhancement: I take great pride in the appearance of my home, and multi-functional garage doors have added a touch of elegance that enhances the overall curb appeal. With a wide array of designs, materials, and finishes to choose from, these doors effortlessly complement my home’s architectural style.
  5. Value-Added Investment: As a homeowner who recognizes the importance of property value, I’m thrilled by the potential for increased home value that comes with multi-functional garage doors. The added versatility and creative use of space make my home stand out in a competitive market.

Creative Applications

The beauty of multi-functional garage doors lies in their adaptability. I’ve had the pleasure of exploring various creative applications:

  1. Home Gym: Fitness is a priority for me, and my garage has been transformed into a vibrant home gym. With the doors open, I can enjoy the energizing breeze and the feeling of exercising outdoors.
  2. Productive Home Office: When I need a quiet workspace, my garage becomes a serene home office. Opening the doors allows me to enjoy the sights and sounds of nature while staying productive.
  3. Entertainment Central: Hosting gatherings has never been more enjoyable. My garage easily converts into an entertainment hub, with guests freely moving between the indoor and outdoor spaces.
  4. Artistic Haven: As a hobbyist artist, I’ve turned my garage into a well-lit art studio. The abundance of natural light and fresh air ignites my creativity and fuels my artistic pursuits.
  5. Extended Family Space: The versatility of multi-functional garage doors shines when I extend my living area for family gatherings. It’s a cozy haven where we create lasting memories.

Designing for Individuality

Multi-functional garage doors offer a plethora of design options, enabling you to express your unique style. From choosing panel configurations to selecting window designs and hardware finishes, the customization possibilities are endless. Some models even feature smart technology, allowing you to control the doors remotely for added convenience and security.

Making it Happen

The journey to realizing the potential of multi-functional garage doors starts with a well-planned installation process. Enlisting the expertise of a professional garage door installation company is crucial. These experts guide you through the design, selection, and installation stages, ensuring that the doors are not only visually appealing but also properly insulated and equipped with essential safety features.

Before embarking on the project, be sure to familiarize yourself with local regulations and any homeowners’ association guidelines. Compliance with these regulations ensures a seamless installation process that aligns with your vision.

Overall, by following Garage Door Repair, my experience with multi-functional garage doors has been nothing short of transformative. These doors have revolutionized the way I interact with my garage space, opening up a world of possibilities I never imagined. With their space optimization, versatility, natural light, enhanced aesthetics, and potential for increased home value, multi-functional garage doors are a game-changer for homeowners seeking to make the most of their property.

Whether you’re dreaming of a home gym, a home office, an entertainment haven, an art studio, or an extended family space, multi-functional garage doors empower you to turn your visions into reality. As someone who cherishes both functionality and style, I wholeheartedly encourage you to explore the world of multi-functional garage doors. By embracing this innovative concept, you’ll unlock the potential of your garage space and elevate your home’s living experience to new heights.

Springtown Gates & Garage Doors

104 Adalida Ln, Springtown, TX 76082, United States

817-631-1036

How To Reset Wayne Dalton Garage Door Remote-Springtown Best Garage & Overhead Doors

To reset a Wayne Dalton Garage Door Repair Springtown TX remote, follow these steps:

Locate the “Learn” button: Look for a small button on the motor unit of your garage door opener. This button is typically located near the antenna wire and is labeled as “Learn” or “Program.” The location of the button may vary depending on the model of your Wayne Dalton opener.

Clear the memory: Press and hold down the “Learn” button on the motor unit. Keep holding it until the indicator light on the opener turns on or starts blinking. This process usually takes a few seconds. Once the indicator light is on, release the “Learn” button.

Erase all codes: To ensure a complete reset, it’s important to erase all the existing codes stored in the opener’s memory. Press the “Learn” button again, but this time, immediately release it. The indicator light should turn off.

Prepare the remote: Take your Wayne Dalton garage door remote and remove the battery cover. You may need a small screwdriver to do this. Inside, you will find small switches or buttons that can be set to different positions. These switches or buttons are used to program the remote with a unique code.

Set the remote code: Now, you need to match the code on the remote with the code on the opener. Use the switches or buttons inside the remote to set the code. Make sure the code you set matches the code on the opener. Refer to the manual that came with your remote for specific instructions on how to set the code. The number of switches or buttons and the process of setting the code may vary depending on the model of your Wayne Dalton remote.

Program the remote: With the code set on the remote, you are now ready to program it with the opener. Press the “Learn” button on the motor unit of the opener once. The indicator light should turn on or start blinking.

Sync the remote and opener: Within 30 seconds of pressing the “Learn” button on the opener, press and hold the button on the remote that you want to use to operate the garage door. Hold the button until the indicator light on the opener blinks or turns off. This process is usually completed within a few seconds.

Test the remote: To confirm that the programming was successful, press the button on the remote that you just programmed. The garage door should respond by opening or closing. If it doesn’t, repeat steps 6 and 7, ensuring that you are within range of the opener.

Repeat for additional remotes: If you have more than one remote that you want to program, repeat steps 4 to 8 for each additional remote. Remember to set a unique code on each remote and follow the programming procedure.

Complete the process: Once you have programmed all the remotes, the reset process is complete. Test each remote again to ensure they are all functioning properly.

Following these steps should allow you to successfully reset your Wayne Dalton Garage Door Repair Springtown TX remote. If you encounter any issues or have a different model, it’s recommended to consult the manual or contact the manufacturer for specific instructions.

Springtown Best Garage & Overhead Doors

205 Ave A, Springtown, TX 76082

817-373-5963

How to Attach Your Garage Door Seal – Springtown TX Garage Door

Attaching a garage door seal can be a straightforward process, but it requires careful attention to detail to ensure that the seal is properly installed and provides adequate protection against the elements.

Here are the steps to follow based from Garage Door Repair Springtown TX:

  1. Determine the type of garage door seal you need

There are different types of garage door seals available on the market, including bottom seals, threshold seals, and weatherstripping seals. Each type is designed to provide a specific level of protection against drafts, debris, and moisture. Before you start attaching the seal, make sure you have the right type for your garage door.

  1. Gather the necessary tools and materials

To attach the garage door seal, you will need the following tools and materials:

  • A measuring tape
  • A pencil or marker
  • Scissors or a utility knife
  • A drill or screwdriver
  • Screws or nails
  • A sealant (optional)
  1. Measure the garage door opening

Before you start attaching the seal, you need to measure the width and length of the garage door opening. Use a measuring tape to determine the dimensions of the opening and write down the measurements on a piece of paper. This will help you determine the length of the seal you need to attach.

  1. Cut the garage door seal to the appropriate length

Using the measurements you took in the previous step, cut the garage door seal to the appropriate length using scissors or a utility knife. Make sure the cut is straight and even.

  1. Position the seal on the bottom of the garage door

If you are attaching a bottom seal, position the seal on the bottom of the garage door, making sure it is centered and covers the entire width of the door. Use a pencil or marker to mark the position of the screw holes on the garage door.

  1. Attach the seal to the garage door

Using a drill or screwdriver, attach the seal to the garage door using screws or nails. Make sure the screws or nails are inserted straight and go all the way through the seal and into the garage door. If you are attaching a threshold seal, use sealant to attach it to the floor before attaching it to the garage door.

  1. Test the seal

Once the seal is attached, close the garage door and check to see if the seal is properly installed. There should be no gaps or spaces between the seal and the garage door. If there are gaps or spaces, you may need to adjust the position of the seal or add additional screws or nails.

  1. Maintain the seal

To ensure that the seal continues to provide adequate protection, it is important to maintain it regularly. Check the seal periodically for signs of wear and tear, and replace it if necessary.

In conclusion, as stated in Garage Door Repair Springtown TX, attaching a garage door seal can be a simple process if you follow these steps carefully. By choosing the right type of seal, measuring the garage door opening accurately, and attaching the seal properly, you can protect your garage from the elements and keep it safe and secure.

Springtown TX Garage Door

205 Ave A, Springtown, TX 76082

817-373-5963

Powered by WordPress & Theme by Anders Norén