Get your Home in Perfect Harmony

Tag: garage door repair Colleyville TX

Who Makes Craftsman Garage Door Openers – Colleyville Gates & Garage Doors

Garage Door Repair Colleyville TX are a popular choice among homeowners for their reliability and innovative features.

These openers are manufactured by several companies, with the Craftsman brand being owned and managed by Stanley Black & Decker.

Stanley Black & Decker is a well-known American manufacturer of tools, hardware, and security products. The company acquired the Craftsman brand from Sears Holdings Corporation in 2017. Sears had been the primary retailer of Craftsman products for many years, and the acquisition allowed Stanley Black & Decker to expand its portfolio and reach a broader market.

Craftsman garage door openers are designed to provide convenience, security, and durability for residential garages. The openers are produced in manufacturing facilities owned or contracted by Stanley Black & Decker. The specific location of production can vary, as the company operates multiple facilities globally to meet the demand for its various products.

The manufacturing process for Craftsman garage door openers involves precision engineering and quality control measures. The openers are assembled using a combination of automated machinery and skilled labor to ensure consistency and reliability. Stanley Black & Decker’s commitment to quality is reflected in the rigorous testing that each product undergoes before reaching the market.

Craftsman garage door openers come in various models, catering to different garage door sizes and types. They are equipped with features such as remote controls, safety sensors, and advanced security systems. The brand continuously updates its products to incorporate the latest technological advancements, enhancing the overall user experience.

In addition to manufacturing, Stanley Black & Decker is responsible for the distribution and marketing of Craftsman garage door openers. The company leverages its extensive network of retailers, including home improvement stores and online platforms, to make Craftsman products accessible to consumers.

Customer support and warranty services for Craftsman garage door openers are also managed by Stanley Black & Decker. This ensures that users can easily obtain assistance in case of any issues with their garage door opener and that the product is backed by a reliable warranty.

Craftsman’s reputation for quality and innovation has been built over many decades. The brand’s transition to Stanley Black & Decker has further strengthened its position in the market. Homeowners continue to choose Craftsman garage door openers for their performance, durability, and the assurance of a well-established brand.

In conclusion, Garage Door Repair Colleyville TX are manufactured by Stanley Black & Decker, a prominent American company in the tools and hardware industry. The acquisition of the Craftsman brand has allowed Stanley Black & Decker to uphold and enhance the legacy of Craftsman’s commitment to quality and innovation. Whether you’re looking for a basic garage door opener or a model with advanced features, Craftsman offers a range of options to meet the diverse needs of homeowners.

Colleyville Gates & Garage Doors

6508 Colleyville Blvd Colleyville, TX, 76034

817-755-6231

How To Remove A Roll Up Garage Door – Colleyville Gates & Garage Doors

Removing a roll-up Garage Door Repair Colleyville TX may seem like a daunting task, but with the right tools and a systematic approach, you can do it yourself.

Follow these detailed steps to ensure a smooth and safe removal process.

: Gather Your Tools and Safety Equipment

Before you begin, make sure you have the necessary tools and safety equipment. You’ll need a ladder, screwdrivers, pliers, locking pliers, adjustable wrenches, a pry bar, safety glasses, and work gloves. Safety first!

: Disconnect the Garage Door Opener

Start by disconnecting the power to the garage door opener. This may involve unplugging it from an electrical outlet or turning off the circuit breaker. If your opener is hardwired, you may need to disconnect the wiring.

: Release the Tension Springs

Tension springs are under significant pressure and need to be released before removing the door. Use winding bars to slowly release the tension by inserting them into the winding cone and turning in the direction that opens the coils. Exercise caution, as releasing too quickly can be dangerous.

: Detach the Rollers and Hinges

Use your pliers and screwdrivers to remove the rollers and hinges attached to the door. Start from the bottom and work your way up, keeping the door balanced. Locking pliers can help secure the door in place during this process.

: Remove Track Bolts and Tracks

Locate the track bolts securing the vertical tracks to the wall and remove them. Once the bolts are removed, carefully detach the tracks from the wall. Depending on the type of door, you may need to remove horizontal tracks as well.

: Disconnect the Door Panels

Most roll-up doors consist of individual panels connected by hinges. Remove the hinges to detach the door panels from each other. Enlist a helper to support the panels as you disconnect them.

: Take Down the Door Sections

With the panels disconnected, carefully lift each section of the door and set it aside. Work systematically to avoid damaging the sections or injuring yourself.

: Remove the Bottom Panel and Weather Stripping

Finally, remove the bottom panel and any remaining weather stripping. This step may require some additional unscrewing or prying.

By following these detailed steps, you can safely and efficiently remove a roll-up Garage Door Repair Colleyville TX. Always prioritize safety and, if in doubt, consult a professional for assistance.

Colleyville Gates & Garage Doors

817-755-6231

How To Fix Garage Door Spring – Colleyville Gates & Garage Doors

Fixing a Garage Door Repair Colleyville TX requires a careful approach to ensure safety and effective repair.

Here’s a detailed guide to help you through the process, step by step.

: Identify the Problem

Before you start fixing the garage door spring, identify the issue. Is the door not opening or closing properly? Do you notice any visible damage to the spring? Understanding the problem will help you determine the right course of action.

: Gather Necessary Tools and Materials

For this task, you’ll need a few essential tools and materials:

  • Safety glasses
  • Adjustable wrench
  • C-clamps
  • Vice grips
  • Ladder
  • Socket wrench set
  • Replacement garage door spring
  • Torsion bars (if dealing with torsion springs)

: Ensure Safety First

Safety should be your top priority. Wear safety glasses to protect your eyes. If you’re dealing with a torsion spring, use C-clamps to secure the door in the open position. This prevents the door from falling during the repair.

: Release Tension from the Spring

If you have a torsion spring, use a winding bar to unwind the tension. Insert the winding bar into one of the holes on the winding cone and turn it slowly until the tension is released. Keep a firm grip on the bar and make sure you are standing to the side of the door to avoid injury.

: Disconnect the Spring

Once the tension is released, use a socket wrench to loosen the set screws on the spring cone. Slide the spring off the bar carefully. If you have extension springs, you may need to disconnect them from the pulley system.

: Remove the Old Spring

Carefully remove the old spring from the door. If you’re dealing with extension springs, they may be attached to the track hanger. Detach them and slide the spring out.

: Install the New Spring

Attach the new spring to the door, following the manufacturer’s instructions. If you’re dealing with torsion springs, wind the tension back onto the spring using the winding bars. Make sure the spring is properly secured.

: Reconnect and Test

Reconnect the spring to the pulley system or track hanger, depending on the type of spring you have. Slowly release the door from the secured position and test its movement. Ensure that it opens and closes smoothly.

: Adjust as Needed

If the door doesn’t operate correctly, you may need to make minor adjustments. Use the winding bars to fine-tune the tension on torsion springs. For extension springs, adjust the cable length if necessary.

: Regular Maintenance

To prevent future issues, perform regular maintenance on your garage door. Lubricate moving parts, check for wear and tear, and address any issues promptly.

Remember, if you’re not comfortable or confident in your ability to fix the Garage Door Repair Colleyville TX, it’s advisable to seek professional help. Safety should always be your priority when working with garage door springs.

Colleyville Gates & Garage Doors

817-755-6231

How to Release a Stuck Garage Door Emergency Release Cord – Colleyville Gates & Garage Doors

As a homeowner, I’ve experienced my fair share of unexpected challenges around the house. One day, I encountered a situation that left me momentarily puzzled and frustrated—the garage door refused to open. It was a situation that demanded immediate attention, and the solution lay in a small but critical component: the emergency release cord.

In this article, I’ll share my experience and guide you through the process from Colleyville Gates & Garage Doors of releasing a stuck garage door emergency release cord step by step.

Understanding the Emergency Release Cord

Before diving into the steps to release a stuck garage door emergency release cord, it’s essential to understand the purpose of this mechanism. The emergency release cord is a safety feature designed to manually disengage the garage door opener from the door itself. In the event of a power outage or a malfunction of the opener, this cord allows you to open or close the garage door manually.

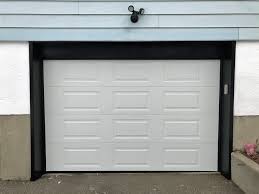
The emergency release cord is typically a red rope or handle hanging from the garage door opener track or carriage. Pulling this cord disconnects the opener from the door, allowing you to operate the door manually. However, when this cord becomes stuck, it can pose a frustrating challenge.

Step-by-Step Guide to Release a Stuck Garage Door Emergency Release Cord

1. Ensure Safety First:

Before attempting any repairs or adjustments, it’s essential to prioritize safety. Make sure the area around the garage door is clear of obstacles, and keep people and pets away from the door during the process.

2. Locate the Emergency Release Cord:

Identify the emergency release cord, which is typically a red rope or handle hanging from the garage door opener track or carriage. It may be positioned close to the door or higher up on the track, depending on the opener’s design.

3. Verify the Door’s Position:

Check whether the garage door is in the fully closed position. Attempting to release the emergency cord while the door is partially open or in an awkward position can be hazardous.

4. Disconnect the Opener:

To release the garage door opener from the door, firmly grip the emergency release cord and pull it down and toward the door. This action should disconnect the opener’s carriage or trolley from the door’s carriage or arm.

5. Test the Manual Operation:

Once you’ve pulled the emergency release cord, gently attempt to lift or lower the garage door by hand. It should move freely along the tracks without resistance. If you encounter difficulty or the door remains stuck, proceed to the next steps.

6. Inspect for Obstructions:

Check the tracks, rollers, and hinges for any obstructions or debris that may be impeding the door’s movement. Remove any visible debris, as this may resolve the issue.

7. Lubricate Moving Parts:

Apply a silicone-based lubricant to the rollers, hinges, and track to ensure smooth operation. Lubrication can often resolve minor issues causing the door to stick.

8. Check for Broken Springs:

Inspect the garage door springs for signs of damage or breakage. If you notice a broken spring, it’s crucial to refrain from attempting to operate the door manually, as it can be extremely dangerous. In such cases, seek professional assistance for spring replacement.

9. Examine the Emergency Release Mechanism:

Inspect the emergency release cord and its mechanism for any visible damage, such as fraying or disconnection. If you notice issues with the cord itself, it may need to be replaced.

10. Verify the Opener’s Functionality:

Once you’ve inspected the emergency release cord and addressed any potential obstructions or issues, reattach it to the opener’s carriage or trolley. You can do this by pulling the cord toward the opener and securing it in place.

11. Reconnect the Opener:

After ensuring that the emergency release cord is properly reattached, test the garage door opener by operating it using the remote control or wall-mounted button. The opener should now function as expected, allowing you to open and close the door automatically.

Common Reasons for a Stuck Emergency Release Cord

Understanding the underlying causes of a stuck emergency release cord can help you prevent similar issues in the future. Here are some common reasons why the emergency release cord may become stuck:

1. Rust or Corrosion:

Over time, the components of the emergency release mechanism, including the cord and the connecting parts, may become rusted or corroded. This can impede the smooth operation of the cord.

2. Misalignment:

Misalignment of the garage door or the opener’s carriage can cause the emergency release cord to become jammed. Ensuring proper alignment is crucial for smooth operation.

3. Obstructions:

Debris, dirt, or objects in the garage door tracks or along the path of the door can hinder the movement of the emergency release cord.

4. Cable or Spring Issues:

Issues with the garage door cables or springs can also affect the operation of the emergency release cord. Broken or damaged cables or springs may prevent the door from moving freely.

When to Seek Professional Assistance

While the steps outlined above can help you release a stuck garage door emergency release cord in many cases, there are situations where it’s best to seek professional assistance. Here are some scenarios where professional help is warranted:

1. Broken Springs:

If you suspect or confirm that the garage door springs are broken or damaged, it’s crucial to avoid any attempts at manual operation. Garage door spring replacement is a complex and hazardous task that should only be handled by experienced professionals.

2. Electrical Issues:

If the garage door opener is experiencing electrical or wiring problems, it’s advisable to have a qualified technician diagnose and repair the issue. Tampering with electrical components without the necessary expertise can be dangerous.

3. Persistent Stuck Door:

If you’ve followed the steps to release the emergency cord, addressed potential obstructions, and the door remains stuck or difficult to operate manually, it’s time to call a professional. There may be underlying issues with the door’s mechanics that require expert assessment and repair.

4. Safety Concerns:

If at any point you feel unsure or unsafe during the process of releasing the emergency cord or troubleshooting the door, do not hesitate to seek professional help. Safety should always be the top priority.

Conclusion: A Handy Skill for Homeowners

Overall, as stated in Colleyville Gates & Garage Doors, releasing a stuck garage door emergency release cord is a valuable skill for homeowners to have in their repertoire. With the right knowledge and a step-by-step approach, you can address common issues and restore the functionality of your garage door. However, it’s essential to exercise caution, prioritize safety, and seek professional assistance when needed, especially when dealing with complex mechanical or electrical problems. By understanding the operation of your garage door and the emergency release mechanism, you can ensure that your garage remains a convenient and secure part of your home.

Colleyville Gates & Garage Doors

6508 Colleyville Blvd, Colleyville, TX 76034, United States

817-755-6231

How to Open a Garage Door Manually From the Outside – Colleyville Gates & Garage Doors


Opening a garage door manually from the outside can be essential in situations where the power is out or the automatic opener is malfunctioning. This guide will provide you with detailed instructions on how to manually open different types of garage doors safely. It’s crucial to follow these steps carefully to avoid injury and ensure the door is operated correctly.

Before You Begin:

  1. Ensure that there are no obstructions in the garage door’s path, as manually opening it requires physical effort.
  2. Make sure all family members and pets are at a safe distance from the door.
  3. Locate the emergency release mechanism on your garage door. This is typically a red handle or cord hanging from the door’s trolley or opener carriage.

1. Identify Your Garage Door Type: Different types of garage doors have varying methods for manual operation. The most common types are:

A. Sectional Garage Door: These are the most prevalent type of garage doors, consisting of horizontal panels that roll up along tracks. To manually open a sectional garage door:

  1. Locate the emergency release handle, usually a red cord, hanging from the trolley carriage.
  2. Pull the release handle down firmly and towards the garage door. This will disengage the door from the automatic opener’s drive mechanism.

B. Up-and-Over Garage Door: These doors swing outward and then upward to open. To manually open an up-and-over garage door:

  1. Find the emergency release handle, which is typically a red cord, hanging from the center track or the release mechanism at the top of the door.
  2. Pull the release handle down firmly, ensuring it clicks into the open position.
  3. Lift the door from the bottom edge while standing inside the garage. Be cautious, as these doors can be heavy.

C. Roll-Up Garage Door: Roll-up garage doors consist of horizontal slats that roll up into a coil above the door opening. To manually open a roll-up garage door:

  1. Locate the emergency release handle, usually a red cord, near the top of the door or on the side.
  2. Pull the release handle down firmly and towards the door. This should disconnect the door from the motor.

2. Manually Lift the Garage Door: After disengaging the door from the opener, you can manually lift it. Keep in mind that garage doors can be heavy, so use proper lifting techniques to avoid injury:

  1. Stand facing the door, with your feet shoulder-width apart and knees slightly bent.
  2. Grasp the bottom of the door with both hands, placing your hands near the center of the door’s bottom edge.
  3. Lift the door slowly and steadily, using your legs and not just your back. Keep a straight back and use your leg muscles for power.
  4. Continue lifting until the door is fully open or at the desired height. Some garage doors have a lock or latch to hold them in place.

3. Securing the Garage Door: Once the garage door is manually open, it’s essential to secure it properly to prevent it from accidentally closing:

  • If your garage door has a locking mechanism, engage it to keep the door in place.
  • If there’s no lock, you can use C-clamps or vice grips on the tracks to prevent the door from rolling down.

4. Reconnecting the Garage Door Opener: When power is restored or you’ve fixed the issue with the automatic opener, you’ll need to reconnect the door to the opener:

  1. Ensure the garage door is fully open.
  2. Find the emergency release handle you pulled earlier.
  3. Push it back up towards the opener until it clicks back into place. This reengages the door with the automatic opener.

5. Testing the Automatic Opener: After reconnecting the door, it’s essential to test the automatic opener to ensure it’s functioning correctly:

  1. Press the garage door opener remote or wall-mounted button.
  2. Observe the door’s movement. It should open or close smoothly.
  3. If there are any issues, consult your garage door opener’s manual or consider calling a professional for repairs.

Safety Tips:

  • Always exercise caution when manually opening a garage door, especially if it’s heavy. Use proper lifting techniques to avoid straining your back.
  • Keep children and pets away from the garage door while operating it manually.
  • If you’re unsure about the process or encounter any difficulties, consult your garage door’s manufacturer manual or contact a professional technician for assistance.
  • Regular maintenance of your Garage Door Repair Colleyville TX and opener can help prevent the need for manual operation. Lubricate moving parts, inspect for wear and tear, and test the emergency release periodically.

In conclusion, manually opening a Garage Door Repair Colleyville TX from the outside requires identifying the type of door you have, locating the emergency release mechanism, and following the proper steps to safely lift and secure the door. Always prioritize safety and seek professional help if you’re unsure or encounter issues.

Colleyville Gates & Garage Doors

6508 Colleyville Blvd, Colleyville, TX 76034, United States

1-817-755-6231

How To Install A Chamberlain Smart Garage Door Opener – Colleyville Gates & Garage Doors

Installing a Chamberlain smart Garage Door Repair Colleyville TX opener involves careful preparation, following instructions, and ensuring safety. Chamberlain offers various smart garage door opener models, so it’s essential to read and follow the specific instructions provided in your model’s manual.

Here’s a general guide on how to install a Chamberlain smart garage door opener:

Step 1: Gather Your Materials and Tools

Before you start the installation process, gather all the necessary materials and tools:

Materials:

  • Chamberlain smart garage door opener kit
  • Mounting hardware
  • Safety sensors
  • Wall control panel
  • Remote control (if included)
  • Wi-Fi connection information

Tools:

  • Screwdriver set
  • Wrenches
  • Power drill
  • Level
  • Ladder
  • Safety glasses
  • Pliers
  • Wire stripper

Step 2: Read the Manual

Carefully read the user manual that comes with your Chamberlain smart garage door opener. This manual contains specific instructions and diagrams for your model, including safety precautions, wiring diagrams, and step-by-step installation procedures.

Step 3: Prepare Your Garage Door

  1. Disconnect Power: Before beginning any installation steps, disconnect power to your existing garage door opener to ensure your safety.
  2. Check Compatibility: Verify that your garage door is compatible with the Chamberlain smart opener. Ensure your door is in good condition and functioning correctly.

Step 4: Install the Ceiling Bracket and Opener Unit

  1. Attach the Ceiling Bracket: Follow the manual’s instructions to attach the ceiling bracket securely to the ceiling or rafters.
  2. Install the Opener Unit: Hang the opener unit from the ceiling bracket, making sure it’s level. Attach the opener securely to the bracket using the provided hardware.

Step 5: Install the Rail and Trolley Assembly

  1. Assemble the Rail: Assemble the rail sections according to the manual. Slide the trolley onto the rail and attach it to the opener unit.
  2. Secure the Rail: Follow the instructions to secure the rail to the ceiling bracket and ensure proper alignment.

Step 6: Install Safety Sensors

  1. Attach Safety Sensors: Install the safety sensors on either side of the garage door, near the floor. These sensors ensure that the door doesn’t close if an object is obstructing the path.
  2. Align Sensors: Make sure the sensors are aligned properly and facing each other. The indicator lights on the sensors should be steady and not blinking.

Step 7: Connect Wiring

  1. Connect Power: Connect the power cord of the opener unit to a power outlet. Follow the manual for proper wiring instructions.
  2. Connect Safety Sensor Wires: Connect the safety sensor wires according to the manual. Typically, this involves connecting the wires to the opener unit’s terminals.
  3. Connect Wall Control Panel: Attach the wall control panel to the wall near the garage entry door. Connect the wires according to the instructions.

Step 8: Set Up the Smart Features

  1. Download the App: Download the Chamberlain MyQ app on your smartphone or tablet. This app allows you to control and monitor your garage door remotely.
  2. Create an Account: Create an account within the MyQ app. This account will link your garage door opener to your smartphone.
  3. Connect to Wi-Fi: Follow the app’s instructions to connect the opener to your home Wi-Fi network. This step is necessary for remote control and monitoring.

Step 9: Program the Opener and Remote Control

  1. Program the Opener: Follow the manual to program the opener to recognize your specific garage door and its movement.
  2. Program the Remote Control: If your Chamberlain smart garage door opener comes with a remote control, follow the instructions to program it to work with the opener.

Step 10: Test and Calibrate

  1. Test Operation: Test the opener’s operation by opening and closing the door a few times. Observe the safety sensors and make sure they’re functioning properly.
  2. Calibrate Limits: Follow the manual’s instructions to calibrate the open and close limits of the garage door to ensure accurate positioning.

Step 11: Install Smart Accessories (if applicable)

  1. Install Accessories: If you have additional smart accessories, such as smart lighting or smart locks, follow the manufacturer’s instructions to install and set them up.

Step 12: Safety Check and Final Steps

  1. Check All Fastenings: Double-check that all nuts, bolts, and screws are tightened securely.
  2. Safety Reversal Test: Perform a safety reversal test by placing a 2×4 board on the floor in the path of the closing door. The door should reverse when it touches the board.
  3. Final Adjustment: Make any necessary adjustments to the force settings and travel limits for optimal performance.

Step 13: Enjoy Smart Control

Now that your Chamberlain smart garage door opener is successfully installed, you can enjoy the convenience of remote control, monitoring, and automation through the MyQ app. Make sure to periodically perform maintenance and check for updates to ensure your opener’s continued functionality.

Remember, this guide provides a general overview of the installation process. Always follow the specific instructions provided in your Chamberlain smart Garage Door Repair Colleyville TX opener’s manual for accurate installation and safety procedures. If you’re unsure about any step, it’s best to seek professional assistance.

Colleyville Gates & Garage Doors

6508 Colleyville Blvd, Colleyville, TX 76034, United States

1-817-755-6231

The Pros and Cons of Fiberglass Garage Doors: Lightweight and Low Maintenance – Colleyville Gates & Garage Doors

As a homeowner with a keen eye for functionality and style, the selection of a garage door is a decision that holds immense significance. The quest for a harmonious balance between durability, visual appeal, and ease of maintenance led me to a material that intrigued me—fiberglass. Driven by a curiosity to uncover the intricacies of this option, I embarked on an exploration of fiberglass garage doors, guided by the insights of industry professionals.

Here are the pros and cons of fiberglass garage doors based from Garage Door Repair, unraveling their lightweight composition, low-maintenance qualities, and the various factors that contribute to this intriguing choice.

1. Embracing the Lightness: The Advantage of Weight

My journey into the realm of fiberglass garage doors began with a revelation—their lightweight nature. Experts were quick to illuminate the significance of this trait. The inherent lightness of fiberglass not only simplifies the installation process but also reduces the strain on the garage door opener’s mechanisms. This newfound knowledge sparked the realization that a lightweight door could potentially translate into a smoother, more efficient operation—enhancing the overall functionality of my garage door.

2. The Allure of Low Maintenance: A Time-Saver

The promise of low maintenance was another intriguing aspect that captured my attention. The material’s resistance to rust, corrosion, and the elements assures that these doors can retain their pristine appearance with minimal effort. Unlike traditional wooden doors that demand regular staining or painting to retain their beauty, fiberglass doors offer a refreshing alternative—periodic cleaning is all that’s needed to preserve their aesthetic charm.

3. Weather Resilience: A Shield Against the Elements

Fiberglass garage doors, I learned, possess a remarkable ability to withstand diverse weather conditions. Their resistance to moisture and fluctuations in temperature makes them a dependable choice, particularly for regions prone to extreme weather patterns. Unlike wooden doors that may succumb to warping or swelling, fiberglass doors stand strong—maintaining their structural integrity and ensuring the longevity of both appearance and function.

4. Design Versatility: A Playground for Creativity

One of the most captivating facets of fiberglass garage doors is their design versatility. The material can be artfully molded and textured to replicate the look of natural wood, offering homeowners the timeless appeal of traditional aesthetics without the labor-intensive maintenance. This design flexibility presents an open canvas of possibilities, allowing homeowners like me to achieve our desired visual impact.

5. Energy Efficiency: The Unsung Advantage

As my exploration deepened, experts shared an intriguing revelation—fiberglass garage doors contribute to energy efficiency. The insulation properties inherent in fiberglass help regulate indoor temperatures, potentially leading to reduced energy consumption over time. This added benefit painted a holistic picture of the advantages that fiberglass doors offer.

6. Authenticity versus Aesthetics: Aesthetic Dilemmas

Yet, it’s essential to acknowledge that while fiberglass can mimic the appearance of wood, some homeowners may prioritize the authenticity and warmth of natural wood textures. While the design adaptability of fiberglass is impressive, those who hold a deep affinity for the genuine character of wood might opt for traditional wooden garage doors.

7. The Initial Investment: Balancing Cost and Long-Term Value

A pragmatic consideration that surfaced was the initial cost of fiberglass garage doors. While they bring a range of benefits, including low maintenance and versatile design, they may come with a slightly higher upfront investment compared to certain alternatives. However, experts were quick to emphasize the long-term value that fiberglass doors deliver, thanks to their durability and resistance to wear and tear.

8. Vulnerability to Impact: A Note of Caution

It’s vital to acknowledge that while fiberglass is sturdy, it may be susceptible to impacts. Unlike steel or aluminum doors that boast superior impact resistance, fiberglass doors may incur damage from substantial impacts. This aspect urged me to weigh the potential risks based on my specific circumstances.

9. The Eco Perspective: A Consideration for the Environment

As I immersed myself in the world of fiberglass, an environmental angle emerged. While the durability and low maintenance of fiberglass contribute to an extended lifecycle, some homeowners may ponder the production process and its ecological implications. Balancing the benefits against potential environmental concerns added an extra layer of consideration.

10. Making an Informed Choice: The Final Decision

In conclusion, by following Garage Door Repair and based on my journey through the realm of fiberglass garage doors has illuminated a material brimming with advantages, yet not devoid of considerations. The lightweight design, low maintenance, weather resistance, and design versatility position fiberglass as an attractive choice for homeowners seeking a harmonious fusion of form and function. While authenticity, initial investment, impact vulnerability, and environmental factors warrant attention, the ultimate decision rests on aligning the choice with individual preferences, lifestyle, and priorities. By seeking guidance from experts and evaluating the comprehensive picture, homeowners like me can make an informed decision that transforms their garage entrance into an elegant blend of practicality and aesthetics—a genuine representation of our distinct style and values. As I reflect on this voyage, I’m reminded that the choice between fiberglass and other materials is a personal one—a choice that resonates deeply with the symphony of our unique aspirations for our home sanctuary.

Colleyville Gates & Garage Doors

6508 Colleyville Blvd, Colleyville, TX 76034, United States

817-755-6231

A Plus Garage Doors-Colleyville Garage Door and GatesA Plus Garage Doors-

A Plus Garage Doors: Providing High-Quality Garage Door Repair Colleyville TX Services for Your Home

Your garage is one of the most important parts of your home. It not only protects your vehicles and other belongings, but it also serves as an additional entryway to your home. As such, it’s crucial to ensure that your garage door is functioning properly and is in good condition. This is where A Plus Garage Doors comes in.

A Plus Garage Doors is a company that provides high-quality garage door services for residential and commercial properties. The company has been in the industry for years, and their experience and expertise make them one of the best garage door service providers in the market.

The company offers a wide range of services that cater to different garage door needs. They offer garage door repair services for damaged doors, broken springs, malfunctioning openers, and other garage door problems. Their team of skilled technicians uses the latest tools and equipment to ensure that the repair work is done efficiently and effectively.

Aside from repair services, A Plus Garage Doors also offers garage door installation services. They have a wide range of garage doors to choose from, including traditional, contemporary, and custom designs. Their team of experts can help you choose the perfect door that fits your home’s style and functionality needs.

If you need a new garage door opener, A Plus Garage Doors can also provide you with one. They offer a range of garage door openers, including belt drive, chain drive, and screw drive openers. These openers are made by top manufacturers and are designed to provide smooth and reliable operation for your garage door.

A Plus Garage Doors also offers garage door maintenance services. Regular maintenance is essential to keep your garage door in good condition and prevent any potential problems from occurring. The company’s maintenance services include lubrication, alignment, inspection, and other tasks that ensure that your garage door is functioning properly.

One of the best things about A Plus Garage Doors is their commitment to customer satisfaction. The company strives to provide excellent service to their customers, and they make sure to address any concerns or questions that their clients may have. They also offer competitive pricing, ensuring that their services are affordable and accessible to everyone.

In addition to their garage door services, A Plus Garage Doors also offers gate installation and repair services. They can install and repair automatic gates, manual gates, and gate openers. Their team of experts can help you choose the perfect gate that complements your home’s style and provides added security.

Overall, A Plus Garage Door Repair Colleyville TX is an excellent choice for anyone who needs garage door services. Their team of experts, quality services, and commitment to customer satisfaction make them one of the best garage door service providers in the market. Whether you need garage door repair, installation, maintenance, or gate services, A Plus Garage Doors has got you covered.

Colleyville Garage Door and Gates

Colleyville Doors and Gates
102 Williamsburg Ct Suit 1C
Colleyville, TX 76034

817-904-4816

How to Wire a Garage Door Opener – Colleyville Door and Gates

Wiring a Garage Door Repair Colleyville TX opener involves several steps, but with proper instructions, it can be a relatively straightforward process.

Here are the steps to follow when wiring a Garage Door Repair Colleyville TX opener:

  1. Determine the Type of Garage Door Opener: Garage door openers come in two types: chain drive and belt drive. The wiring for each type is different, so you need to determine which type you have. Chain drive openers use a metal chain to move the door, while belt drive openers use a rubber belt.
  2. Turn off Power: Before starting the wiring process, turn off power to the garage door opener. You can do this by unplugging it or turning off the circuit breaker that powers the opener.
  3. Check the Safety Reversal System: Most garage door openers come with a safety reversal system. This system ensures that the door stops and reverses direction if it encounters an obstacle. Check that the system is functioning properly before proceeding with the wiring.
  4. Locate the Electrical Outlet: Most garage door openers require an electrical outlet to power the unit. Locate the nearest electrical outlet and ensure that it is in good condition.
  5. Connect the Power Cord: Most garage door openers come with a power cord that needs to be connected to the electrical outlet. Connect the power cord to the outlet and the opener, making sure that the connections are secure.
  6. Connect the Control Wires: Garage door openers come with a set of control wires that connect the opener to the wall-mounted control switch. Connect these wires according to the instructions that came with the opener.
  7. Connect the Safety Sensor Wires: Garage door openers come with safety sensors that prevent the door from closing if an object is in the way. Connect the safety sensor wires according to the instructions that came with the opener.
  8. Install the Wall-Mounted Control Switch: The wall-mounted control switch is usually installed near the entrance to the garage. Drill a hole in the wall and install the switch according to the instructions that came with the opener.
  9. Test the Opener: Once you have completed the wiring, turn on the power to the garage door opener and test it to ensure that it is functioning properly. Test the safety reversal system by placing an object in the path of the door and checking that it stops and reverses direction.
  10. Mount the Garage Door Opener: Mount the garage door opener according to the instructions that came with the opener. This typically involves mounting the unit to the ceiling of the garage and attaching the chain or belt to the garage door.
  11. Adjust the Opener: After mounting the garage door opener, adjust the settings according to the instructions that came with the opener. This typically involves adjusting the limit switches that control the open and close positions of the door.

In conclusion, wiring a garage door opener is a fairly straightforward process that requires some basic electrical knowledge. If you are unsure about any step in the process, consult the instructions that came with the opener or seek the assistance of a professional electrician. With proper installation and maintenance, a garage door opener can provide years of trouble-free operation.

Colleyville Door and Gates

817-904-4816

Powered by WordPress & Theme by Anders Norén