Get your Home in Perfect Harmony

Tag: garage door repair Southlake TX

When Is It Time To Replace Garage Door – Southlake Garage Door & Gate Repair

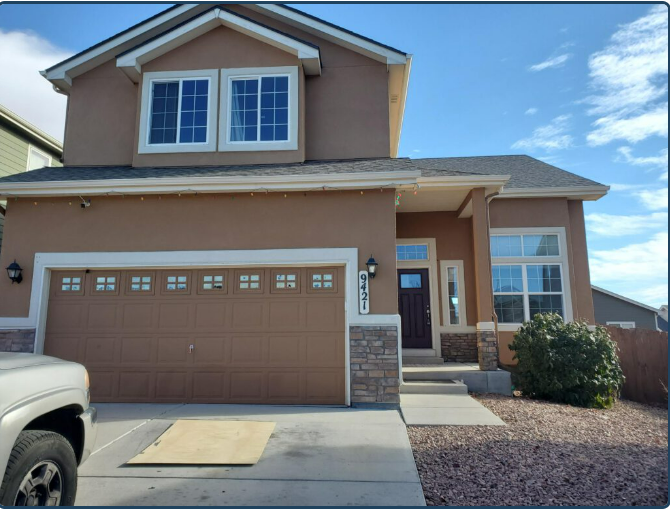
Your Southlake Garage Door Repair is a crucial component of your home, serving both functional and aesthetic purposes. Over time, wear and tear can take a toll on its performance, prompting the need for replacement. Here are several key indicators that it might be time to consider replacing your garage door.

1. Age of the Door:

Like any other mechanical system, garage doors have a finite lifespan. If your door is approaching or has exceeded its expected lifespan, it’s wise to start considering a replacement. Most garage doors can last around 15 to 30 years, depending on the material and maintenance.
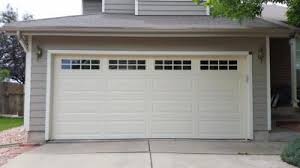
2. Visible Damage:

Inspect your garage door regularly for visible signs of damage. This includes dents, cracks, warping, or rust. Small dings may be repairable, but extensive damage can compromise the structural integrity of the door, making replacement necessary.

3. Difficulty in Operation:

A well-functioning garage door should open and close smoothly without any hitches. If you notice jerky movements, strange noises, or if the door doesn’t open or close evenly, there might be an issue with the mechanisms. In some cases, repairs may suffice, but if problems persist, replacement may be more cost-effective in the long run.

4. High Energy Bills:

Older garage doors may lack proper insulation, leading to energy loss. If you notice a significant increase in your heating or cooling bills and your garage is attached to your home, it might be worth investing in a new, energy-efficient garage door.
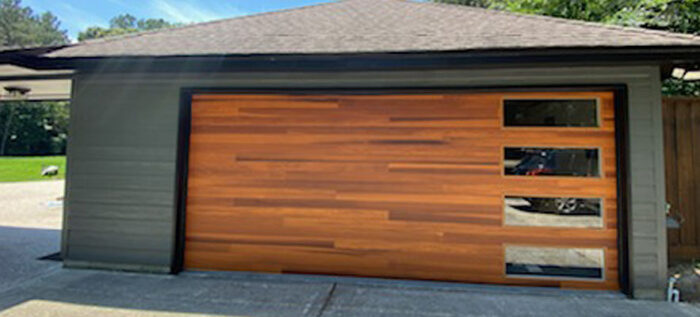
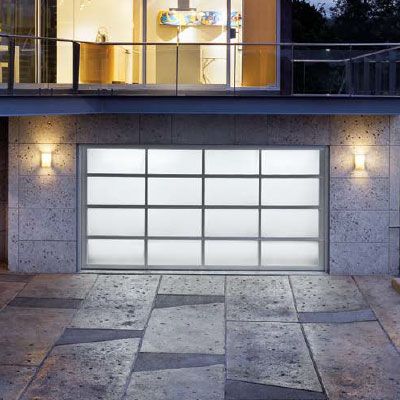
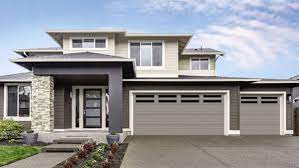
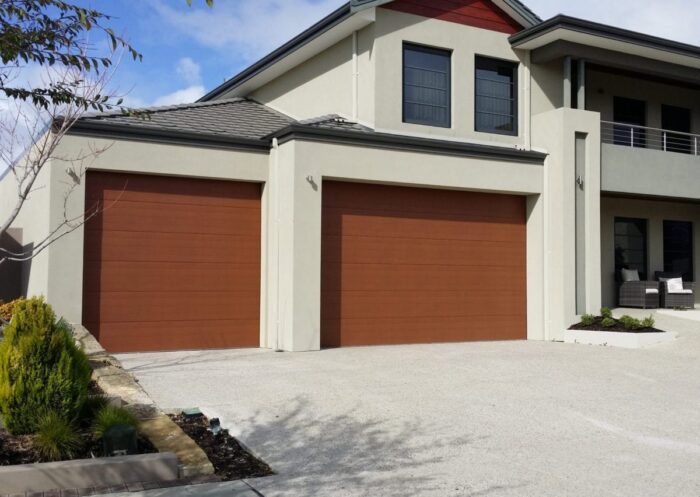
5. Outdated Design:

Aesthetics matter, and an outdated garage door can negatively impact your home’s curb appeal. If your door looks worn, faded, or no longer complements the overall style of your home, replacing it can enhance the visual appeal and increase your property’s value.

6. Safety Concerns:

Garage doors are equipped with safety features to prevent accidents. If your door lacks the latest safety features, such as photoelectric sensors or an auto-reverse mechanism, it’s time to upgrade to a safer model.

7. Frequent Repairs:

If you find yourself constantly repairing your garage door, it might be more cost-effective to invest in a new one. Frequent breakdowns indicate that the door is reaching the end of its useful life, and the cumulative cost of repairs can often surpass the cost of replacement.

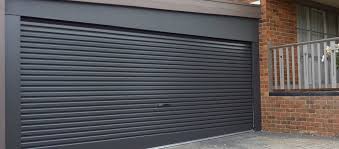
8. Technology Advancements:

Modern garage doors come with advanced features such as smart technology integration, improved security features, and convenient remote control options. If your current door lacks these modern conveniences, upgrading to a newer model can enhance the functionality and security of your garage.

9. Security Concerns:

If your garage door doesn’t provide adequate security, it’s time for an upgrade. Older models may lack the robust security features present in newer doors, putting your belongings and home at risk.

10. Changes in Lifestyle:

If your family’s needs have changed, such as acquiring larger vehicles or needing more storage space, it might be time to consider a new garage door that better suits your current lifestyle.

In conclusion, the decision to replace your Southlake Garage Door Repair depends on a combination of factors, including its age, condition, functionality, and your specific needs. Regular maintenance can extend the life of your garage door, but when signs of wear and inefficiency become apparent, investing in a new door becomes a wise choice for both practical and aesthetic reasons.

Southlake Garage Door & Gate Repairs

817-587-0445

How To Replace Garage Door – Southlake Garage Door & Gate Repairs

Replacing a Garage Door Repair Southlake TX may seem like a daunting task, but with the right tools, materials, and a clear plan, it can be a manageable DIY project.

A new garage door can enhance your home’s curb appeal, improve security, and increase energy efficiency. In this comprehensive guide, we’ll walk you through the process of replacing your garage door step by step.

: Gather Your Tools and Materials

Before you begin, make sure you have all the necessary tools and materials:

  • New garage door and hardware kit
  • Tape measure
  • Level
  • Screwdriver
  • Wrench
  • Sawhorses
  • Safety glasses
  • Hammer
  • Nails and screws
  • Drill with masonry bit (if attaching to a masonry wall)

: Measure and Prepare

Measure your existing garage door carefully to ensure you purchase the correct size replacement. Take measurements of the width, height, and thickness. Additionally, measure the space between the door opening and the ceiling.

: Remove the Old Door

To remove the old garage door, follow these steps:

  1. Disconnect the garage door opener from the power source.
  2. Release the tension on the garage door springs using a wrench.
  3. Remove the brackets and hardware securing the door to the tracks.
  4. Carefully lift the door off the tracks with the help of a friend.

: Prepare the Opening

Inspect the opening for any damage or rot. Repair any issues before proceeding. Next, clean the area to ensure a smooth installation. Install weatherstripping along the bottom of the opening to prevent drafts and moisture infiltration.

: Install the Tracks and Hardware

Follow the manufacturer’s instructions to install the vertical and horizontal tracks. Make sure they are level and secure them with screws. Attach the hinges to the door panels, following the manufacturer’s guidelines. Then, attach the rollers to the hinges.

: Hang the Door Panels

With the help of a friend, carefully lift the door panels into place one at a time. Secure them to the tracks and each other using the provided hardware. Ensure that the panels are level and plumb as you go.

: Install the Springs

Follow the manufacturer’s instructions to install the torsion springs or extension springs, depending on your door type. Be extremely cautious when working with springs, as they are under high tension and can be dangerous if mishandled.

: Attach the Cables and Pulleys

Attach the lifting cables to the bottom of the door and thread them through the pulleys. Connect the cables to the bottom bracket and secure them tightly.

: Install the Garage Door Opener

If you’re installing a new garage door opener, follow the manufacturer’s instructions carefully. Ensure that the opener is securely fastened to the ceiling and that the drive system is properly connected to the door.

: Test and Adjust

Test the garage door to ensure it opens and closes smoothly. Make any necessary adjustments to the springs, cables, and tracks to ensure proper operation. Lubricate all moving parts as recommended by the manufacturer.

: Final Touches

Seal any gaps around the door with weatherstripping to improve insulation and weatherproofing. Paint or stain the door if necessary to match your home’s aesthetics.

: Safety First

Remember that garage doors can be heavy and pose safety risks. Always follow safety guidelines and consider consulting a professional if you’re unsure about any aspect of the installation.

Conclusion:

Replacing a Garage Door Repair Southlake TX can be a rewarding DIY project that enhances your home’s appearance and functionality. By carefully following these steps and adhering to safety precautions, you can successfully replace your garage door and enjoy the benefits of a fresh, secure, and energy-efficient entrance to your home.

Southlake Garage Door & Gate Repairs

817-587-0445

Can Sunlight Interfere With Garage Door Sensors – Southlake Garage Door & Gate Repairs

Sunlight can interfere with the proper functioning of Southlake Garage Door & Gate Repairs sensors, particularly the safety sensors that are designed to prevent the door from closing if an obstruction is detected in its path. Garage door safety sensors play a crucial role in preventing accidents and ensuring the safe operation of the door. However, various external factors, including sunlight, can affect their performance.

Here’s how sunlight can interfere with garage door sensors and what you can do to address the issue:

1. Sunlight Glare and Reflections:

Sunlight can create glare and reflections that affect the sensors’ ability to communicate with each other. Safety sensors typically consist of a transmitter and a receiver, and they work by sending an invisible beam of light between them. If sunlight hits the sensors at a certain angle, it can cause the sensors to interpret the light beam as being interrupted, even if there’s no obstruction in the path.

2. False Positives:

Interference from sunlight can lead to false positives, where the sensors wrongly detect an obstruction and prevent the garage door from closing. This can be frustrating and might require manual intervention to override the safety system.

3. Reduced Sensitivity:

Sunlight interference can reduce the sensitivity of the sensors. If the sensors are not detecting obstructions as effectively as they should, it compromises the overall safety of the garage door system.

4. How to Address Sunlight Interference:

Here are some steps you can take to address sunlight interference with garage door sensors:

  • Adjust Sensor Alignment: Ensure that the sensors are properly aligned. If they are misaligned, they might be more susceptible to sunlight interference. Check the manufacturer’s guidelines for the correct alignment procedure.
  • Use Sun Shields: Some garage door sensor kits include sun shields or hoods that can be attached to the sensors. These shields can help block direct sunlight and reduce glare and reflections that might affect sensor performance.
  • Tinted Covers: Consider using tinted or shaded covers for the sensors to reduce the impact of direct sunlight.
  • Clean Sensors: Keep the sensors clean from dirt, dust, and debris. Dirty sensors might be more prone to sunlight interference.
  • Reposition Sensors: If possible, consider repositioning the sensors to minimize their exposure to direct sunlight. However, this should be done while still maintaining proper alignment.
  • Install Awnings: Installing awnings or shades above the sensors can help block sunlight and protect them from glare and reflections.

5. LED Lighting Interference:

It’s worth mentioning that some LED lighting systems can also emit light in a frequency that interferes with the operation of garage door sensors. If you’ve recently installed LED lights near your garage door, they might be contributing to the interference issue. In such cases, using different LED bulbs or adjusting the positioning of the lights might help.

6. Consult a Professional:

If you’ve tried the above steps and are still experiencing interference issues with your garage door sensors, consider consulting a professional garage door technician. They have experience dealing with sensor-related problems and can provide expert solutions.

Conclusion:

Sunlight interference can indeed affect the performance of Southlake Garage Door & Gate Repairs safety sensors, leading to false positives and compromised safety. Taking preventive measures, such as adjusting alignment, using sun shields, and keeping the sensors clean, can help mitigate the impact of sunlight. If you’re unable to resolve the issue on your own, seeking assistance from a professional technician is a recommended course of action to ensure the safe and reliable operation of your garage door system.

Southlake Garage Door & Gate Repairs

2106 E State Hwy 114 #105, Southlake, TX 76092, United States

1-817-587-0445

Do Garage Door Insulation Kits Work-Southlake Automatic Gates LLC

Garage Door Repair Southlake TX insulation kits have gained popularity in recent years as homeowners seek to improve energy efficiency and comfort in their homes. These kits typically consist of insulation materials and installation instructions, promising to reduce heat transfer, lower energy costs, and provide a more comfortable environment in the garage.

However, to determine whether garage door insulation kits work as intended, it is essential to examine their effectiveness through a comprehensive review. This article aims to analyze the benefits, drawbacks, and overall effectiveness of garage door insulation kits.

  1. Understanding Garage Door Insulation Kits: Garage door insulation kits are designed to provide an additional layer of insulation to the garage door, which is often a significant source of energy loss in homes. These kits commonly include insulation panels made of materials such as polystyrene or polyurethane, adhesive or tape for installation, and sometimes additional accessories like weatherstripping. The insulation panels are typically placed on the inner side of the garage door, creating a barrier against outside temperature fluctuations.
  2. Benefits of Garage Door Insulation Kits: Temperature Regulation: One of the primary advantages of garage door insulation kits is their ability to regulate temperature. By reducing heat transfer, they help maintain a more stable temperature inside the garage, preventing extreme heat or cold from affecting the surrounding areas of the home. This can lead to increased comfort and reduced energy consumption.

1. Energy Efficiency: Insulated garage doors can contribute to energy efficiency by reducing heat loss during the winter and heat gain during the summer. By minimizing the temperature differential between the garage and the outside environment, less energy is required to heat or cool the garage space, potentially resulting in lower energy bills.

2.Noise Reduction: Another benefit of garage door insulation kits is their ability to dampen noise. Insulation materials can absorb sound vibrations, reducing the amount of noise that escapes from the garage. This can be particularly beneficial if the garage is used as a workshop or if noisy equipment, such as lawnmowers or power tools, is stored inside.

  1. Drawbacks and Limitations: Installation Challenges: While garage door insulation kits are designed for easy installation, some individuals may find the process challenging or time-consuming. Improper installation could result in reduced effectiveness or even damage to the garage door.

1. Compatibility Issues: Garage door insulation kits may not be suitable for all types of garage doors. It is important to ensure that the kit is compatible with the specific door model and dimensions before purchasing. Additionally, certain door designs, such as those with windows or decorative elements, may limit the effectiveness of insulation.

2. Limited Insulation Value: Although garage door insulation kits provide an extra layer of insulation, their effectiveness may vary depending on the overall insulation level of the garage. If the walls, ceiling, or floor of the garage are poorly insulated, the impact of the door insulation kit alone may be limited.

  1. Overall Effectiveness: Garage door insulation kits can be effective in improving energy efficiency, temperature regulation, and noise reduction in the garage. However, their effectiveness is contingent upon proper installation, compatibility with the garage door, and the overall insulation condition of the garage. To maximize the benefits, it is advisable to consider comprehensive insulation solutions for the entire garage, including walls, ceiling, and door.

Conclusion:

Garage Door Repair Southlake TX insulation kits offer several benefits, including improved temperature regulation, energy efficiency, and noise reduction. While they may have limitations and require careful installation, they can contribute to a more comfortable and energy-efficient garage space. To achieve optimal results, it is recommended to evaluate the insulation needs of the entire garage and consider complementary insulation measures. By doing so, homeowners can make informed decisions regarding the use of garage door insulation kits and enjoy the advantages they provide.

Southlake Automatic Gates LLC

100 N Carroll Ave, Southlake, TX 76092, United States

1-817-631-4158

How To Respool Garage Door Cable-Southlake Best Garage & Overhead Doors

Respooling a Garage Door Repair Southlake TX cable is a task that requires caution and attention to detail. It is important to follow the correct procedure to ensure the safety and functionality of your garage door.

Here is a step-by-step guide on how to respool a garage door cable:

  1. Safety First:
    • Before starting any work, make sure to disconnect the power to the garage door opener to prevent any accidents.
    • Wear safety goggles and gloves to protect your eyes and hands.
  2. Prepare the Tools:
    • Gather the necessary tools for the job, including a winding bar, pliers, wrenches, and a new cable if needed.
    • Ensure that you have enough space in the garage to move around comfortably and access all parts of the door mechanism.
  3. Release Tension:
    • Locate the tension adjustment mechanism on the garage door opener. It is usually a set of screws or an adjustment plate.
    • Use a wrench or pliers to loosen the tension on the cable. This will reduce the risk of injury while respooling.
  4. Remove the Old Cable:
    • Carefully remove the existing cable from the drum and the bottom bracket of the garage door.
    • Take note of the cable’s path as you remove it, as this will help you install the new cable correctly.
  5. Inspect the Drum and Pulleys:
    • Inspect the drum and pulleys for any signs of wear or damage. Replace them if necessary to ensure smooth operation.
  6. Install the New Cable:
    • Begin by securing the new cable to the bottom bracket of the garage door. Follow the same path as the old cable.
    • Wind the cable onto the drum in a neat and even manner. Use a winding bar to rotate the drum and wind the cable around it.
    • Make sure the cable is snug but not overly tight. Too much tension can cause the door to malfunction.
  7. Test the Tension:
    • Once the cable is respooled onto the drum, reapply tension to the system.
    • Follow the manufacturer’s instructions for adjusting the tension on your specific garage door opener.
    • Test the tension by manually opening and closing the garage door. It should move smoothly and without any unusual noises.
  8. Check for Proper Alignment:
    • Inspect the door’s alignment to ensure it is level and properly balanced.
    • Make any necessary adjustments to the tracks or spring tension to achieve the correct alignment.
  9. Lubrication:
    • Apply lubrication to the moving parts of the garage door system, including the drum, pulleys, and hinges.
    • Regular lubrication will help maintain smooth operation and prevent premature wear.
  10. Reconnect the Power:
    • Once you are satisfied with the respooling and overall condition of the garage door, reconnect the power to the opener.
    • Test the door using the remote control or wall switch to ensure it is functioning correctly.

Remember, if you are unsure about any aspect of respooling your Garage Door Repair Southlake TX cable or if you encounter any difficulties, it is always recommended to consult a professional garage door technician. They have the expertise and experience to handle any issues safely and effectively.

Southlake Best Garage & Overhead Doors

Southlake, TX 76092

817-385-7628

Common Garage Door Problems in Southlake, TX: Solutions and Repair Tips

Garage Door Southlake TX

Common Garage Door Problems in Southlake, TX

Garage doors are an integral component of your home’s functional and security. It provides easy access to your car, but it also acts as a defense against burglars. Like all mechanical systems garage doors may encounter issues that can disrupt their operation. If you live within Southlake, TX, and you are experiencing problems regarding your garage doors, then this article is perfect for you. We’ll discuss typical garage door southlake TX issues, along with practical solutions and repair techniques to restore the functionality of your garage door.

Misaligned Tracks

Tracks that are not aligned properly is a frequent issue that can affect the functioning the garage door. If you spot any bends or gaps on the tracks, it is crucial to take action immediately. Begin in loosening up the screws that secure the track in place. Then, then align the track to its original position, and then tighten the screws. A level can help to ensure that the track is properly aligned.

Noisy Operation

Garage doors that produce an excessive amount of noise when it is in operation could be an issue for your neighbors and you. The noise could result from a variety of causes like worn-out wheels, loose or damaged hardware or a lack of lubrication. To find the cause, examine the rollers to see if there are signs of wear, and change them as needed. Lock the screws or bolts loose and lubricate any moving parts including springs, hinges and tracks with the use of a silicone-based lubricant.

Broken Springs

The garage door’s springs serve an important part in counterbalancing the load on the doors, which makes it simpler for you to close and open. However, they are susceptible to wear and tear with time. If you spot a damaged spring, you should seek out professional help because handling springs is hazardous. Highly trained experts located in Southlake, TX, can repair the spring without risk and make sure the right tension is applied to prevent any future problems.

Malfunctioning Garage Door

Opener An opener that’s not working properly for your garage is a nightmare and can cause a lot of inconvenience. Before you decide that the opener should be repaired, examine the batteries of the remote to ensure that they’re working properly. Check the safety sensors at the lower part on the doors to confirm they’re clean and aligned. If the issue persists then consult a garage repair service for your door located in Southlake, TX, to determine and resolve the issue.

Damaged Panels

Garage door panels are susceptible to being damaged as a result of storms, accidents or even general wear and wear and. Panels that are damaged do not just impact the look of your door, but they can affect its function as well. In the majority of cases damaged panels, they are able to be replaced separately without having to replace the whole door. Call a reputable garage repair service for doors within Southlake, TX, to examine the damage and recommend appropriate replacement panels.

Stuck or Jammed Garage Door

Garage doors that get stuck or blocked during operation could cause a lot of issue. Examine for obstructions on the tracks or in the area around the door which could be the cause of the issue. Lubricate the hinges and tracks to ensure that they move smoothly. If the problem continues it could indicate an issue that is more serious It is recommended to seek out a professional technician to conduct a thorough examination and repair.

Conclusion

Be aware of the most the most frequent garage door issues that are common in Southlake, TX, and knowing their solutions and repair methods can help you save time, money and a lot of frustration. Although some small issues can be solved with easy DIY steps, it’s vital to prioritise safety and seek out professional help when you encounter more complex issues. Professional garage door repair experts that are located in Southlake, TX, can identify and fix issues efficiently making sure your garage door is operating seamlessly and safely. Don’t let garage door problems disrupt your daily routine; take proactive steps to keep your garage door in optimal condition.

How to Adjust Garage Door Springs – Dragon Garage Door & Gates

Adjusting Garage Door Repair Southlake TX springs can be a dangerous task if not done properly, and it is recommended that a professional should handle it. However, if you have experience with tools and home repairs, you can try adjusting the garage door springs yourself.

Before we begin, it’s important to note that there are two types of garage door springs: extension springs and torsion springs.

Extension springs are located above the upper tracks on either side of the door and stretch to provide the lifting force. Torsion springs are located above the door opening and use torque to lift the door.

Step 1: Inspect the Springs

The first step in adjusting your garage door springs is to inspect them thoroughly. Look for signs of wear and tear, such as cracks, rust, or fraying cables. If you notice any of these issues, do not attempt to adjust the springs yourself. Call a professional garage door technician to replace the springs.

Step 2: Determine the Type of Spring

It is important to know whether you have extension springs or torsion springs. The method for adjusting them is different. If you are unsure of which type of spring you have, consult the owner’s manual or a garage door professional.

Step 3: Release the Tension

If you have extension springs, you will need to release the tension before making any adjustments. Start by opening the garage door completely. Use C-clamps to secure the door to the tracks to prevent it from moving. Find the safety cable attached to the spring and remove it from the bracket. Slowly and carefully loosen the two bolts that hold the spring in place. Be sure to hold onto the spring as you loosen the bolts, as it will be under tension.

Step 4: Make Adjustments

To adjust the tension of the spring, use a winding bar to turn the spring in the direction needed. Turning the spring in a clockwise direction will increase the tension, while turning it counterclockwise will decrease the tension. Make small adjustments and test the door after each adjustment until you reach the desired tension.

If you have torsion springs, do not attempt to adjust them yourself. Torsion springs are under extreme tension and can cause serious injury or even death if mishandled. Call a professional garage door technician to adjust the torsion springs.

Step 5: Reattach the Safety Cable

Once you have adjusted the tension on the extension spring, reattach the safety cable to the bracket.

Step 6: Test the Door

After making any adjustments, test the door to make sure it opens and closes smoothly. If the door is still difficult to open or close, make additional adjustments until it functions properly.

Step 7: Maintenance

To keep your garage door springs in good working order, perform regular maintenance. Lubricate the springs with a silicone-based lubricant every three months to reduce friction and prevent wear and tear. Check the springs for signs of wear and tear and replace them as needed.

In conclusion, adjusting Garage Door Repair Southlake TX springs can be a risky task, and it is recommended that you hire a professional to handle it. However, if you have experience with tools and home repairs, you can try adjusting the springs yourself. Remember to follow safety precautions and consult the owner’s manual or a garage door professional if you are unsure of what to do.

Dragon Garage Door & Gates

351 Central Ave #7, Southlake, TX 76092, United States

1-817-587-0445

Powered by WordPress & Theme by Anders Norén