Get your Home in Perfect Harmony

Tag: garage door repair arlington tx

Does Home Depot Install Garage Doors – Lake Arlington Gates & Garage Doors

Firstly, Home Depot, as a company, doesn’t directly handleGarage Door Repair Arlington TX installations. Instead, they often collaborate with third-party service providers or recommend independent contractors who specialize in garage door installation.

This means that while you can find a wide selection of garage doors at Home Depot, the actual installation process is a separate service that you may need to arrange through other channels.

The absence of in-house installation services is not uncommon in the retail industry, especially for larger items like garage doors. Instead, Home Depot focuses on providing quality products and guiding customers to external professionals who can ensure proper installation.

The availability of installation services can vary depending on your location and the specific Home Depot store. In some cases, Home Depot may have established partnerships with local contractors, making it easier for customers to find reliable installers through the store.

If you’re interested in having a garage door installed and you’ve purchased one from Home Depot, it’s advisable to reach out to your local Home Depot store directly. They can provide information on available installation options and may guide you to contractors or services in your area.

When considering garage door installation, keep in mind that this service often comes with its own cost, separate from the purchase price of the garage door itself. It’s crucial to have a clear understanding of the overall expenses involved in both buying the door and having it professionally installed.

Moreover, the quality of installation is paramount for the functionality, safety, and longevity of your garage door. Even if Home Depot doesn’t directly provide installation services in your location, they can still be a valuable resource for connecting you with reputable professionals who can get the job done right.

If Home Depot’s recommendations or partnerships don’t align with your preferences, you also have the option of exploring other local contractors who specialize in garage door installation. Obtaining multiple quotes and comparing services is a good practice to ensure you make an informed decision based on factors such as pricing, reputation, and customer reviews.

In conclusion, while Home Depot doesn’t typically handle Garage Door Repair Arlington TX installations directly, they can be a useful starting point in your journey. By reaching out to your local Home Depot, you can gather information about available installation services and potentially find reliable professionals who can ensure your garage door is installed correctly and functions optimally. Taking the time to research and choose the right installer is a crucial step in the process, ensuring that your investment in a new garage door is well-placed and serves you effectively for years to come.

Lake Arlington Gates & Garage Doors

4101 W Green Oaks Blvd #305-318, Arlington, TX 76016, United States

1-817-993-6623

Garage Door Opener Technology Trends: What’s New? – Arlington Overhead & Garage Doors

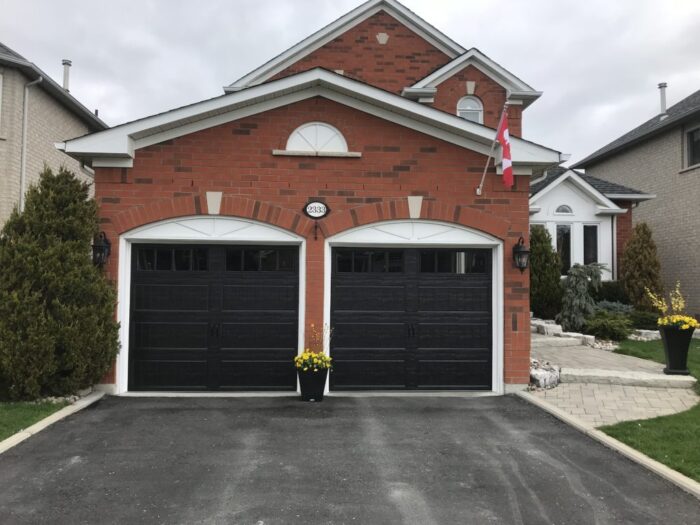
As a homeowner who values both security and convenience, I’m always on the lookout for the latest advancements in home technology. Recently, I turned my attention to the world of garage door openers and discovered a host of exciting trends and innovations that are reshaping how we interact with this essential home feature.

In this article, I’ll share my fascination with the cutting-edge garage door opener technology trends that are making waves in the industry. From smart connectivity to enhanced safety features, these innovations are not only practical but also promise to elevate the way we use and manage our garages as stated in Arlington Overhead & Garage Doors.

  1. Smart Garage Door Openers

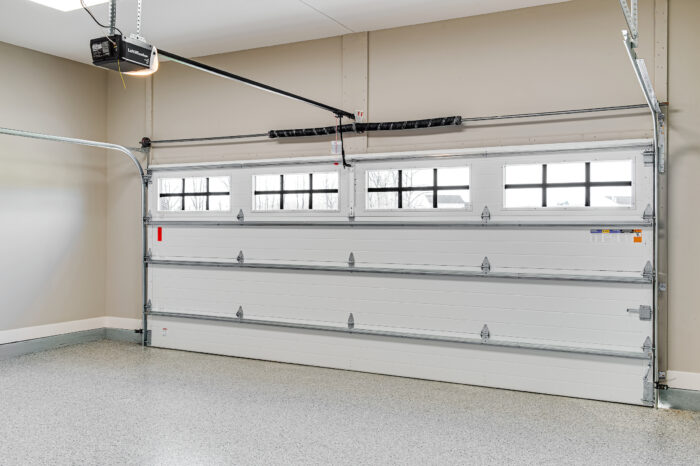
One of the most significant and game-changing trends in garage door opener technology is the rise of smart garage door openers. These devices bring connectivity and remote control to a whole new level.

My Experience: I recently upgraded to a smart garage door opener, and it has transformed how I interact with my garage. With a smartphone app, I can open and close my garage door from anywhere. This level of control is incredibly convenient, especially when I need to grant access to family members or delivery personnel while I’m not at home. Additionally, I receive real-time alerts on my phone, notifying me whenever the garage door is opened or closed, enhancing security.

Key Benefits:

  • Remote control via smartphone apps.
  • Integration with virtual assistants like Amazon Alexa and Google Assistant.
  • Real-time notifications for added security.
  • Convenient access management for family and guests.
  1. Battery Backup Systems

Power outages can be a major inconvenience, and they often leave us unable to access our garages. To address this issue, many modern garage door openers come equipped with battery backup systems.

My Experience: I live in an area prone to power outages, so having a garage door opener with a battery backup has been a game-changer. During an outage, the backup system automatically kicks in, allowing me to open and close the garage door as usual. This feature has proven invaluable in maintaining access to my garage, even when the electricity is down.

Key Benefits:

  • Continued functionality during power outages.
  • Peace of mind knowing you can access your garage in emergencies.
  • Battery backup systems recharge automatically when the power is restored.
  1. Improved Safety Sensors

Safety is paramount when it comes to garage doors, and the latest technology trends focus on enhancing safety through advanced sensors and features.

My Experience: My new garage door opener comes with improved safety sensors that detect any obstructions in the door’s path. If an object or person is detected while the door is closing, it automatically reverses direction. This added layer of safety is particularly reassuring when my children are playing near the garage.

Key Benefits:

  • Enhanced safety features to prevent accidents.
  • Sensors that detect obstructions and reverse door movement.
  • Photoelectric eyes that provide an additional safety layer.
  1. Quiet and Smooth Operation

Modern garage door openers are designed with quieter and smoother operation in mind. This is a significant improvement, especially if your garage is attached to your living space.

My Experience: The whisper-quiet operation of my new garage door opener has been a pleasant surprise. No more waking up the family with noisy garage door movements during early morning departures. This trend towards quieter operation ensures a more peaceful living environment.

Key Benefits:

  • Reduced noise levels for quieter operation.
  • Smooth and vibration-free movement.
  • Enhanced durability due to reduced wear and tear.
  1. Advanced Security Features

As security concerns continue to grow, garage door opener manufacturers are incorporating advanced security features to protect against unauthorized access.

My Experience: My new garage door opener features rolling code technology, which changes the access code every time the door is operated. This prevents code grabbing by potential intruders and ensures that only authorized users can open the garage door.

Key Benefits:

  • Rolling code technology for enhanced security.
  • Encryption and secure communication protocols.
  • Secure access management and authorization controls.
  1. Energy Efficiency

In an era of increased environmental awareness, energy efficiency is a growing trend in garage door opener technology.

My Experience: My energy-efficient garage door opener uses less power, reducing my energy consumption and utility bills. It also incorporates LED lighting, which is not only energy-efficient but also provides bright and efficient illumination in the garage.

Key Benefits:

  • Reduced energy consumption.
  • LED lighting for improved visibility and efficiency.
  • Environmental benefits and cost savings.
  1. Integration with Smart Home Systems

The trend of garage door openers integrating seamlessly with smart home systems is gaining momentum.

My Experience: I’ve integrated my smart garage door opener with my home automation system. This means that I can control my garage door along with other smart devices in my home, all from a single app or voice command. It’s a convenient and efficient way to manage my entire home.

Key Benefits:

  • Centralized control of smart home devices.
  • Integration with popular smart home ecosystems.
  • Streamlined home automation and convenience.
  1. DIY-Friendly Installation

Garage door opener manufacturers are making installation more accessible to homeowners, with user-friendly DIY options.

My Experience: When I upgraded to a new garage door opener, I was pleasantly surprised by the user-friendly installation instructions. The step-by-step guides and instructional videos provided by the manufacturer made the installation process smooth and manageable, even for someone with limited DIY experience.

Key Benefits:

  • Simplified DIY installation options.
  • User-friendly guides and resources.
  • Cost savings by avoiding professional installation fees.

Conclusion

According to Arlington Overhead & Garage Doors, the world of garage door opener technology is evolving rapidly, with innovations that prioritize convenience, safety, and security. My own experiences with these trends have shown me the tangible benefits they bring to everyday life. Whether it’s the convenience of a smart garage door opener, the security of advanced safety sensors, or the peace of mind provided by battery backup systems, these technologies are transforming our garages into smarter, safer, and more efficient spaces. As a homeowner, I’m excited to see where future advancements in garage door opener technology will take us and how they will continue to enhance our lives.

Arlington Overhead & Garage Doors

700 Secretary Dr, Arlington, TX 76015, United States

817-646-2532

How To Reconnect Garage Door Chain – Lake Arlington Gates & Garage Doors

A Garage Door Repair Arlington TX plays a pivotal role in the operation of your garage door. Over time, it may become disconnected due to various reasons like wear and tear or improper maintenance.

Reconnecting the garage door chain is a manageable task that you can tackle on your own, saving both time and money. In this comprehensive guide, we will walk you through the process step by step, ensuring a successful reconnection.

Tools and Materials Needed:

Before you begin, gather the necessary tools and materials:

  1. Adjustable wrench
  2. Screwdriver (flathead and Phillips)
  3. Pliers
  4. Safety glasses
  5. Lubricating oil
  6. Replacement chain (if needed)

Safety Precautions:

Safety should be your top priority when working on any garage door components. Follow these precautions:

  1. Ensure the garage door is fully closed.
  2. Disconnect the power supply to the garage door opener.
  3. Wear safety glasses to protect your eyes from debris.
  4. Keep your hands and fingers away from moving parts.
  5. If in doubt, consult a professional technician.

: Inspect the Chain:

Start by visually inspecting the garage door chain. Look for any signs of damage, excessive rust, or wear. If the chain is severely damaged or worn, it’s advisable to replace it to ensure long-term functionality.

: Locate the Chain Ends:

Identify the two ends of the garage door chain. One end is attached to the trolley on the garage door opener, and the other end is connected to the door itself. The disconnected end may be hanging freely.

: Realign the Ends:

Use your pliers to grip the disconnected end of the chain. Carefully align it with the sprocket on the trolley attached to the garage door opener.

: Reconnect the Chain:

With the chain aligned with the sprocket, use your adjustable wrench to tighten the chain around the sprocket securely. Ensure it is snug but not overly tight. You should be able to move the chain slightly.

: Test the Connection:

Manually move the garage door up and down a few times to test the connection. Ensure that the chain moves smoothly and doesn’t bind or skip on the sprocket.

: Lubricate the Chain:

Apply lubricating oil to the entire length of the chain. Proper lubrication reduces friction and extends the life of the chain.

: Adjust Chain Tension (If Needed):

If the chain appears too loose or too tight during testing, use your adjustable wrench to adjust the tension. A well-tensioned chain should have about 1/4 inch of slack when you push or pull it at the midpoint.

: Reconnect the Power:

Once you are satisfied with the chain’s tension and operation, reconnect the power to the garage door opener.

: Test the Garage Door:

Operate the garage door using the opener to ensure that it opens and closes smoothly without any issues.

: Final Inspection:

Give the entire system one last visual inspection to make sure there are no loose bolts, nuts, or other components. Ensure that the chain is secure and properly aligned with the sprocket.

Conclusion:

Reconnecting a Garage Door Repair Arlington TX is a straightforward process that can be completed with basic tools and some patience. Regular maintenance and lubrication of the chain can help prevent future disconnections. However, if you encounter any difficulties or are unsure about any step, it’s always a good idea to consult a professional garage door technician for assistance. By following this guide and prioritizing safety, you can ensure your garage door functions smoothly for years to come.

Lake Arlington Gates & Garage Doors

4101 W Green Oaks Blvd #305-318, Arlington, TX 76016, United States

1-817-993-6623

How Do I Program My Liftmaster Garage Door Opener – Arlington Overhead & Garage Doors

Programming a LiftMaster Garage Door Repair Arlington TX can vary depending on the model and type of opener you have.

However, I’ll provide you with a general guide that should work for most LiftMaster garage door openers. Please consult your opener’s user manual or LiftMaster’s official website for specific instructions for your model if needed.

Before you begin, here are a few important notes:

  1. Safety First: Ensure that your garage door is in good working condition and properly balanced before programming your opener. If your door is not balanced, it could cause damage or become a safety hazard.
  2. Clear the Memory: If you are reprogramming your opener, it’s a good practice to clear the memory of the opener first to remove any existing codes. Consult your user manual for instructions on how to do this.
  3. Remote Control: You will need a working remote control or a wireless keypad to program your opener. Make sure the remote control’s battery is in good condition.
  4. Find the Learn Button: Locate the “Learn” or “Program” button on your garage door opener motor unit. This button is typically colored and could be green, red, orange, or purple, depending on your model.

Now, let’s proceed with programming your LiftMaster garage door opener:

: Clear Existing Codes (if needed)

If you are reprogramming your opener or if it’s a new installation, clear any existing codes by pressing and holding the “Learn” or “Program” button on the opener for about 10 seconds until the indicator light next to the button goes off.

: Program the Remote Control

  • Stand within a few feet of the garage door opener.
  • Press the “Learn” or “Program” button on the opener. The indicator light will come on.
  • Within 30 seconds, press the button on your remote control that you want to program. Hold it until the indicator light on the opener flashes or clicks.
  • Release the button on the remote control. The opener should now recognize and store the remote’s code. Test the remote to ensure it operates the door.

: Program the Wireless Keypad (if applicable)

  • If you have a wireless keypad, you’ll need to program it next. The process is similar to programming a remote control.
  • Find the “Learn” or “Program” button on the opener and press it.
  • Enter your desired PIN on the keypad and then press the “Enter” or “Send” button.
  • The opener should acknowledge the keypad by flashing or clicking. Test the keypad by entering your PIN followed by the “Enter” or “Send” button.

: Test the Opener

  • Ensure that everything is working as expected. Test the remote control and keypad, and make sure the door opens and closes properly.

Additional Tips:

  • To program additional remotes or keypads, repeat the steps above for each one.
  • If you experience issues, consult your user manual or LiftMaster’s customer support for troubleshooting guidance.
  • Keep the remote controls and keypads in a secure location to prevent unauthorized access.

Remember that this is a general guide, and the exact steps may vary based on your specific LiftMaster Garage Door Repair Arlington TX model. Always consult your user manual for model-specific instructions if available.

Arlington Overhead & Garage Doors

700 Secretary Dr, Arlington, TX 76015, United States

1-817-646-2532

How Much Slack In Garage Door Chain – Lake Arlington Gates & Garage Doors

The slack in a Lake Arlington Gates & Garage Doors chain refers to the amount of loose or sagging chain between the motor unit and the trolley (carriage) that moves the garage door along the track. Proper tensioning of the chain is crucial for the smooth and efficient operation of the garage door opener. While the specific amount of slack can vary based on the manufacturer and model of the garage door opener, there are general guidelines you can follow to ensure that the chain is properly tensioned.

Here’s a comprehensive guide on how much slack should be in a garage door chain:

1. Consult the Manual:
Always refer to the manufacturer’s manual for your specific garage door opener model. The manual should provide detailed instructions on how to adjust and tension the chain properly. It will also indicate the manufacturer’s recommended amount of slack for the chain.

2. Check for Proper Alignment:
Before adjusting the chain tension, ensure that the track, trolley, and motor unit are properly aligned. Misalignment can lead to uneven wear and affect the performance of the garage door opener.

3. Measure the Slack:
As a general rule of thumb, most garage door openers should have around 1/2 to 3/4 inches of slack in the chain when the garage door is in the closed position. This means that when the garage door is fully closed, you can lift the chain slightly to achieve this amount of slack. However, this measurement can vary, so it’s important to consult your manual for the recommended slack.

4. Adjusting Chain Tension:
To adjust the chain tension, follow these steps:

a. Disconnect Power: Before making any adjustments, disconnect the power to the garage door opener to prevent accidental activation.

b. Locate Adjustment Points: Most garage door openers have adjustment points on the motor unit. These points allow you to tighten or loosen the chain.

c. Loosening the Chain: If the chain is too tight, causing excessive tension, you’ll need to loosen it. Loosen the lock nut on the tension adjustment bolt. Then, turn the adjustment bolt counterclockwise to create more slack in the chain. Once you’ve achieved the recommended amount of slack, tighten the lock nut.

d. Tightening the Chain: If the chain has too much slack, causing it to sag, tighten it. Loosen the lock nut and turn the adjustment bolt clockwise to reduce the slack. Again, make sure you achieve the proper amount of slack before tightening the lock nut.

5. Test the Door Operation:
After making adjustments to the chain tension, test the garage door to ensure that it operates smoothly and without any binding or excessive noise. The garage door should open and close evenly along the track.

6. Regular Maintenance:
Periodically check the chain tension as part of your garage door maintenance routine. Over time, factors such as temperature changes and wear can affect the chain’s tension. If you notice any unusual sounds or performance issues, it might be an indication that the chain needs adjustment.

7. Seek Professional Assistance:
If you’re unsure about adjusting the chain tension or if you encounter difficulties during the adjustment process, consider seeking the assistance of a professional garage door technician. They have the expertise and tools to ensure proper chain tension and optimal garage door opener performance.

In conclusion, the recommended amount of slack in a Lake Arlington Gates & Garage Doors chain is generally around 1/2 to 3/4 inches when the door is in the closed position. However, always refer to the manufacturer’s manual for your specific garage door opener model to get accurate guidelines on chain tension. Properly tensioning the chain is important for the smooth and efficient operation of your garage door opener, and regular maintenance can help ensure its longevity and reliable performance.

Lake Arlington Gates & Garage Doors

4101 W Green Oaks Blvd #305-318, Arlington, TX 76016, United States

1-817-993-6623

Do It Yourself Garage Door – Arlington Overhead & Garage Doors

Creating a DIY Arlington Overhead & Garage Doors can be a rewarding project, allowing you to customize the design and save on costs compared to purchasing a pre-made door. However, it’s important to approach this project with careful planning and attention to detail to ensure a safe and functional result.

Here’s a step-by-step guide on how to build a DIY garage door:

1. Gather Your Tools and Materials:

  • Tape measure
  • Saw (circular saw or miter saw)
  • Drill
  • Screws and nails
  • Hinges and hardware
  • Insulation material (if desired)
  • Weatherstripping
  • Paint or stain
  • Garage door opener (if applicable)
  • Plywood or lumber for the door panels
  • Lumber for framing

2. Measure and Plan:

  • Measure the garage opening accurately to determine the size of your door panels.
  • Plan the design of the door, including the style, number of panels, and any decorative elements.

3. Design the Panels:

  • Decide on the design and number of panels you want for your door. Common designs include raised panels, flat panels, or a combination of both.

4. Frame Construction:

  • Construct a frame for the door using pressure-treated lumber. The frame should match the size of the door opening and accommodate the panels.

5. Cut and Assemble Panels:

  • Cut the plywood or lumber to create the individual panels. Sand the edges and surfaces to achieve a smooth finish.
  • Assemble the panels within the frame using screws and nails. Make sure the panels fit snugly within the frame.

6. Add Decorative Elements (Optional):

  • If desired, add decorative elements such as trim, molding, or lattice to enhance the appearance of the door.

7. Insulation (Optional):

  • If you want to insulate your garage, consider adding insulation material to the back of the panels before attaching them to the frame.

8. Paint or Stain:

  • Paint or stain the door panels and frame to protect the wood and enhance the appearance. Use exterior-grade paint or stain for durability.

9. Attach Hardware:

  • Attach hinges to the door frame and panels. Make sure the hinges are properly aligned to allow smooth movement.

10. Install Weatherstripping:

  • Attach weatherstripping to the bottom of the door to create a seal and prevent drafts and debris from entering the garage.

11. Hang the Door:

  • With the help of a friend or family member, position the door in the garage door opening.
  • Attach the hinges to the door jamb, ensuring the door is level and aligned.

12. Install Garage Door Opener (Optional):

  • If you’re installing a garage door opener, follow the manufacturer’s instructions to properly attach the opener to the door and the ceiling.

13. Test and Adjust:

  • Test the door by opening and closing it manually and using the garage door opener (if installed). Make any necessary adjustments to ensure smooth and proper operation.

14. Maintain and Care:

  • Regularly inspect and maintain your DIY garage door to prevent any issues. Lubricate moving parts, replace weatherstripping as needed, and touch up paint or stain when necessary.

Conclusion:

Building a DIY Arlington Overhead & Garage Doors can be a challenging but rewarding project. With careful planning, accurate measurements, and attention to detail, you can create a custom garage door that complements your home’s design. Keep safety in mind throughout the construction process and ensure that the door is properly balanced and functional. If you’re unsure about any aspect of the project, consider seeking guidance from experienced DIYers or professionals in the field.

Arlington Overhead & Garage Doors

700 Secretary Dr, Arlington, TX 76015, United States

1-817-646-2532

How Many Winds on a Garage Door Spring-Garage Door Experts of North Arlington

The number of winds on a Garage Door Repair Arlington TX spring can vary depending on the specific type of spring, the size of the door, and the desired tension. However, I will provide you with a general explanation of garage door springs, their purpose, and the factors that influence the number of winds.

Garage door springs play a crucial role in the operation of overhead garage doors. They provide the necessary force to counterbalance the weight of the door, making it easier to open and close manually or through an automated system. The springs essentially store and release energy as the door moves, reducing the amount of effort required to operate the door.

There are two main types of garage door springs: torsion springs and extension springs. Torsion springs are typically mounted above the garage door, while extension springs are installed alongside the horizontal tracks on either side of the door. The number of winds specifically applies to torsion springs.

Torsion springs consist of a metal shaft with a stationary cone at one end and a winding cone at the other. The number of winds refers to the number of times the spring is twisted or wound around the shaft. Each wind adds tension and potential energy to the spring, allowing it to counterbalance the weight of the door.

Determining the appropriate number of winds for a garage door spring involves several factors, including the weight of the door, the height of the door, the cable drum size, and the desired tension. These variables are calculated based on the specific requirements of the door system and are often provided by the manufacturer or a professional installer.

It is crucial to note that adjusting or replacing garage door springs can be dangerous and should be performed by experienced individuals. The springs are under high tension and can cause serious injury if mishandled. It is recommended to consult a professional technician who has the knowledge and expertise to safely work with garage door springs.

In summary, the number of winds on a Garage Door Repair Arlington TX spring depends on various factors related to the specific door system. It is not possible to provide a precise number of winds without considering the individual requirements of the door. To ensure safety and proper operation, it is best to consult a professional technician when dealing with garage door springs.

Garage Door Experts of North Arlington

711 Trinity Cir, Arlington, TX 76006, United States

817-383-2114

How do You Frame a Garage Door Opening-South Arlington Overhead & Garage Door


Framing a Garage Door Repair Arlington TX opening is an essential step in constructing a garage. It involves creating a sturdy and properly aligned structure that will support the weight of the garage door and provide a secure and functional entryway.

In this guide, I will explain the process of framing a garage door opening in detail, step by step.

  1. Gather the necessary tools and materials:
    • Tape measure
    • Level
    • Hammer
    • Nails
    • Circular saw
    • Lumber (2×4 or 2×6)
    • Plywood
    • Galvanized metal brackets
    • Safety goggles
    • Work gloves
  2. Measure and mark the desired dimensions for the garage door opening on the wall. Ensure that the opening is wide enough to accommodate the door size, with extra space for the door frame.
  3. Use a circular saw to cut through the wall studs and header above the marked opening. Remove the cut sections carefully.
  4. Install a king stud on each side of the opening. These vertical studs will provide support for the header. Measure and cut the studs to match the height of the garage door, plus additional clearance.
  5. Attach the king studs to the adjacent wall studs using nails or galvanized metal brackets. Make sure they are plumb (vertical) and securely fastened.
  6. Measure and cut two jack studs to fit between the bottom plate and the header. These studs will provide additional support for the header and help distribute the weight of the door evenly.
  7. Position the jack studs on either side of the opening, aligning them with the king studs. Secure them in place with nails or brackets.
  8. Measure and cut a header to fit the width of the opening. The header should be made of a sturdy material, such as doubled-up 2×4 or 2×6 lumber, to support the weight of the garage door.
  9. Place the header on top of the jack studs. Ensure that it is level and properly aligned with the king studs. Secure the header to the king and jack studs using nails or brackets.
  10. Install cripple studs above the header. These shorter studs will fill the gap between the header and the top plate. Measure and cut the cripple studs to fit the space, and secure them in place with nails or brackets.
  11. Check the entire framing for plumb and level using a level. Make any necessary adjustments to ensure that the opening is straight and square.
  12. Once the framing is complete, cover the exposed wall with plywood or other suitable sheathing material. Attach the sheathing to the studs using nails or screws, ensuring a secure fit.
  13. Double-check the squareness and alignment of the opening before proceeding with further construction or installing the garage door.

Framing a Garage Door Repair Arlington TX opening requires careful measurements, precise cutting, and proper alignment to ensure a solid structure. Following these steps will help you create a sturdy and functional opening that can support the weight of the garage door and provide a secure entryway to your garage. Always prioritize safety by wearing goggles and gloves during construction, and consult local building codes or regulations to ensure compliance with specific requirements in your area.

South Arlington Overhead & Garage Door

3330 Matlock Rd #204, Arlington, TX 76015

817-383-2173

Powered by WordPress & Theme by Anders Norén