Get your Home in Perfect Harmony

Tag: garage door repair bedford tx

How To Sync Car Garage Door Opener – Bedford Gates & Garage Doors

Syncing your car’s Garage Door Repair Bedford TX involves integrating your vehicle’s Home Link system with your garage door opener.

This process ensures that you can conveniently open and close your garage door using buttons in your car. The following detailed guide provides step-by-step instructions for a successful synchronization, taking into account different scenarios and potential challenges.

Before initiating the synchronization process, confirm that your garage door opener is compatible with HomeLink. Consult the user manual of your garage door opener for specific compatibility information. Additionally, make sure your car is parked outside the garage with enough space for maneuvering.

If your car has been previously programmed with HomeLink, it’s advisable to clear existing codes. To do this, press and hold the first and third buttons on HomeLink until the indicator light starts flashing.

Enlist the help of someone to stand within sight of the garage door opener motor unit. This assistant will play a crucial role in the synchronization process.

Locate the HomeLink buttons in your car. Typically, these buttons are found on the sun visor or in the overhead console.

Begin the programming process by holding down the HomeLink button you wish to program. Simultaneously, your assistant should press the “Learn” or “Smart” button on the garage door opener motor unit. Hold both buttons until the HomeLink indicator light flashes rapidly.

If your garage door opener is equipped with rolling codes (common in post-1996 models), an additional step is required. After the rapid flashing, press and hold the HomeLink button for two seconds, release, and then press again. Repeat this sequence until the garage door starts moving.

Test the HomeLink system by pressing the programmed button in your car. Check if the garage door opens or closes. It may take a few attempts for the programming to take effect.

If the synchronization is successful, congratulations! Your car’s garage door opener is now programmed. If not, consult the user manuals of both your car and garage door opener for troubleshooting tips.

In conclusion, syncing your car’s Garage Door Repair Bedford TX involves a series of straightforward yet critical steps. Following this comprehensive guide ensures a smooth integration process, allowing you to enjoy the convenience of operating your garage door directly from your car.

Garage Door Repair in Bedford, TX

817-886-3064

How To Release Tension On A Garage Door – Bedford Gates & Garage Doors

Before diving into tension release techniques, let’s familiarize ourselves with the key components of a Garage Door Repair Bedford TX system.

This foundational knowledge is essential for a successful tension release.Recognizing the early signs of tension buildup empowers you to take proactive measures. We’ll discuss common indicators that your garage door needs attention.

: Safety First:

Equipping yourself with the right tools ensures a safe and effective tension release process. We’ll provide a comprehensive list of tools every DIY enthusiast should have.Safety should be a priority. We’ll outline the necessary safety gear, including protective eyewear and gloves, to minimize risks during tension release.

: Identifying Tension Points

Examining cables and springs is a critical step. We’ll guide you through the process of identifying tension points in these vital components.Rollers and tracks also contribute to tension-related issues. Learn how to assess and address tension problems in these areas.

: Step-by-Step Tension Release Process

For garage doors with extension springs, we’ll walk you through the step-by-step process of safely releasing tension.Torsion springs require a different approach. We’ll guide you through the process of adjusting torsion springs while prioritizing safety.

: Common Mistakes to Avoid

We’ll highlight common mistakes DIYers make, emphasizing the importance of following safety measures throughout the tension release process.While DIY is often viable, certain situations demand professional expertise. Learn when it’s time to seek help from a garage door specialist.

: Regular Maintenance Tips

Proper lubrication is key to preventing tension-related issues. We’ll provide tips on choosing the right lubricant and applying it effectively.Regular visual inspections can catch potential problems early on. Discover how to conduct thorough inspections to maintain a well-functioning garage door.

: Handling Unusual Noises

Unusual noises can indicate tension issues. We’ll troubleshoot common sounds and guide you through solutions to eliminate them.Grinding sounds are often a cause for concern. We’ll explore the potential reasons behind these sounds and how to address them.

: Professional Help

While many tension-related tasks are DIY-friendly, there are instances where professional assistance is advisable. Learn when to tackle the job yourself and when to call in the experts.Recognizing the signs that indicate a need for professional intervention is crucial. We’ll help you discern when it’s time to seek expert help.

: Enhancing Garage Door Longevity

Maintaining balanced tension contributes to the longevity of your garage door. Discover how proper tension release can extend the lifespan of your system.Implementing a seasonal maintenance routine ensures ongoing functionality. We’ll outline simple tasks to perform throughout the year to keep your garage door in top condition.

: Impact of Weather on Tension

Cold weather presents unique challenges. We’ll discuss how winter conditions can affect garage door tension and what precautions to take.High temperatures also impact Garage Door Repair Bedford TX performance. Learn how to safeguard your door against the effects of summer heat.

Bedford Gates & Garage Doors

817-886-3064

Garage Door Hinge Replacement: Expert Tips and Services – Bedford Gates & Garage Doors

As a homeowner who has faced various garage door issues over the years, I’ve learned that proper maintenance and occasional replacements are essential to ensure the longevity and functionality of this critical household feature. One aspect of garage door maintenance that often goes overlooked is hinge replacement.

In this article, I’ll share the importance of garage door hinge replacement, along with expert tips and services I’ve encountered along the way as stated in Bedford Gates & Garage Doors.

1. The Unsung Heroes: Garage Door Hinges

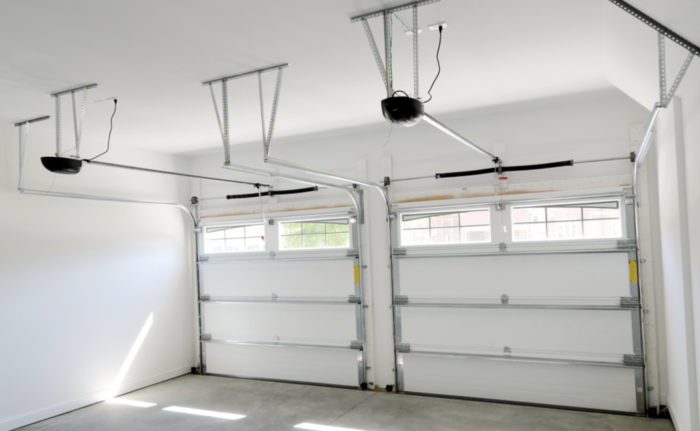
Before delving into the world of garage door hinge replacement, it’s essential to understand the role these seemingly small components play in the overall functionality of your garage door. Hinges are the joints that allow your door panels to pivot smoothly during opening and closing. Over time, wear and tear can cause hinges to deteriorate, leading to various problems.

My Experience: I once neglected to address squeaky and rusted hinges on my garage door, thinking they were minor issues. However, these seemingly insignificant problems soon escalated into more significant malfunctions.

2. Signs Your Hinges Need Replacement

Recognizing the signs that your garage door hinges require replacement is the first step toward ensuring the continued smooth operation of your door. Common signs include:

  • Squeaking or Grinding Noises: If your garage door produces loud, unpleasant noises when opening or closing, it’s a sign that the hinges may be deteriorating.
  • Rust or Corrosion: Rust and corrosion on the hinges not only affect their appearance but can also weaken their structural integrity.
  • Difficulty in Opening or Closing: If your garage door is becoming increasingly difficult to open or close, it may be due to worn-out hinges hindering the smooth movement of the door panels.
  • Visible Damage: Inspect your hinges for visible signs of damage, such as cracks, bends, or missing parts.

Expert Tip: According to the garage door expert I consulted, regular visual inspections of your hinges are crucial to catch early signs of wear and damage. Prompt replacement can prevent more extensive and costly issues.

My Experience: After noticing persistent squeaking and rust on my garage door hinges, I decided to seek professional advice and explore the option of hinge replacement.

3. DIY vs. Professional Replacement

Once you’ve identified the need for hinge replacement, you’ll face the decision of whether to tackle the task yourself or hire a professional. While some homeowners may possess the skills and tools necessary for a DIY replacement, it’s essential to weigh the pros and cons carefully.

Expert Tip: The garage door expert emphasized that hinge replacement is not a task to be taken lightly. While some homeowners may have the skills, it often requires specialized tools and knowledge of the specific hinge type and placement. DIY attempts can lead to further damage or misalignment of the door.

My Experience: I initially considered a DIY approach but soon realized that the precision required for hinge replacement was beyond my capabilities. I opted for professional assistance to ensure the job was done correctly.

4. The Role of Professional Garage Door Services

Engaging the services of a professional garage door technician can provide several advantages when it comes to hinge replacement:

  • Expertise: Experienced technicians possess in-depth knowledge of various hinge types and their compatibility with specific garage door models. They can accurately identify the hinges that need replacement and ensure proper installation.
  • Specialized Tools: Professionals have access to specialized tools and equipment designed for garage door maintenance and repairs. These tools allow for precise hinge removal and installation.
  • Safety: Garage door work can be hazardous, especially when dealing with heavy components like door panels and hinges. Professionals are trained in safety protocols to minimize the risk of accidents.
  • Efficiency: A skilled technician can complete hinge replacement efficiently, reducing downtime for your garage door and minimizing inconvenience.
  • Preventive Maintenance: In addition to hinge replacement, professionals often conduct a thorough inspection of the entire door system. They can identify other potential issues and address them before they escalate.

My Experience: When I enlisted the services of a professional garage door technician for hinge replacement, I was impressed by their efficiency and attention to detail. They also identified and addressed a minor issue with one of the cables, preventing a potential future problem.

5. Choosing the Right Hinges

Selecting the right hinges for your garage door is a critical aspect of the replacement process. Hinges come in various types and materials, and choosing the appropriate ones depends on factors such as the door’s weight and design.

Expert Tip: The garage door expert stressed the importance of selecting hinges that are compatible with your specific garage door model. Using the wrong hinges can lead to improper alignment and further issues.

My Experience: I relied on the expertise of the technician to choose the correct hinges for my garage door. They took into account the weight and design of the door to ensure a proper fit.

6. The Hinge Replacement Process

The hinge replacement process involves several steps, and professional technicians follow a systematic approach to ensure a successful replacement:

  • Inspection: The technician begins by inspecting the entire garage door system to identify the hinges that require replacement.
  • Removal: Old or damaged hinges are carefully removed from the door panels and the frame.
  • Cleaning: The technician cleans the hinge mounting areas, removing any debris or residue.
  • Installation: New hinges are securely installed, ensuring proper alignment and smooth movement.
  • Lubrication: The technician applies lubrication to the hinges to reduce friction and prevent future issues.
  • Testing: The garage door is tested to ensure it opens and closes smoothly without any issues.

Expert Tip: A thorough inspection and testing process is essential to verify that the replacement has been successful. Professionals pay close attention to the door’s balance and alignment.

My Experience: Watching the technician go through each step of the replacement process gave me confidence that the job was being done correctly. The garage door operated noticeably smoother after the hinge replacement.

7. Maintenance and Longevity

Once the hinges have been replaced, it’s crucial to follow a regular maintenance schedule to extend their longevity. Proper lubrication and periodic inspections can help prevent premature wear and damage.

Expert Tip: The garage door expert advised scheduling annual maintenance checks with a professional technician to ensure that the hinges and the entire door system are in good condition.

My Experience: I now follow a maintenance routine that includes regular lubrication and visual inspections of the hinges. It’s a small investment of time that pays off in the long run by prolonging the life of my garage door.

In summary, as stated in Bedford Gates & Garage Doors, garage door hinge replacement is a critical aspect of maintaining the functionality and longevity of your garage door. While it may seem like a minor task, the hinges play a vital role in the smooth operation of the door. Seeking the expertise of a professional technician not only ensures that the replacement is done correctly but also provides the peace of mind that your garage door will continue to operate smoothly and safely. Regular inspections and maintenance further contribute to the longevity of the hinges and the overall performance of your garage door, making it a worthwhile investment in your home’s maintenance.

Bedford Gates & Garage Doors

2201 Harwood Rd, Bedford, TX 76021, United States

817-886-3064

How Do You Reset Garage Door Sensors – Bedford Gates & Garage Doors

Resetting Garage Door Repair Bedford TX is a crucial maintenance task that ensures the safety and functionality of your garage door system. These sensors are designed to detect obstructions in the door’s path and prevent it from closing if something is in the way.

If your garage door sensors are malfunctioning or misaligned, it’s essential to reset them properly to avoid accidents and damage to your property. In this comprehensive guide, I’ll walk you through the steps to reset garage door sensors effectively.

Step 1: Safety First Before attempting to reset your garage door sensors, prioritize safety. Ensure that all objects, including vehicles, are clear of the door’s path. Disconnect the power to the garage door opener to prevent any accidental activations during the reset process. If your garage door is inoperable, do not attempt to reset it yourself. Consult a professional technician.

Step 2: Visual Inspection Start by visually inspecting your garage door sensors. Typically, there are two sensors located on either side of the door’s opening, near the floor. Each sensor consists of a transmitter (sending unit) and a receiver (receiving unit). Check for any obstructions or debris that may be blocking the sensors’ view of each other. Clean the sensors with a soft, dry cloth to remove dirt, dust, or spiderwebs that can interfere with their operation.

Step 3: Check the Sensor Alignment Proper alignment between the transmitter and receiver is crucial for the sensors to work correctly. Ensure that both sensors are facing each other and that their LED lights are on and not blinking. If one or both LEDs are blinking, it indicates a misalignment issue.

Step 4: Adjust Sensor Alignment To adjust sensor alignment:

  1. Loosen the mounting bracket or screw that holds the misaligned sensor in place.
  2. Gently move the sensor until the LED lights on both sensors are solid, not blinking.
  3. Retighten the mounting bracket or screw to secure the sensor in its corrected position.

Step 5: Test the Sensors Once the sensors are aligned correctly, it’s essential to test them to ensure they are working correctly. Reconnect the power to the garage door opener and operate the door using the opener or remote control. The door should close and then immediately reverse if an obstruction is detected. If it doesn’t reverse or still has issues, proceed to the next steps.

Step 6: Inspect Wiring and Connections Check the wiring between the sensors and the garage door opener for any damage or loose connections. Ensure that the wires are securely connected to the terminals on both the sensors and the opener unit. Repair or replace any damaged wires or connectors.

Step 7: Reset the Opener If the sensors are still not functioning correctly, you may need to reset the garage door opener. To do this:

  1. Locate the “Learn” or “Reset” button on the opener unit (usually on the back or side).
  2. Press and hold the “Learn” or “Reset” button until the indicator light on the opener blinks.
  3. Release the button.

This action will reset the opener’s memory, including the sensor settings.

Step 8: Realign and Test Again After resetting the opener, repeat the sensor alignment process as described in Steps 3 and 4. Once the sensors are properly aligned, test the garage door again to ensure it closes and reverses when an obstruction is present.

Step 9: Call a Professional If you’ve followed all the steps above and your garage door sensors still aren’t working correctly, it’s advisable to contact a professional garage door technician. There may be underlying issues with the sensors, opener, or other components that require expert diagnosis and repair.

In conclusion, resetting Garage Door Repair Bedford TX is a critical safety measure to ensure your garage door operates correctly and prevents accidents. By following these steps, you can often resolve sensor issues on your own. However, if problems persist, it’s always wise to seek professional assistance to avoid any further complications or safety hazards. Remember, safety should be your top priority when working with garage door systems.

Bedford Gates & Garage Doors

2201 Harwood Rd, Bedford, TX 76021, United States

1-817-886-3064

How To Deprogram Garage Door Opener – Bedford Gates & Garage Doors

Deprogramming a Bedford Gates & Garage Doors opener involves removing the existing codes or remotes from the opener’s memory. This might be necessary if you’re moving to a new home, have lost a remote, or want to reset the system for security reasons. The process can vary depending on the brand and model of your garage door opener.

Below is a general guide on how to deprogram a garage door opener:

Materials You’ll Need:

  • Ladder (if needed)
  • Screwdriver
  • New remote (optional, for reprogramming)
  • Safety goggles and gloves

Step-by-Step Guide:

1. Identify Your Garage Door Opener Model:

  • Different garage door opener models have varying procedures for deprogramming. Refer to your garage door opener’s manual for specific instructions.

2. Locate the “Learn” Button:

  • Most modern garage door openers have a “Learn” or “Program” button. This button is typically located on the back of the motor unit, near the antenna wire.

3. Clear Existing Codes:

  • To clear the existing codes from the opener’s memory, press and hold the “Learn” button for a few seconds until the indicator light (LED) on the motor unit blinks or turns off. This indicates that the codes have been cleared.

4. Test the Opener:

  • After clearing the codes, test the garage door opener to ensure that none of the previously programmed remotes or devices can operate the door.

5. Reprogram Remotes (Optional):

  • If you intend to reprogram your existing remotes or add new ones, follow these steps:
  • Press the “Learn” button on the motor unit again. The indicator light will start blinking.
  • Press the button on the remote you want to program. The indicator light should stop blinking and remain solid or flash to confirm successful programming.
  • Test the remote to ensure it operates the garage door.

6. Reset Keypad Codes (if applicable):

  • If your garage door opener has a keypad, you might need to reset the codes by following similar steps as with the remote. Refer to your opener’s manual for keypad-specific instructions.

7. Consult the Manual:

  • If the steps above don’t work or if your garage door opener model has specific deprogramming instructions, refer to the manufacturer’s manual or contact customer support.

8. Safety Check:

  • Test the garage door opener to ensure it’s functioning correctly after deprogramming. Make sure the door opens and closes smoothly and that all safety features are operational.

9. Document Codes (Optional):

  • If you’ve cleared all codes, it’s a good idea to document the newly programmed remotes’ codes and the keypad code for future reference.

10. Seek Professional Help (if needed):

  • If you’re uncertain about deprogramming your garage door opener, or if you encounter difficulties during the process, consider seeking assistance from a professional garage door technician.

Conclusion:

Deprogramming a Bedford Gates & Garage Doors opener involves clearing existing codes or remotes from the opener’s memory. By following the general steps outlined above and referring to your garage door opener’s manual, you can successfully deprogram the opener to improve security, reset the system, or reprogram new remotes. Always prioritize safety and accurate execution during the process.

Bedford Gates & Garage Doors

2201 Harwood Rd, Bedford, TX 76021, United States

1-817-886-3064

Garage Door Maintenance: How Top Companies Keep Your Door in Prime Condition – Bedford Gates & Garage Doors

As a proud homeowner in the United States, the intricate blend of aesthetics, comfort, and regulations that shape my property has always fascinated me. Amidst the joys of homeownership, adhering to local building codes stands as a testament to responsible living. While I often focus on interior design and landscaping, it’s crucial not to overlook the role that my garage door plays in this intricate dance. In this article, I’m excited to share my insights into the vital connection between garage door service and ensuring compliance with local building codes across the United States.

By exploring how regular maintenance and expert guidance pave the way for code adherence according from Garage Door Repair, I hope to shed light on the pivotal role that garage door service plays in aligning my property with the architectural regulations of my community.

Navigating the Complex World of Building Codes

Building codes, the silent architects of our neighborhoods, establish the blueprint for safety, functionality, and uniformity in construction. These codes encompass an array of aspects, from structural soundness to energy efficiency, shaping the spaces we call home.

Elevating the Garage Door: A Fusion of Aesthetics and Regulations

My garage door isn’t just a functional element; it’s a canvas that merges practicality with visual appeal. Adhering to local building codes isn’t merely a legal obligation—it’s a commitment to the safety and well-being of my loved ones and neighbors. The realization that my garage door must align with these codes has transformed my perspective on its significance.

The Vital Role of Garage Door Service

Enter the unsung hero: garage door service. Regular maintenance and professional care serve as the guardians of my garage door’s compliance with local building codes. Here’s why garage door service is a pivotal force:

  1. Technical Proficiency: Garage door experts possess the knowledge required to navigate the intricate maze of building codes. Their understanding of code nuances ensures that my garage door harmonizes seamlessly with these regulations.
  2. Scheduled Inspections: Routine garage door service involves meticulous inspections. These evaluations pinpoint any deviations from building codes, enabling swift corrective measures.
  3. Adapting to Code Evolution: Building codes are dynamic, evolving over time. Garage door service professionals keep me informed about necessary modifications to my garage door to ensure ongoing code compliance.
  4. Safety at the Forefront: Building codes often emphasize safety measures. Garage door service addresses these critical aspects, including sensor functionality, emergency release mechanisms, and adherence to weight and balance stipulations.
  5. Quality and Installation Standards: Building codes prescribe material quality and installation methods for durability and performance. Garage door service professionals adhere to these standards, bolstering my garage door’s longevity while upholding compliance.

Essential Elements of Garage Door Service for Code Compliance

To optimize my garage door’s compliance with local building codes, I’ve adopted a proactive approach encompassing the following:

  1. Regular Assessments: Scheduling regular assessments by garage door professionals ensures prompt identification of any deviations from building codes.
  2. Precision Balancing and Alignment: Properly balancing and aligning my garage door not only enhances its function but also aligns with weight and balance criteria outlined in building codes.
  3. Ensuring Safety Mechanisms: Regular garage door service incorporates testing and maintenance of safety mechanisms, such as sensors and emergency release functions, which are often mandated by building codes.
  4. Effective Insulation and Weather Sealing: Many building codes stipulate insulation and weather sealing requirements for enhanced energy efficiency. Garage door service guarantees these aspects meet or exceed standards.
  5. Bolstering Security Measures: Security is paramount in building codes. Garage door service may encompass maintaining locks, security features, and even integrating modern security technologies.

Navigating Variations: Garage Doors and Diverse Building Codes

It’s important to acknowledge that building codes can vary significantly from one locality to another. This emphasizes the indispensable role of garage door service professionals, who possess an in-depth understanding of my specific area’s code requirements.

The Collaborative Spirit: Partnering for Code-Compliant Excellence

Engaging the expertise of garage door service professionals establishes a collaborative partnership that ensures my garage door’s alignment with local building codes. These professionals offer invaluable benefits:

  1. Code Acumen: Garage door service experts possess comprehensive knowledge of the building codes relevant to my locality. Their guidance ensures seamless adherence to these regulations.
  2. Streamlined Process: Professionals streamline the journey towards code compliance, efficiently managing inspections, adjustments, and necessary modifications.
  3. Customized Solutions: Every property is unique, and garage door service professionals tailor their approach to match my specific needs, guaranteeing my garage door meets exacting local building code standards.
  4. Peace of Mind: Entrusting my garage door’s code compliance to experts provides peace of mind, reassuring me that this crucial aspect of my property is in capable hands.

In conclusion, based from Garage Door Repair and as I reflect on the delicate balance between design aspirations and regulatory guidelines, I’m reminded of the importance of my garage door’s role in this intricate tapestry. Local building codes serve as custodians of architectural integrity, and my garage door must harmonize seamlessly. Garage door service isn’t a mundane chore; it’s a proactive commitment to building code compliance. As I collaborate with garage door professionals to ensure that my garage door stands as a compliant masterpiece, I’m reminded that every feature of my home plays a pivotal role in the symphony of responsible homeownership. By embracing garage door service, I’m not only maintaining a functional entryway; I’m actively contributing to the safety, beauty, and harmony of my property within the broader landscape of my community’s architectural vision.

Bedford Gates & Garage Doors

2201 Harwood Rd, Bedford, TX 76021, United States

817-886-3064

How to Lubricate Your Own Garage Door – Bedford Overhead & Garage Door

Lubricating your garage door is an essential maintenance task that can keep your door functioning smoothly and prevent costly repairs.

Follow these steps from Garage Door Repair Bedford TX to lubricate your garage door:

  1. Gather the necessary supplies: You will need a can of silicone spray lubricant or white lithium grease, a rag or cloth, and a ladder.
  2. Clean the garage door tracks: Use a rag or cloth to clean the garage door tracks of any debris or buildup.
  3. Apply lubricant to the garage door tracks: Apply a small amount of silicone spray lubricant or white lithium grease to the garage door tracks. Be sure to apply the lubricant evenly along the entire length of the tracks.
  4. Lubricate the rollers: Apply lubricant to the rollers of the garage door. Be sure to apply the lubricant to both sides of the rollers.
  5. Lubricate the hinges: Apply lubricant to the hinges of the garage door. Be sure to apply the lubricant to both sides of the hinges.
  6. Lubricate the springs: Apply a small amount of lubricant to the springs of the garage door. Be careful not to apply too much lubricant, as this can cause the springs to become too slippery and lead to malfunction.
  7. Test the garage door: After lubricating the garage door, test it to ensure that it operates smoothly. If there are any issues, such as unusual noises or jerky movements, you may need to lubricate the door again or contact a professional garage door technician.

In conclusion, as stated in Garage Door Repair Bedford TX, it’s recommended to lubricate your garage door every six months to keep it functioning smoothly. Additionally, it’s important to use the correct lubricant for your garage door, as using the wrong type of lubricant can cause damage to the door or its components. Consult your owner’s manual or contact a professional garage door technician if you’re unsure which type of lubricant to use.

Bedford Overhead & Garage Door

2200 Airport Fwy Suite 555, Bedford, TX 76022

817-373-5968

Powered by WordPress & Theme by Anders Norén