Get your Home in Perfect Harmony

Tag: garage door Page 4 of 20

What is the Average Cost of Garage Door Repair Services? – Trophy Club Overhead & Garage Doors

As a homeowner, I’ve encountered my fair share of unexpected repairs and maintenance tasks. One day, it was my garage door that demanded attention. It’s an essential part of my home, providing security, convenience, and curb appeal. When it started acting up, I knew I needed to address the issue promptly.

By following Trophy Club Overhead & Garage Doors, I’ll share my personal journey and insights into the average cost of garage door repair services.

The Significance of a Functioning Garage Door

Before we delve into the costs, let’s discuss why a functioning garage door is so vital. For most homeowners, the garage door serves multiple purposes:

  1. Security: A garage door acts as a barrier between your home and the outside world. A malfunctioning door compromises the security of your property.
  2. Convenience: Your garage door provides easy access to your vehicles and serves as a primary entry point to your home. A smoothly operating door saves time and hassle.
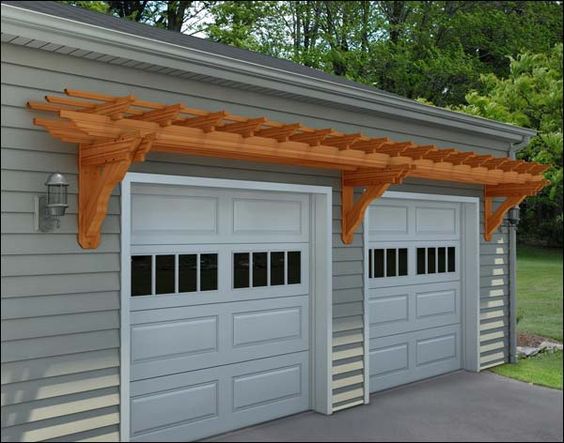
  3. Curb Appeal: The garage door is a prominent feature of your home’s exterior. A well-maintained and aesthetically pleasing door enhances your property’s curb appeal.
  4. Protection: In many homes, the garage also serves as storage for valuable items. A functional garage door protects these possessions from the elements and theft.

Given these essential roles, addressing garage door issues promptly is crucial.

Understanding the Costs of Garage Door Repairs

The cost of garage door repair services can vary widely, depending on several factors. Here are some key considerations when estimating the expenses:

  1. Type of Repair: The nature of the repair plays a significant role in determining the cost. Minor issues like a misaligned sensor or a malfunctioning remote control will typically be less expensive to fix than major structural problems or spring replacements.
  2. Parts and Materials: The cost of replacement parts and materials, such as springs, cables, rollers, hinges, and sensors, will contribute to the overall expense. High-quality parts may come at a higher price but often offer better longevity.
  3. Labor: The labor cost associated with garage door repairs can vary based on the complexity of the job and the service provider’s rates. Expect to pay hourly labor fees in addition to parts costs.
  4. Emergency vs. Scheduled Repairs: Emergency repairs, especially outside of regular business hours, can incur higher costs due to service call fees and urgency. Scheduling repairs during regular hours may be more cost-effective.
  5. Warranty Coverage: If your garage door or its components are under warranty, some repair costs may be covered. It’s essential to check your warranty terms and conditions.
  6. Service Provider: The choice of a service provider can impact the cost. Established and reputable garage door companies may charge more for their services, but they often provide quality work and customer service.
  7. Location: The cost of garage door repairs can vary by location and market demand. Prices may be higher in urban areas or regions with a high cost of living.

Now that we have an understanding of the factors that influence garage door repair costs, let me share my experiences and insights.

My Garage Door Repair Journey

  1. Diagnosing the Issue: When my garage door began acting up, I started by diagnosing the problem as best as I could. I observed its behavior, listened for unusual sounds, and checked for obvious signs of damage.
  2. Consulting a Professional: While I attempted to identify the issue, I knew that a professional’s expertise was essential. I contacted a reputable local garage door repair company and scheduled an inspection.
  3. Inspection and Assessment: The technician arrived promptly and conducted a thorough inspection of my garage door system. They quickly identified the issue – a damaged spring that needed replacement.
  4. Quotation: The technician provided me with a detailed quotation for the repair, which included the cost of the replacement spring, labor, and any additional parts that might be needed.
  5. Cost Evaluation: I evaluated the cost of the repair and compared it to the potential consequences of not addressing the issue promptly. A malfunctioning garage door could lead to further damage or even safety risks.
  6. Proceeding with the Repair: After careful consideration, I approved the repair. The technician promptly replaced the damaged spring and conducted a safety inspection to ensure everything was functioning correctly.
  7. Final Costs: The total cost of the repair, including parts, labor, and a service fee, amounted to approximately $250. While it may seem like a significant expense, it was a worthwhile investment in the security and functionality of my garage door.

Common Garage Door Repairs and Their Costs

Now, let’s take a closer look at some common garage door repairs and their average costs:

  1. Spring Replacement: Replacing a single garage door spring can cost between $100 and $200. If both springs need replacement, the cost may double.
  2. Roller Replacement: Replacing a set of rollers typically ranges from $85 to $150, depending on the type and quality of the rollers.
  3. Cable Replacement: Cable replacement can cost between $100 and $200, including labor and materials.
  4. Sensor or Photo Eye Replacement: Replacing a malfunctioning sensor or photo eye usually costs between $50 and $100 per sensor.
  5. Opener Repair: Repairing a garage door opener can range from $100 to $400, depending on the issue and whether any replacement parts are needed.
  6. Track Alignment: Fixing misaligned tracks may cost around $125 to $150.
  7. Panel Replacement: Replacing a damaged garage door panel can range from $150 to $500, depending on the panel’s size, material, and design.

It’s essential to note that these are average costs, and the actual expenses can vary based on factors such as location, the service provider, and the specific requirements of your repair.

Tips for Managing Garage Door Repair Costs

To manage garage door repair costs effectively, consider the following tips:

  1. Regular Maintenance: Invest in regular garage door maintenance to catch and address issues early, reducing the likelihood of costly repairs.
  2. Compare Quotes: Obtain multiple quotes from reputable garage door repair companies to ensure competitive pricing.
  3. Understand Warranty Coverage: If your garage door or its components are under warranty, be sure to understand what is and isn’t covered to minimize out-of-pocket expenses.
  4. Emergency Funds: Set aside a budget for unexpected garage door repairs in your home maintenance budget.
  5. Proactive Repairs: Address minor issues promptly to prevent them from escalating into more expensive problems.

In conclusion, as per Trophy Club Overhead & Garage Doors, the average cost of garage door repair services can vary depending on several factors. While these expenses may seem burdensome, it’s important to consider the value of a well-functioning garage door in terms of security, convenience, and property value. Taking a proactive approach to maintenance and addressing issues promptly can help you save money in the long run and ensure the continued reliability of your garage door.

Trophy Club Overhead & Garage Doors

2412 Trophy Club Dr, Trophy Club, TX 76262, United States

817-646-5315

Garage Door Opener Technology Trends: What’s New? – Arlington Overhead & Garage Doors

As a homeowner who values both security and convenience, I’m always on the lookout for the latest advancements in home technology. Recently, I turned my attention to the world of garage door openers and discovered a host of exciting trends and innovations that are reshaping how we interact with this essential home feature.

In this article, I’ll share my fascination with the cutting-edge garage door opener technology trends that are making waves in the industry. From smart connectivity to enhanced safety features, these innovations are not only practical but also promise to elevate the way we use and manage our garages as stated in Arlington Overhead & Garage Doors.

  1. Smart Garage Door Openers

One of the most significant and game-changing trends in garage door opener technology is the rise of smart garage door openers. These devices bring connectivity and remote control to a whole new level.

My Experience: I recently upgraded to a smart garage door opener, and it has transformed how I interact with my garage. With a smartphone app, I can open and close my garage door from anywhere. This level of control is incredibly convenient, especially when I need to grant access to family members or delivery personnel while I’m not at home. Additionally, I receive real-time alerts on my phone, notifying me whenever the garage door is opened or closed, enhancing security.

Key Benefits:

  • Remote control via smartphone apps.
  • Integration with virtual assistants like Amazon Alexa and Google Assistant.
  • Real-time notifications for added security.
  • Convenient access management for family and guests.
  1. Battery Backup Systems

Power outages can be a major inconvenience, and they often leave us unable to access our garages. To address this issue, many modern garage door openers come equipped with battery backup systems.

My Experience: I live in an area prone to power outages, so having a garage door opener with a battery backup has been a game-changer. During an outage, the backup system automatically kicks in, allowing me to open and close the garage door as usual. This feature has proven invaluable in maintaining access to my garage, even when the electricity is down.

Key Benefits:

  • Continued functionality during power outages.
  • Peace of mind knowing you can access your garage in emergencies.
  • Battery backup systems recharge automatically when the power is restored.
  1. Improved Safety Sensors

Safety is paramount when it comes to garage doors, and the latest technology trends focus on enhancing safety through advanced sensors and features.

My Experience: My new garage door opener comes with improved safety sensors that detect any obstructions in the door’s path. If an object or person is detected while the door is closing, it automatically reverses direction. This added layer of safety is particularly reassuring when my children are playing near the garage.

Key Benefits:

  • Enhanced safety features to prevent accidents.
  • Sensors that detect obstructions and reverse door movement.
  • Photoelectric eyes that provide an additional safety layer.
  1. Quiet and Smooth Operation

Modern garage door openers are designed with quieter and smoother operation in mind. This is a significant improvement, especially if your garage is attached to your living space.

My Experience: The whisper-quiet operation of my new garage door opener has been a pleasant surprise. No more waking up the family with noisy garage door movements during early morning departures. This trend towards quieter operation ensures a more peaceful living environment.

Key Benefits:

  • Reduced noise levels for quieter operation.
  • Smooth and vibration-free movement.
  • Enhanced durability due to reduced wear and tear.
  1. Advanced Security Features

As security concerns continue to grow, garage door opener manufacturers are incorporating advanced security features to protect against unauthorized access.

My Experience: My new garage door opener features rolling code technology, which changes the access code every time the door is operated. This prevents code grabbing by potential intruders and ensures that only authorized users can open the garage door.

Key Benefits:

  • Rolling code technology for enhanced security.
  • Encryption and secure communication protocols.
  • Secure access management and authorization controls.
  1. Energy Efficiency

In an era of increased environmental awareness, energy efficiency is a growing trend in garage door opener technology.

My Experience: My energy-efficient garage door opener uses less power, reducing my energy consumption and utility bills. It also incorporates LED lighting, which is not only energy-efficient but also provides bright and efficient illumination in the garage.

Key Benefits:

  • Reduced energy consumption.
  • LED lighting for improved visibility and efficiency.
  • Environmental benefits and cost savings.
  1. Integration with Smart Home Systems

The trend of garage door openers integrating seamlessly with smart home systems is gaining momentum.

My Experience: I’ve integrated my smart garage door opener with my home automation system. This means that I can control my garage door along with other smart devices in my home, all from a single app or voice command. It’s a convenient and efficient way to manage my entire home.

Key Benefits:

  • Centralized control of smart home devices.
  • Integration with popular smart home ecosystems.
  • Streamlined home automation and convenience.
  1. DIY-Friendly Installation

Garage door opener manufacturers are making installation more accessible to homeowners, with user-friendly DIY options.

My Experience: When I upgraded to a new garage door opener, I was pleasantly surprised by the user-friendly installation instructions. The step-by-step guides and instructional videos provided by the manufacturer made the installation process smooth and manageable, even for someone with limited DIY experience.

Key Benefits:

  • Simplified DIY installation options.
  • User-friendly guides and resources.
  • Cost savings by avoiding professional installation fees.

Conclusion

According to Arlington Overhead & Garage Doors, the world of garage door opener technology is evolving rapidly, with innovations that prioritize convenience, safety, and security. My own experiences with these trends have shown me the tangible benefits they bring to everyday life. Whether it’s the convenience of a smart garage door opener, the security of advanced safety sensors, or the peace of mind provided by battery backup systems, these technologies are transforming our garages into smarter, safer, and more efficient spaces. As a homeowner, I’m excited to see where future advancements in garage door opener technology will take us and how they will continue to enhance our lives.

Arlington Overhead & Garage Doors

700 Secretary Dr, Arlington, TX 76015, United States

817-646-2532

How To Reconnect Garage Door Chain – Lake Arlington Gates & Garage Doors

A Garage Door Repair Arlington TX plays a pivotal role in the operation of your garage door. Over time, it may become disconnected due to various reasons like wear and tear or improper maintenance.

Reconnecting the garage door chain is a manageable task that you can tackle on your own, saving both time and money. In this comprehensive guide, we will walk you through the process step by step, ensuring a successful reconnection.

Tools and Materials Needed:

Before you begin, gather the necessary tools and materials:

  1. Adjustable wrench
  2. Screwdriver (flathead and Phillips)
  3. Pliers
  4. Safety glasses
  5. Lubricating oil
  6. Replacement chain (if needed)

Safety Precautions:

Safety should be your top priority when working on any garage door components. Follow these precautions:

  1. Ensure the garage door is fully closed.
  2. Disconnect the power supply to the garage door opener.
  3. Wear safety glasses to protect your eyes from debris.
  4. Keep your hands and fingers away from moving parts.
  5. If in doubt, consult a professional technician.

: Inspect the Chain:

Start by visually inspecting the garage door chain. Look for any signs of damage, excessive rust, or wear. If the chain is severely damaged or worn, it’s advisable to replace it to ensure long-term functionality.

: Locate the Chain Ends:

Identify the two ends of the garage door chain. One end is attached to the trolley on the garage door opener, and the other end is connected to the door itself. The disconnected end may be hanging freely.

: Realign the Ends:

Use your pliers to grip the disconnected end of the chain. Carefully align it with the sprocket on the trolley attached to the garage door opener.

: Reconnect the Chain:

With the chain aligned with the sprocket, use your adjustable wrench to tighten the chain around the sprocket securely. Ensure it is snug but not overly tight. You should be able to move the chain slightly.

: Test the Connection:

Manually move the garage door up and down a few times to test the connection. Ensure that the chain moves smoothly and doesn’t bind or skip on the sprocket.

: Lubricate the Chain:

Apply lubricating oil to the entire length of the chain. Proper lubrication reduces friction and extends the life of the chain.

: Adjust Chain Tension (If Needed):

If the chain appears too loose or too tight during testing, use your adjustable wrench to adjust the tension. A well-tensioned chain should have about 1/4 inch of slack when you push or pull it at the midpoint.

: Reconnect the Power:

Once you are satisfied with the chain’s tension and operation, reconnect the power to the garage door opener.

: Test the Garage Door:

Operate the garage door using the opener to ensure that it opens and closes smoothly without any issues.

: Final Inspection:

Give the entire system one last visual inspection to make sure there are no loose bolts, nuts, or other components. Ensure that the chain is secure and properly aligned with the sprocket.

Conclusion:

Reconnecting a Garage Door Repair Arlington TX is a straightforward process that can be completed with basic tools and some patience. Regular maintenance and lubrication of the chain can help prevent future disconnections. However, if you encounter any difficulties or are unsure about any step, it’s always a good idea to consult a professional garage door technician for assistance. By following this guide and prioritizing safety, you can ensure your garage door functions smoothly for years to come.

Lake Arlington Gates & Garage Doors

4101 W Green Oaks Blvd #305-318, Arlington, TX 76016, United States

1-817-993-6623

How To Program Garage Door Remote Clicker Overhead Door – Trophy Club Overhead & Garage Doors

Programming a Garage Door Repair Trophy Club TX for an overhead door can vary depending on the specific model and brand of the garage door opener.

I’ll provide you with a general guide that covers the most common steps involved in programming a garage door remote clicker. Please consult your garage door opener’s manual for model-specific instructions, and ensure you follow all safety precautions.

: Gather Materials

Before you begin, make sure you have the following materials:

  1. Garage door remote clicker (new or existing).
  2. Ladder (if needed to reach the garage door opener).
  3. The garage door opener’s instruction manual.

: Access the Garage Door Opener

If your garage door opener has a cover or panel, remove it to access the programming buttons or switches. These buttons are typically located on the back or side of the opener motor unit.

: Clear Existing Codes (if necessary)

If you’re programming a new remote or need to reset the existing codes, look for a “Learn” or “Reset” button on the opener motor unit. Press and hold this button until the indicator light blinks or changes color, usually for about 10 seconds. This clears all previously programmed remote codes.

: Program the Remote

Now, it’s time to program the remote:

  1. Locate the “Program” or “Learn” button on the garage door opener motor unit. This button is usually near the antenna wire.
  2. Press and release the “Program” or “Learn” button. The indicator light should light up, indicating that the opener is in programming mode. You typically have about 30 seconds to complete the next steps.
  3. On your remote, press and hold the button you want to use to operate the garage door. Hold it until the indicator light on the opener flashes or changes, which indicates that the remote’s code has been accepted. This might take a few seconds.

: Test the Remote

After programming the remote, test it to ensure it operates the garage door correctly. Stand clear of the door’s path in case it doesn’t work as expected.

: Repeat (if necessary)

If you have multiple remotes to program, repeat Step 4 for each one within the allotted time.

: Replace Cover and Cleanup

Once all remotes are programmed and tested successfully, replace any covers or panels you removed from the garage door opener.

: Additional Features (if applicable)

Some garage door openers have advanced features like setting the remote’s range or enabling vacation mode. Refer to your garage door opener’s manual for information on these features.

Remember to follow all safety precautions, especially when testing the remote. Make sure no one is in the path of the closing garage door during testing, and always keep the remote out of reach of children.

Keep your Garage Door Repair Trophy Club TX manual handy for future reference and troubleshooting. If you encounter difficulties or your specific model has unique programming instructions, consult the manual or contact the manufacturer’s customer support for assistance.

Trophy Club Overhead & Garage Doors

2412 Trophy Club Dr, Trophy Club, TX 76262, United States

1-817-646-5315

How To Build Garage Doors – Kokomo Overhead & Garage Doors

Garage Door Repair Kokomo IN serve as an essential component of any home, providing security, convenience, and aesthetics. Whether you’re a homeowner looking to replace an old garage door or a DIY enthusiast eager to take on a challenging project, building your garage doors can be a rewarding endeavor.

In this comprehensive guide, we will take you through the step-by-step process of building garage doors from scratch. From planning and materials selection to construction and installation, we’ll cover everything you need to know to create durable and functional garage doors that enhance the curb appeal of your home.

I. Planning and Design:

  1. Measurements and Requirements: Begin by accurately measuring the dimensions of your garage opening. Consider factors such as height, width, and clearance requirements for your vehicles and any additional features like windows or insulation.
  2. Style and Design: Choose a garage door style that complements your home’s architecture. Options include traditional raised-panel, modern flush, or carriage house designs. Decide on the materials you’ll use, such as wood, steel, or aluminum.
  3. Insulation and Energy Efficiency: Depending on your climate, consider adding insulation to your garage doors for improved energy efficiency. This step is crucial if your garage is connected to your home.

II. Materials and Tools:

  1. Materials: Gather all the necessary materials, including the selected door panels, tracks, springs, hinges, rollers, and fasteners. Ensure that the materials are of high quality to ensure the durability of your garage doors.
  2. Tools: You’ll need a variety of tools, including a saw, drill, screwdriver, wrenches, and a level. Safety equipment like gloves, safety glasses, and ear protection is also essential.

III. Building the Frame:

  1. Frame Construction: Begin by constructing a sturdy frame to support the garage door. Typically, this frame is made from pressure-treated lumber and should match the dimensions of your garage opening.
  2. Header Installation: Install a header above the opening to distribute the door’s weight evenly. Properly secure the header to the framing.

IV. Assembling the Door Panels:

  1. Panel Assembly: Assemble the door panels according to the manufacturer’s instructions. Attach hinges and reinforcement struts as needed.
  2. Track and Spring Installation: Install the vertical and horizontal tracks on the frame. Next, mount the torsion or extension springs, ensuring they are properly tensioned for safe operation.

V. Finishing and Painting:

  1. Surface Preparation: Sand and prepare the door panels for painting or staining. Fill any imperfections and ensure a smooth surface.
  2. Paint or Stain: Apply a high-quality paint or stain to protect the wood and enhance the door’s appearance. Multiple coats may be necessary for optimal coverage.

VI. Installation:

  1. Hang the Door: With the help of a friend or a professional, carefully hang the door on the tracks, making sure it is level and aligned correctly.
  2. Test and Adjust: Test the door’s operation and adjust the springs and track alignment as needed for smooth, balanced movement.

Conclusion:

Building your Garage Door Repair Kokomo IN can be a challenging but rewarding DIY project. By following this comprehensive guide, you can create customized garage doors that not only enhance the functionality and security of your home but also add to its aesthetic appeal. Remember to prioritize safety and quality throughout the construction process for long-lasting results.

Kokomo Overhead & Garage Doors

1910 Valerie Ct, Kokomo, IN 46902, United States

1-765-945-2524

How Do I Program My Liftmaster Garage Door Opener – Arlington Overhead & Garage Doors

Programming a LiftMaster Garage Door Repair Arlington TX can vary depending on the model and type of opener you have.

However, I’ll provide you with a general guide that should work for most LiftMaster garage door openers. Please consult your opener’s user manual or LiftMaster’s official website for specific instructions for your model if needed.

Before you begin, here are a few important notes:

  1. Safety First: Ensure that your garage door is in good working condition and properly balanced before programming your opener. If your door is not balanced, it could cause damage or become a safety hazard.
  2. Clear the Memory: If you are reprogramming your opener, it’s a good practice to clear the memory of the opener first to remove any existing codes. Consult your user manual for instructions on how to do this.
  3. Remote Control: You will need a working remote control or a wireless keypad to program your opener. Make sure the remote control’s battery is in good condition.
  4. Find the Learn Button: Locate the “Learn” or “Program” button on your garage door opener motor unit. This button is typically colored and could be green, red, orange, or purple, depending on your model.

Now, let’s proceed with programming your LiftMaster garage door opener:

: Clear Existing Codes (if needed)

If you are reprogramming your opener or if it’s a new installation, clear any existing codes by pressing and holding the “Learn” or “Program” button on the opener for about 10 seconds until the indicator light next to the button goes off.

: Program the Remote Control

  • Stand within a few feet of the garage door opener.
  • Press the “Learn” or “Program” button on the opener. The indicator light will come on.
  • Within 30 seconds, press the button on your remote control that you want to program. Hold it until the indicator light on the opener flashes or clicks.
  • Release the button on the remote control. The opener should now recognize and store the remote’s code. Test the remote to ensure it operates the door.

: Program the Wireless Keypad (if applicable)

  • If you have a wireless keypad, you’ll need to program it next. The process is similar to programming a remote control.
  • Find the “Learn” or “Program” button on the opener and press it.
  • Enter your desired PIN on the keypad and then press the “Enter” or “Send” button.
  • The opener should acknowledge the keypad by flashing or clicking. Test the keypad by entering your PIN followed by the “Enter” or “Send” button.

: Test the Opener

  • Ensure that everything is working as expected. Test the remote control and keypad, and make sure the door opens and closes properly.

Additional Tips:

  • To program additional remotes or keypads, repeat the steps above for each one.
  • If you experience issues, consult your user manual or LiftMaster’s customer support for troubleshooting guidance.
  • Keep the remote controls and keypads in a secure location to prevent unauthorized access.

Remember that this is a general guide, and the exact steps may vary based on your specific LiftMaster Garage Door Repair Arlington TX model. Always consult your user manual for model-specific instructions if available.

Arlington Overhead & Garage Doors

700 Secretary Dr, Arlington, TX 76015, United States

1-817-646-2532

Garage Door Hinge Replacement: Expert Tips and Services – Bedford Gates & Garage Doors

As a homeowner who has faced various garage door issues over the years, I’ve learned that proper maintenance and occasional replacements are essential to ensure the longevity and functionality of this critical household feature. One aspect of garage door maintenance that often goes overlooked is hinge replacement.

In this article, I’ll share the importance of garage door hinge replacement, along with expert tips and services I’ve encountered along the way as stated in Bedford Gates & Garage Doors.

1. The Unsung Heroes: Garage Door Hinges

Before delving into the world of garage door hinge replacement, it’s essential to understand the role these seemingly small components play in the overall functionality of your garage door. Hinges are the joints that allow your door panels to pivot smoothly during opening and closing. Over time, wear and tear can cause hinges to deteriorate, leading to various problems.

My Experience: I once neglected to address squeaky and rusted hinges on my garage door, thinking they were minor issues. However, these seemingly insignificant problems soon escalated into more significant malfunctions.

2. Signs Your Hinges Need Replacement

Recognizing the signs that your garage door hinges require replacement is the first step toward ensuring the continued smooth operation of your door. Common signs include:

  • Squeaking or Grinding Noises: If your garage door produces loud, unpleasant noises when opening or closing, it’s a sign that the hinges may be deteriorating.
  • Rust or Corrosion: Rust and corrosion on the hinges not only affect their appearance but can also weaken their structural integrity.
  • Difficulty in Opening or Closing: If your garage door is becoming increasingly difficult to open or close, it may be due to worn-out hinges hindering the smooth movement of the door panels.
  • Visible Damage: Inspect your hinges for visible signs of damage, such as cracks, bends, or missing parts.

Expert Tip: According to the garage door expert I consulted, regular visual inspections of your hinges are crucial to catch early signs of wear and damage. Prompt replacement can prevent more extensive and costly issues.

My Experience: After noticing persistent squeaking and rust on my garage door hinges, I decided to seek professional advice and explore the option of hinge replacement.

3. DIY vs. Professional Replacement

Once you’ve identified the need for hinge replacement, you’ll face the decision of whether to tackle the task yourself or hire a professional. While some homeowners may possess the skills and tools necessary for a DIY replacement, it’s essential to weigh the pros and cons carefully.

Expert Tip: The garage door expert emphasized that hinge replacement is not a task to be taken lightly. While some homeowners may have the skills, it often requires specialized tools and knowledge of the specific hinge type and placement. DIY attempts can lead to further damage or misalignment of the door.

My Experience: I initially considered a DIY approach but soon realized that the precision required for hinge replacement was beyond my capabilities. I opted for professional assistance to ensure the job was done correctly.

4. The Role of Professional Garage Door Services

Engaging the services of a professional garage door technician can provide several advantages when it comes to hinge replacement:

  • Expertise: Experienced technicians possess in-depth knowledge of various hinge types and their compatibility with specific garage door models. They can accurately identify the hinges that need replacement and ensure proper installation.
  • Specialized Tools: Professionals have access to specialized tools and equipment designed for garage door maintenance and repairs. These tools allow for precise hinge removal and installation.
  • Safety: Garage door work can be hazardous, especially when dealing with heavy components like door panels and hinges. Professionals are trained in safety protocols to minimize the risk of accidents.
  • Efficiency: A skilled technician can complete hinge replacement efficiently, reducing downtime for your garage door and minimizing inconvenience.
  • Preventive Maintenance: In addition to hinge replacement, professionals often conduct a thorough inspection of the entire door system. They can identify other potential issues and address them before they escalate.

My Experience: When I enlisted the services of a professional garage door technician for hinge replacement, I was impressed by their efficiency and attention to detail. They also identified and addressed a minor issue with one of the cables, preventing a potential future problem.

5. Choosing the Right Hinges

Selecting the right hinges for your garage door is a critical aspect of the replacement process. Hinges come in various types and materials, and choosing the appropriate ones depends on factors such as the door’s weight and design.

Expert Tip: The garage door expert stressed the importance of selecting hinges that are compatible with your specific garage door model. Using the wrong hinges can lead to improper alignment and further issues.

My Experience: I relied on the expertise of the technician to choose the correct hinges for my garage door. They took into account the weight and design of the door to ensure a proper fit.

6. The Hinge Replacement Process

The hinge replacement process involves several steps, and professional technicians follow a systematic approach to ensure a successful replacement:

  • Inspection: The technician begins by inspecting the entire garage door system to identify the hinges that require replacement.
  • Removal: Old or damaged hinges are carefully removed from the door panels and the frame.
  • Cleaning: The technician cleans the hinge mounting areas, removing any debris or residue.
  • Installation: New hinges are securely installed, ensuring proper alignment and smooth movement.
  • Lubrication: The technician applies lubrication to the hinges to reduce friction and prevent future issues.
  • Testing: The garage door is tested to ensure it opens and closes smoothly without any issues.

Expert Tip: A thorough inspection and testing process is essential to verify that the replacement has been successful. Professionals pay close attention to the door’s balance and alignment.

My Experience: Watching the technician go through each step of the replacement process gave me confidence that the job was being done correctly. The garage door operated noticeably smoother after the hinge replacement.

7. Maintenance and Longevity

Once the hinges have been replaced, it’s crucial to follow a regular maintenance schedule to extend their longevity. Proper lubrication and periodic inspections can help prevent premature wear and damage.

Expert Tip: The garage door expert advised scheduling annual maintenance checks with a professional technician to ensure that the hinges and the entire door system are in good condition.

My Experience: I now follow a maintenance routine that includes regular lubrication and visual inspections of the hinges. It’s a small investment of time that pays off in the long run by prolonging the life of my garage door.

In summary, as stated in Bedford Gates & Garage Doors, garage door hinge replacement is a critical aspect of maintaining the functionality and longevity of your garage door. While it may seem like a minor task, the hinges play a vital role in the smooth operation of the door. Seeking the expertise of a professional technician not only ensures that the replacement is done correctly but also provides the peace of mind that your garage door will continue to operate smoothly and safely. Regular inspections and maintenance further contribute to the longevity of the hinges and the overall performance of your garage door, making it a worthwhile investment in your home’s maintenance.

Bedford Gates & Garage Doors

2201 Harwood Rd, Bedford, TX 76021, United States

817-886-3064

Garage Door Cable Repair: Why It’s a Dangerous Job for Amateurs? – Springtown Gates & Garage Doors

As a homeowner, I’ve always been a bit of a DIY enthusiast. There’s a certain satisfaction that comes from tackling home improvement projects on my own, from painting walls to fixing leaky faucets. However, through my journey of homeownership, I’ve also learned that not all tasks around the house should be approached with a DIY mindset, especially when it comes to garage door cable repair.

By following Springtown Gates & Garage Doors, I’ll share why garage door cable repair is a dangerous job for amateurs like me.

The Crucial Role of Garage Door Cables

Before delving into the reasons behind the risks associated with garage door cable repair, it’s essential to understand the critical role that these cables play in the operation of a garage door. Garage door cables are responsible for supporting the weight of the door and ensuring its smooth and balanced movement.

Most garage doors use either torsion or extension springs in combination with cables. Torsion springs wind and unwind to provide the necessary force for lifting and lowering the door, while extension springs stretch and contract to counterbalance the door’s weight. Garage door cables are attached to these springs and are vital in distributing the tension and weight evenly, allowing for controlled and safe operation.

Reasons Why Garage Door Cable Repair Is Dangerous for Amateurs:

1. High Tension and Force

One of the primary reasons why garage door cable repair is perilous for amateurs is the incredibly high tension and force involved in these systems. Garage door cables are under immense pressure, especially when connected to torsion springs. Attempting to repair or replace cables without the proper knowledge and tools can result in severe injury.

My Experience: Early in my homeownership journey, I attempted to replace a frayed garage door cable without understanding the full extent of the tension involved. The moment I loosened the cable, it snapped with a loud bang, narrowly missing my head. The force was enough to leave a lasting impression of the risks involved.

2. Inadequate Knowledge and Training

Garage door cable systems are complex and require a deep understanding of their mechanics. Amateurs like myself may not have the necessary knowledge to assess the condition of cables accurately, identify potential issues, or perform repairs safely.

My Experience: In my initial attempts at DIY garage door cable repair, I failed to recognize the early signs of cable wear and tension problems. This lack of knowledge led to ineffective repairs and, in some cases, further damage to the cables and springs.

3. Incorrect Cable Installation

Proper cable installation is crucial for the safe and reliable operation of a garage door. Amateurs may struggle with ensuring the cables are correctly positioned, attached, and tensioned. Incorrect installation can result in unbalanced door movement or cable failure, posing significant risks.

My Experience: Once, I attempted to reattach a loose cable without understanding the precise positioning required. My attempts at securing the cable inadequately resulted in the door shifting off balance, which could have led to further damage or accidents.

4. Safety Hazards

Garage door cable repair involves working with heavy components and tools. Amateurs may underestimate the safety hazards associated with handling these materials and may not take the necessary precautions to protect themselves from accidents.

My Experience: I recall a situation where I didn’t secure the ladder properly while attempting a garage door cable repair. The ladder slipped, causing me to lose balance and fall. Fortunately, the fall resulted in minor injuries, but it could have been much worse.

5. Risk of Damaging Other Components

Attempting garage door cable repair without the requisite expertise can lead to unintended consequences. Amateurs may inadvertently damage other critical components of the garage door system, such as the springs, tracks, or rollers, which can result in more extensive and costly repairs.

My Experience: In one instance, my attempts at cable repair led to misalignment of the tracks. This caused the garage door to repeatedly get stuck, requiring professional intervention to correct the issue.

6. Lack of Proper Tools and Equipment

Professional technicians have access to specialized tools and equipment designed for safe and effective garage door cable repair. Amateurs may not possess the required tools or might use inadequate makeshift solutions, increasing the likelihood of accidents.

My Experience: I once attempted to replace a garage door cable using a pair of pliers and a makeshift tool. The lack of proper equipment made the task significantly more challenging and less safe.

7. Insurance and Liability Concerns

In the event of an accident or injury resulting from amateur garage door cable repair, there may be insurance and liability implications. Homeowners may find themselves facing medical bills or property damage costs, which could have been avoided by hiring a professional technician.

My Experience: Fortunately, I never experienced a severe injury while attempting garage door cable repair. However, the potential liability and insurance concerns always loomed in the back of my mind, causing unnecessary stress.

Conclusion

A stated in Springtown Gates & Garage Doors and through my experiences as a homeowner, I’ve learned that garage door cable repair is a dangerous job for amateurs. The high tension and force involved, coupled with the lack of knowledge, inadequate tools, and potential for accidents, make it a task best left to professionals.

While I appreciate the satisfaction that comes from DIY projects around the house, I’ve come to understand that safety should always be a top priority. When it comes to garage door cable repair, I now recognize the value of hiring experienced and trained technicians who have the expertise, knowledge, and proper equipment to perform these tasks safely and effectively. By doing so, I not only protect my own well-being but also ensure the reliable and secure operation of one of the most crucial components of my home.

Springtown Gates & Garage Doors

104 Adalida Ln, Springtown, TX 76082, United States

817-631-1036

How to Reset a Garage Door Opener After a Power Outage – Anderson Gates & Garage Doors

As a homeowner who has experienced my fair share of power outages, I’ve come to realize that even the most reliable garage door openers can become temporarily disabled when the electricity goes out. It’s a situation that can be quite frustrating, especially when you’re in a hurry or facing unfavorable weather conditions.

Over time, I’ve learned how to reset a garage door opener after a power outage, and I’m excited to share the step-by-step guide to help you tackle this common issue as stated in Anderson Gates & Garage Doors.

The Frustration of a Power Outage

Picture this: a sudden power outage plunges your home into darkness, and the familiar hum of your appliances comes to an abrupt halt. While you may be prepared with flashlights and candles, there’s one unexpected inconvenience that often catches homeowners off guard – the garage door opener no longer functions.

During a power outage, your garage door opener becomes disconnected from its power source, and it loses its programmed settings. As a result, you can’t use the remote control or the wall-mounted keypad to operate the door. However, resetting the garage door opener is a manageable task that can save you time and frustration.

Step 1: Ensure Safety

Before you begin the process of resetting your garage door opener, it’s crucial to prioritize safety:

  • Unplug the Opener: If the power outage is due to a storm or other natural disaster, unplug the garage door opener from its electrical outlet to prevent damage from power surges when the electricity returns.
  • Disable the Door: To avoid any accidents, ensure that the garage door is fully closed. If it’s partially open, you can manually close it by pulling the emergency release cord (usually a red cord hanging from the opener’s trolley). Gently pull the cord down and away from the door, allowing you to close the door manually.

Step 2: Locate the Opener’s Reset Button

Most modern garage door openers are equipped with a reset button, often referred to as a “learn” or “program” button. The location of this button may vary depending on the manufacturer and model of your opener, but it is typically found on the back or side of the motor unit.

  • Check the Motor Unit: Stand directly beneath the garage door opener motor unit and look for a small button. It’s usually colored and may be labeled “Learn,” “Program,” or “Set.”
  • Refer to the Manual: If you have difficulty locating the reset button, consult your garage door opener’s manual. The manual will provide clear instructions on where to find the button and how to reset the opener.

Step 3: Press and Release the Reset Button

With the reset button located, follow these steps:

  1. Press the Button: Using your finger or a small tool, press and hold down the reset button. Keep it held down for a few seconds until you notice a change in the indicator lights on the opener. Typically, the indicator light will either start flashing or change color to indicate that the opener is in “programming” mode.
  2. Release the Button: After holding the reset button down, release it. The indicator light should now be steady, indicating that the opener is ready to receive new programming.

Step 4: Reprogram the Remote Control

After successfully entering programming mode, it’s time to reprogram your remote control. This step may vary depending on the type of remote you have:

  • Standard Remote Control: For a standard remote control, press and hold the button you want to use to open the garage door. Hold it down until the indicator light on the opener blinks or changes color, usually within 30 seconds.
  • Keyless Entry Keypad: If you have a wall-mounted keypad for keyless entry, enter your desired PIN code and press the “Enter” or “OK” button. The opener’s indicator light should again blink or change color to confirm successful programming.
  • Homelink System (In-Car Remote): For in-car remote systems like Homelink, refer to your vehicle’s owner’s manual for specific instructions on how to reprogram the opener with your vehicle.

Step 5: Test the Garage Door Opener

After reprogramming the remote control or keypad, it’s time to test the garage door opener:

  • Press the Remote Button: Stand a few feet away from the garage door opener and press the newly programmed button on your remote control. The door should respond by opening or closing.
  • Test the Keypad: If you have a wall-mounted keypad, enter your PIN code and press the “Enter” or “OK” button to operate the door. Verify that it opens or closes as expected.
  • Check Homelink (In-Car Remote): If you’ve reprogrammed an in-car remote system, test it from inside your vehicle to ensure it operates the garage door opener correctly.

Step 6: Reconnect the Garage Door Opener

With the garage door opener successfully reset and reprogrammed, it’s time to reconnect it to its power source:

  • Plug It In: If you unplugged the garage door opener during the power outage, plug it back into its electrical outlet. Ensure that the outlet is functioning correctly and providing power.

Step 7: Restore the Door to Automatic Operation

After reconnecting the opener, you can restore the garage door to automatic operation:

  • Activate Automatic Mode: Locate the emergency release cord that you used to manually close the door earlier. Gently pull the cord down and away from the door, allowing the opener to re-engage with the door’s mechanism. You may hear a click or notice that the trolley reattaches to the opener’s carriage.
  • Test the Automatic Operation: Using your remote control or wall-mounted keypad, open and close the garage door a few times to ensure that it operates automatically and smoothly.

Step 8: Regular Maintenance and Preparedness

Power outages are often unpredictable, and they can happen at any time. To ensure that your garage door opener remains reliable and functional during such events, consider these maintenance and preparedness tips:

  • Battery Backup: Some garage door openers come with battery backup systems that allow them to operate during power outages. If your opener doesn’t have this feature, you may want to consider upgrading to a model that does.
  • Regular Battery Replacement: If your remote control uses batteries, make it a habit to replace them regularly to ensure that the remote remains operational when needed.
  • Practice Manual Operation: Familiarize yourself with the manual operation of your garage door. This will come in handy during power outages or if your opener experiences a malfunction.
  • Emergency Release Cord: Keep the emergency release cord accessible and in good condition. Ensure that it’s not tangled or obstructed in any way.

Conclusion

Dealing with a garage door opener that has been reset due to a power outage may seem daunting at first, but with the right steps and a bit of patience, it’s a manageable task. By following this step-by-step guide, you can quickly reset your garage door opener, reprogram your remote control or keypad, and restore the door to automatic operation. Remember to prioritize safety throughout the process, and be prepared for future power outages with battery backups and regular maintenance. With these precautions in place, you can ensure that your garage door opener remains reliable and ready to serve you, even in challenging situations.

As a homeowner who has experienced my fair share of power outages, I’ve come to realize that even the most reliable garage door openers can become temporarily disabled when the electricity goes out. It’s a situation that can be quite frustrating, especially when you’re in a hurry or facing unfavorable weather conditions. Over time, I’ve learned how to reset a garage door opener after a power outage, and I’m excited to share my first-person perspective and step-by-step guide to help you tackle this common issue.

The Frustration of a Power Outage

Picture this: a sudden power outage plunges your home into darkness, and the familiar hum of your appliances comes to an abrupt halt. While you may be prepared with flashlights and candles, there’s one unexpected inconvenience that often catches homeowners off guard – the garage door opener no longer functions.

During a power outage, your garage door opener becomes disconnected from its power source, and it loses its programmed settings. As a result, you can’t use the remote control or the wall-mounted keypad to operate the door. However, resetting the garage door opener is a manageable task that can save you time and frustration.

Step 1: Ensure Safety

Before you begin the process of resetting your garage door opener, it’s crucial to prioritize safety:

  • Unplug the Opener: If the power outage is due to a storm or other natural disaster, unplug the garage door opener from its electrical outlet to prevent damage from power surges when the electricity returns.
  • Disable the Door: To avoid any accidents, ensure that the garage door is fully closed. If it’s partially open, you can manually close it by pulling the emergency release cord (usually a red cord hanging from the opener’s trolley). Gently pull the cord down and away from the door, allowing you to close the door manually.

Step 2: Locate the Opener’s Reset Button

Most modern garage door openers are equipped with a reset button, often referred to as a “learn” or “program” button. The location of this button may vary depending on the manufacturer and model of your opener, but it is typically found on the back or side of the motor unit.

  • Check the Motor Unit: Stand directly beneath the garage door opener motor unit and look for a small button. It’s usually colored and may be labeled “Learn,” “Program,” or “Set.”
  • Refer to the Manual: If you have difficulty locating the reset button, consult your garage door opener’s manual. The manual will provide clear instructions on where to find the button and how to reset the opener.

Step 3: Press and Release the Reset Button

With the reset button located, follow these steps:

  1. Press the Button: Using your finger or a small tool, press and hold down the reset button. Keep it held down for a few seconds until you notice a change in the indicator lights on the opener. Typically, the indicator light will either start flashing or change color to indicate that the opener is in “programming” mode.
  2. Release the Button: After holding the reset button down, release it. The indicator light should now be steady, indicating that the opener is ready to receive new programming.

Step 4: Reprogram the Remote Control

After successfully entering programming mode, it’s time to reprogram your remote control. This step may vary depending on the type of remote you have:

  • Standard Remote Control: For a standard remote control, press and hold the button you want to use to open the garage door. Hold it down until the indicator light on the opener blinks or changes color, usually within 30 seconds.
  • Keyless Entry Keypad: If you have a wall-mounted keypad for keyless entry, enter your desired PIN code and press the “Enter” or “OK” button. The opener’s indicator light should again blink or change color to confirm successful programming.
  • Homelink System (In-Car Remote): For in-car remote systems like Homelink, refer to your vehicle’s owner’s manual for specific instructions on how to reprogram the opener with your vehicle.

Step 5: Test the Garage Door Opener

After reprogramming the remote control or keypad, it’s time to test the garage door opener:

  • Press the Remote Button: Stand a few feet away from the garage door opener and press the newly programmed button on your remote control. The door should respond by opening or closing.
  • Test the Keypad: If you have a wall-mounted keypad, enter your PIN code and press the “Enter” or “OK” button to operate the door. Verify that it opens or closes as expected.
  • Check Homelink (In-Car Remote): If you’ve reprogrammed an in-car remote system, test it from inside your vehicle to ensure it operates the garage door opener correctly.

Step 6: Reconnect the Garage Door Opener

With the garage door opener successfully reset and reprogrammed, it’s time to reconnect it to its power source:

  • Plug It In: If you unplugged the garage door opener during the power outage, plug it back into its electrical outlet. Ensure that the outlet is functioning correctly and providing power.

Step 7: Restore the Door to Automatic Operation

After reconnecting the opener, you can restore the garage door to automatic operation:

  • Activate Automatic Mode: Locate the emergency release cord that you used to manually close the door earlier. Gently pull the cord down and away from the door, allowing the opener to re-engage with the door’s mechanism. You may hear a click or notice that the trolley reattaches to the opener’s carriage.
  • Test the Automatic Operation: Using your remote control or wall-mounted keypad, open and close the garage door a few times to ensure that it operates automatically and smoothly.

Step 8: Regular Maintenance and Preparedness

Power outages are often unpredictable, and they can happen at any time. To ensure that your garage door opener remains reliable and functional during such events, consider these maintenance and preparedness tips:

  • Battery Backup: Some garage door openers come with battery backup systems that allow them to operate during power outages. If your opener doesn’t have this feature, you may want to consider upgrading to a model that does.
  • Regular Battery Replacement: If your remote control uses batteries, make it a habit to replace them regularly to ensure that the remote remains operational when needed.
  • Practice Manual Operation: Familiarize yourself with the manual operation of your garage door. This will come in handy during power outages or if your opener experiences a malfunction.
  • Emergency Release Cord: Keep the emergency release cord accessible and in good condition. Ensure that it’s not tangled or obstructed in any way.

Conclusion

Overall, based from Anderson Gates & Garage Doors, dealing with a garage door opener that has been reset due to a power outage may seem daunting at first, but with the right steps and a bit of patience, it’s a manageable task. By following this step-by-step guide, you can quickly reset your garage door opener, reprogram your remote control or keypad, and restore the door to automatic operation. Remember to prioritize safety throughout the process, and be prepared for future power outages with battery backups and regular maintenance. With these precautions in place, you can ensure that your garage door opener remains reliable and ready to serve you, even in challenging situations.

Anderson Gates & Garage Doors

2007 McKinley St, Anderson, IN 46016, United States

463-217-0904

How To Replace Rollers On Garage Door – Haslet Gates & Garage Doors

Garage Door Repair Haslet TX are a crucial component of your garage door system. Over time, they can wear out and become noisy or even malfunction, causing inconvenience and potential safety hazards.

Replacing garage door rollers is a manageable DIY project that can save you money on repair costs and improve the overall performance of your garage door. In this guide, we will provide step-by-step instructions on how to replace the rollers on a standard residential garage door.

Tools and Materials You’ll Need:

  1. New garage door rollers (nylon or steel)
  2. A ladder
  3. A socket wrench set
  4. A pair of pliers
  5. A flat-head screwdriver
  6. Safety glasses
  7. A clamp or vice grips
  8. Lubricating spray
  9. Safety gloves

: Safety First

Before you begin, ensure your safety. Wear safety glasses to protect your eyes from any debris or dust that may fall during the process. You should also wear safety gloves to safeguard your hands while working on the garage door.

: Disconnect the Opener

To prevent any accidents, disconnect the garage door opener by pulling the release cord. This will disengage the door from the opener, allowing you to operate it manually.

: Open the Door

Raise the garage door to its highest position using the manual release handle. This will give you easy access to the rollers.

: Secure the Door

To prevent the garage door from accidentally falling, clamp or use vice grips on the tracks just below the rollers you are replacing. This ensures that the door remains in place throughout the process.

: Remove the Old Rollers

Using a socket wrench, carefully loosen the nuts securing the roller brackets to the door. Once the nuts are removed, use a flat-head screwdriver to gently pry the brackets apart, releasing the old rollers.

: Replace with New Rollers

Slide the new rollers into the brackets. Make sure they are positioned correctly and that the stem of the roller fits into the track. Tighten the nuts on the brackets to secure the new rollers in place.

: Lubricate the Rollers

Apply a generous amount of lubricating spray to the new rollers. This will ensure smooth and quiet operation. Roll the door up and down a few times to distribute the lubricant evenly.

: Test the Door

Release the clamps or vice grips and manually open and close the garage door to ensure the new rollers are functioning correctly. If there are any issues, recheck the installation and make necessary adjustments.

: Reconnect the Opener

Once you are satisfied with the roller replacement and the door’s operation, reconnect the garage door opener by pulling the release cord back into position.

: Clean Up

Dispose of the old rollers properly and clean up any debris or tools in your work area. Store any remaining lubricating spray for future maintenance.

Conclusion:

Replacing Garage Door Repair Haslet TX is a manageable DIY project that can improve the performance and longevity of your garage door. By following these step-by-step instructions and taking the necessary safety precautions, you can successfully replace your garage door rollers and enjoy a quieter and smoother-operating garage door. Regular maintenance, including lubrication, will help extend the lifespan of your new rollers and ensure the continued reliability of your garage door.

Haslet Gates & Garage Doors

817-482-3394

Preventing Garage Door Opener Theft – Grapevine Gates & Garage Doors

As a homeowner, I’ve always considered safety and security to be paramount. However, it was a recent incident in my neighborhood that made me realize how vulnerable our homes can be if we don’t take the necessary precautions. It all started when a rash of garage door opener thefts occurred in our area. Intruders were breaking into cars parked in driveways and stealing garage door openers, which they then used to gain access to homes. This unsettling situation prompted me to investigate ways to prevent garage door opener theft and enhance the security of my own home.

In this article, I’ll share my insights and strategies from Grapevine Gates & Garage Doors for safeguarding your garage and, ultimately, your peace of mind.

Understanding the Risk

Garage door opener theft may seem like a relatively minor issue compared to other security concerns, but it can have serious consequences. Once thieves have your garage door opener, they have a direct route into your home, where they can potentially steal valuable possessions, compromise your safety, or even vandalize your property. To protect against this threat, it’s crucial to understand how garage door opener theft occurs and take proactive measures to prevent it.

1. Keep Your Car Secure

The first line of defense against garage door opener theft is ensuring the security of your vehicle. Thieves often break into cars to find garage door openers, as these devices are frequently left inside glove compartments or on the sun visors for convenience. To prevent this, always lock your car doors, even when it’s parked in your own driveway. Additionally, avoid leaving your garage door opener in plain sight. Consider purchasing a small lockable container or pouch specifically designed for storing the opener discreetly.

2. Upgrade to Rolling Code Technology

One of the most effective ways to prevent garage door opener theft is to invest in a modern opener with rolling code technology. This advanced feature generates a new and unique code every time you use the remote to open or close your garage door. Unlike older fixed-code openers, which can be intercepted and duplicated by tech-savvy criminals, rolling code technology makes it nearly impossible for thieves to gain unauthorized access.

Upgrading to a rolling code garage door opener is a smart investment in your home’s security. It provides peace of mind, knowing that even if your opener falls into the wrong hands, it won’t grant access to your garage or home.

3. Consider Keyless Entry

Many modern garage door openers come with keyless entry options. These systems allow you to enter a secure PIN code on a keypad located outside the garage to gain access. By using keyless entry, you can eliminate the need for a physical remote control, reducing the risk of theft. Additionally, keyless entry systems often offer the convenience of temporary PIN codes, which can be given to trusted individuals and revoked when no longer needed.

4. Secure Your Garage

Preventing garage door opener theft isn’t just about protecting the remote itself; it also involves securing your garage to deter thieves from attempting a break-in. Here are some essential steps to ensure your garage is a fortress:

  • Install a Solid Door: Choose a sturdy, solid-core door for your garage with a deadbolt lock. Reinforce the door frame to prevent it from being easily kicked in.
  • Upgrade Windows: If your garage has windows, consider reinforcing them with shatterproof film or replacing them with more secure options. This prevents potential burglars from peeking inside to spot your garage door opener.
  • Use Motion-Activated Lights: Install motion-activated lighting around your garage. These lights deter thieves and provide additional security by illuminating the area when motion is detected.
  • Install Security Cameras: Consider installing security cameras both inside and outside your garage. Modern systems can be monitored remotely, giving you real-time access to footage and the ability to respond to potential threats.

5. Educate Your Family

It’s crucial to educate your family members about the importance of garage door opener security. Make sure everyone understands the potential risks associated with leaving the opener in the car or sharing the access code. Teach them how to keep the opener secure and emphasize the need for responsible use.

6. Secure Your Car Interior

In addition to securing your car’s exterior, take steps to protect your vehicle’s interior. Thieves may also target your vehicle for valuables, including your garage door opener. Here are some tips to keep your car interior secure:

  • Use Tinted Windows: Tinted windows can obscure the view into your car’s interior, making it less tempting for thieves.
  • Hide Valuables: Never leave valuables in plain sight inside your car. This includes not only your garage door opener but also electronics, bags, and other items that may attract burglars.
  • Install an Alarm System: An alarm system can deter potential thieves and alert you to any unauthorized access or tampering with your vehicle.

7. Install a Home Security System

A comprehensive home security system can provide an additional layer of protection against garage door opener theft and home invasion. These systems often include door and window sensors, motion detectors, and 24/7 monitoring services. If someone attempts to use a stolen garage door opener to access your home, the security system can trigger an alarm, notify you, and even contact the authorities if necessary.

8. Perform Regular Maintenance

Maintaining your garage door and opener is essential to ensure they function correctly and securely. Regularly inspect the door and its components, including the opener, springs, and sensors. If you notice any issues, address them promptly to prevent vulnerabilities that burglars could exploit.

9. Secure the Emergency Release Cord

The emergency release cord in your garage can be another potential point of entry for thieves. To prevent unauthorized use of this cord, secure it with a zip tie or lock. This simple step ensures that even if someone gains access to your garage, they won’t be able to release the door manually.

10. Be Vigilant and Alert

Finally, staying vigilant and aware of your surroundings is crucial for preventing garage door opener theft. If you notice any suspicious activity in your neighborhood or see unfamiliar individuals lurking around, report it to your local authorities. Timely reporting can help prevent thefts and protect your community.

In conclusion, according to Grapevine Gates & Garage Doors, garage door opener theft is a real threat that can lead to serious security breaches and property damage. However, by taking proactive steps to secure your garage, vehicle, and remote control, you can significantly reduce the risk of falling victim to this type of crime. Investing in modern garage door opener technology, upgrading your garage’s security features, and educating your family are all essential components of a comprehensive approach to preventing garage door opener theft. By implementing these measures, you can safeguard your home, your family, and your peace of mind.

Grapevine Gates & Garage Doors

601 W Wall St, Grapevine, TX 76051, United States

817-631-6355

How Do You Reset Garage Door Sensors – Bedford Gates & Garage Doors

Resetting Garage Door Repair Bedford TX is a crucial maintenance task that ensures the safety and functionality of your garage door system. These sensors are designed to detect obstructions in the door’s path and prevent it from closing if something is in the way.

If your garage door sensors are malfunctioning or misaligned, it’s essential to reset them properly to avoid accidents and damage to your property. In this comprehensive guide, I’ll walk you through the steps to reset garage door sensors effectively.

Step 1: Safety First Before attempting to reset your garage door sensors, prioritize safety. Ensure that all objects, including vehicles, are clear of the door’s path. Disconnect the power to the garage door opener to prevent any accidental activations during the reset process. If your garage door is inoperable, do not attempt to reset it yourself. Consult a professional technician.

Step 2: Visual Inspection Start by visually inspecting your garage door sensors. Typically, there are two sensors located on either side of the door’s opening, near the floor. Each sensor consists of a transmitter (sending unit) and a receiver (receiving unit). Check for any obstructions or debris that may be blocking the sensors’ view of each other. Clean the sensors with a soft, dry cloth to remove dirt, dust, or spiderwebs that can interfere with their operation.

Step 3: Check the Sensor Alignment Proper alignment between the transmitter and receiver is crucial for the sensors to work correctly. Ensure that both sensors are facing each other and that their LED lights are on and not blinking. If one or both LEDs are blinking, it indicates a misalignment issue.

Step 4: Adjust Sensor Alignment To adjust sensor alignment:

  1. Loosen the mounting bracket or screw that holds the misaligned sensor in place.
  2. Gently move the sensor until the LED lights on both sensors are solid, not blinking.
  3. Retighten the mounting bracket or screw to secure the sensor in its corrected position.

Step 5: Test the Sensors Once the sensors are aligned correctly, it’s essential to test them to ensure they are working correctly. Reconnect the power to the garage door opener and operate the door using the opener or remote control. The door should close and then immediately reverse if an obstruction is detected. If it doesn’t reverse or still has issues, proceed to the next steps.

Step 6: Inspect Wiring and Connections Check the wiring between the sensors and the garage door opener for any damage or loose connections. Ensure that the wires are securely connected to the terminals on both the sensors and the opener unit. Repair or replace any damaged wires or connectors.

Step 7: Reset the Opener If the sensors are still not functioning correctly, you may need to reset the garage door opener. To do this:

  1. Locate the “Learn” or “Reset” button on the opener unit (usually on the back or side).
  2. Press and hold the “Learn” or “Reset” button until the indicator light on the opener blinks.
  3. Release the button.

This action will reset the opener’s memory, including the sensor settings.

Step 8: Realign and Test Again After resetting the opener, repeat the sensor alignment process as described in Steps 3 and 4. Once the sensors are properly aligned, test the garage door again to ensure it closes and reverses when an obstruction is present.

Step 9: Call a Professional If you’ve followed all the steps above and your garage door sensors still aren’t working correctly, it’s advisable to contact a professional garage door technician. There may be underlying issues with the sensors, opener, or other components that require expert diagnosis and repair.

In conclusion, resetting Garage Door Repair Bedford TX is a critical safety measure to ensure your garage door operates correctly and prevents accidents. By following these steps, you can often resolve sensor issues on your own. However, if problems persist, it’s always wise to seek professional assistance to avoid any further complications or safety hazards. Remember, safety should be your top priority when working with garage door systems.

Bedford Gates & Garage Doors

2201 Harwood Rd, Bedford, TX 76021, United States

1-817-886-3064

How Much is A New Garage Door – Springtown Gates & Garage Doors

A new Garage Door Repair Springtown, TX cost can vary significantly based on several factors, including the type of door, materials, size, design, insulation, and additional features.

To provide a comprehensive guide on garage door prices, I will break down the key factors that influence the cost and provide estimates for different scenarios.

1. Types of Garage Doors

There are several types of garage doors, each with its own price range:

  • Single Panel Garage Door: These are the most basic and affordable type, costing between $400 and $700 on average for the door alone.
  • Sectional Garage Door: These are more common and can range from $700 to $2,500 or more, depending on materials and features.
  • Roll-Up Garage Door: Typically found in commercial settings, roll-up doors can cost between $1,000 and $10,000 or more.

2. Garage Door Materials

The choice of materials significantly impacts the cost:

  • Steel Garage Doors: These are popular for their durability and range from $750 to $3,500 or more.
  • Wooden Garage Doors: They offer a classic look but can be more expensive, ranging from $1,200 to $4,000 or higher.
  • Aluminum Garage Doors: These doors are lightweight and rust-resistant, costing between $800 and $2,500 or more.
  • Fiberglass Garage Doors: These are less common and typically range from $1,000 to $2,500.

3. Size and Design

The size and design of the garage door will also affect the price. Standard single-car garage doors are cheaper than double-car doors or custom designs. Expect to pay more for intricate designs, windows, and decorative hardware. Prices can vary from $500 to $5,000 or more.

4. Insulation

Insulated garage doors help regulate temperature and energy costs. Insulation options include:

  • Single-Layer (Non-insulated): The most affordable option, ranging from $300 to $1,500.
  • Double-Layer (Polystyrene Insulated): Mid-range insulation, typically priced between $600 and $2,500.
  • Triple-Layer (Polyurethane Insulated): High insulation and soundproofing, costing between $800 and $4,000 or more.

5. Additional Features

Additional features like automatic openers, remote controls, and smart home integration can add to the cost. These accessories can range from $100 to $500 or more.

6. Installation Costs

Professional installation is crucial for safety and proper functioning. Installation fees range from $200 to $800, depending on complexity and location.

7. Location and Labor Costs

Labor costs can vary depending on your location and the availability of skilled garage door installers. Expect to pay more in areas with a higher cost of living.

8. Brand and Warranty

Reputable brands often come with higher price tags, but they may also offer better warranties and long-term reliability. Expect to pay a premium for well-known brands like Clopay, Amarr, and Wayne Dalton.

9. DIY vs. Professional Installation

While some homeowners opt for DIY installation to save money, it’s essential to consider the complexity and safety aspects. A professional installation ensures the door operates correctly and safely.

10. Maintenance Costs

Factor in ongoing maintenance costs, such as lubrication, periodic inspections, and potential repairs, to ensure the longevity of your garage door.

In conclusion, the cost of a new Garage Door Repair Springtown, TX can range from a few hundred dollars to several thousand dollars or more, depending on the factors mentioned above. On average, you can expect to spend between $700 and $3,000 for a standard sectional garage door with moderate insulation and features. However, for a more accurate estimate, it’s recommended to consult with local garage door dealers or contractors who can provide quotes based on your specific requirements.

Springtown Gates & Garage Doors

104 Adalida Ln, Springtown, TX 76082, United States

1-817-631-1036

How to Release a Stuck Garage Door Emergency Release Cord – Colleyville Gates & Garage Doors

As a homeowner, I’ve experienced my fair share of unexpected challenges around the house. One day, I encountered a situation that left me momentarily puzzled and frustrated—the garage door refused to open. It was a situation that demanded immediate attention, and the solution lay in a small but critical component: the emergency release cord.

In this article, I’ll share my experience and guide you through the process from Colleyville Gates & Garage Doors of releasing a stuck garage door emergency release cord step by step.

Understanding the Emergency Release Cord

Before diving into the steps to release a stuck garage door emergency release cord, it’s essential to understand the purpose of this mechanism. The emergency release cord is a safety feature designed to manually disengage the garage door opener from the door itself. In the event of a power outage or a malfunction of the opener, this cord allows you to open or close the garage door manually.

The emergency release cord is typically a red rope or handle hanging from the garage door opener track or carriage. Pulling this cord disconnects the opener from the door, allowing you to operate the door manually. However, when this cord becomes stuck, it can pose a frustrating challenge.

Step-by-Step Guide to Release a Stuck Garage Door Emergency Release Cord

1. Ensure Safety First:

Before attempting any repairs or adjustments, it’s essential to prioritize safety. Make sure the area around the garage door is clear of obstacles, and keep people and pets away from the door during the process.

2. Locate the Emergency Release Cord:

Identify the emergency release cord, which is typically a red rope or handle hanging from the garage door opener track or carriage. It may be positioned close to the door or higher up on the track, depending on the opener’s design.

3. Verify the Door’s Position:

Check whether the garage door is in the fully closed position. Attempting to release the emergency cord while the door is partially open or in an awkward position can be hazardous.

4. Disconnect the Opener:

To release the garage door opener from the door, firmly grip the emergency release cord and pull it down and toward the door. This action should disconnect the opener’s carriage or trolley from the door’s carriage or arm.

5. Test the Manual Operation:

Once you’ve pulled the emergency release cord, gently attempt to lift or lower the garage door by hand. It should move freely along the tracks without resistance. If you encounter difficulty or the door remains stuck, proceed to the next steps.

6. Inspect for Obstructions:

Check the tracks, rollers, and hinges for any obstructions or debris that may be impeding the door’s movement. Remove any visible debris, as this may resolve the issue.

7. Lubricate Moving Parts:

Apply a silicone-based lubricant to the rollers, hinges, and track to ensure smooth operation. Lubrication can often resolve minor issues causing the door to stick.

8. Check for Broken Springs:

Inspect the garage door springs for signs of damage or breakage. If you notice a broken spring, it’s crucial to refrain from attempting to operate the door manually, as it can be extremely dangerous. In such cases, seek professional assistance for spring replacement.

9. Examine the Emergency Release Mechanism:

Inspect the emergency release cord and its mechanism for any visible damage, such as fraying or disconnection. If you notice issues with the cord itself, it may need to be replaced.

10. Verify the Opener’s Functionality:

Once you’ve inspected the emergency release cord and addressed any potential obstructions or issues, reattach it to the opener’s carriage or trolley. You can do this by pulling the cord toward the opener and securing it in place.

11. Reconnect the Opener:

After ensuring that the emergency release cord is properly reattached, test the garage door opener by operating it using the remote control or wall-mounted button. The opener should now function as expected, allowing you to open and close the door automatically.

Common Reasons for a Stuck Emergency Release Cord

Understanding the underlying causes of a stuck emergency release cord can help you prevent similar issues in the future. Here are some common reasons why the emergency release cord may become stuck:

1. Rust or Corrosion:

Over time, the components of the emergency release mechanism, including the cord and the connecting parts, may become rusted or corroded. This can impede the smooth operation of the cord.

2. Misalignment:

Misalignment of the garage door or the opener’s carriage can cause the emergency release cord to become jammed. Ensuring proper alignment is crucial for smooth operation.

3. Obstructions:

Debris, dirt, or objects in the garage door tracks or along the path of the door can hinder the movement of the emergency release cord.

4. Cable or Spring Issues:

Issues with the garage door cables or springs can also affect the operation of the emergency release cord. Broken or damaged cables or springs may prevent the door from moving freely.

When to Seek Professional Assistance

While the steps outlined above can help you release a stuck garage door emergency release cord in many cases, there are situations where it’s best to seek professional assistance. Here are some scenarios where professional help is warranted:

1. Broken Springs:

If you suspect or confirm that the garage door springs are broken or damaged, it’s crucial to avoid any attempts at manual operation. Garage door spring replacement is a complex and hazardous task that should only be handled by experienced professionals.

2. Electrical Issues:

If the garage door opener is experiencing electrical or wiring problems, it’s advisable to have a qualified technician diagnose and repair the issue. Tampering with electrical components without the necessary expertise can be dangerous.

3. Persistent Stuck Door:

If you’ve followed the steps to release the emergency cord, addressed potential obstructions, and the door remains stuck or difficult to operate manually, it’s time to call a professional. There may be underlying issues with the door’s mechanics that require expert assessment and repair.

4. Safety Concerns:

If at any point you feel unsure or unsafe during the process of releasing the emergency cord or troubleshooting the door, do not hesitate to seek professional help. Safety should always be the top priority.

Conclusion: A Handy Skill for Homeowners

Overall, as stated in Colleyville Gates & Garage Doors, releasing a stuck garage door emergency release cord is a valuable skill for homeowners to have in their repertoire. With the right knowledge and a step-by-step approach, you can address common issues and restore the functionality of your garage door. However, it’s essential to exercise caution, prioritize safety, and seek professional assistance when needed, especially when dealing with complex mechanical or electrical problems. By understanding the operation of your garage door and the emergency release mechanism, you can ensure that your garage remains a convenient and secure part of your home.

Colleyville Gates & Garage Doors

6508 Colleyville Blvd, Colleyville, TX 76034, United States

817-755-6231

How to Open Liftmaster Garage Door opener – Shelbyville Gates & Garage Doors

Opening a LiftMaster Garage Door Repair Shelbyville KY typically involves using a remote control or a keypad, depending on the model.

It’s important to note that attempting to forcibly open a garage door or tamper with it in any way may damage the door or opener and is not recommended. Here are the general steps to open a LiftMaster garage door opener:

  1. Remote Control Method:
    • Ensure that your remote control has a fresh battery.
    • Stand within range of the garage door, typically within 20-30 feet.
    • Press the button on your remote control that is programmed to open the garage door. This button is usually labeled with a garage door icon or has an “Open” or “Up” label.
  2. Keypad Method (if applicable):
    • Enter your security code on the keypad installed near your garage door. LiftMaster garage door openers often come with a wireless keypad that you can mount outside your garage.
    • After entering the correct code, press the “Enter” or “Open” button on the keypad.
  3. Wall-Mounted Control Panel Method (if applicable):
    • If your garage door opener has a wall-mounted control panel inside the garage, press the “Open” button on it.
  4. Manual Release (in case of a power outage or emergency):
    • In some cases, you may need to use the manual release mechanism to open the door. This is a red cord or handle usually located near the opener on the ceiling of the garage.
    • Pull down on the manual release cord to disengage the garage door opener from the door. This allows you to manually lift the door.

Please note that the exact steps may vary depending on the model and type of your LiftMaster garage door opener. Refer to your Garage Door Repair Shelbyville KY user manual for specific instructions. Additionally, be cautious when manually opening the door, as it can be heavy and could cause injury if not handled properly. If you encounter any issues or are unsure about the process, it’s best to consult a professional garage door technician for assistance.

Shelbyville Gates & Garage Doors

1927 Burks Branch Rd, Shelbyville, KY, 40065

502-513-6328

What Are the Signs That My Garage Door Needs Repairs – Anderson Gates & Garage Doors

Your Garage Door Repair Anderson IN is an essential part of your home, serving not only as a protective barrier for your vehicles and belongings but also as a key element in your home’s security and curb appeal. Over time, wear and tear can take a toll on your garage door, leading to various issues that may require repairs. Recognizing the signs of garage door problems early on can save you from costly repairs and ensure the safety of your family and property.

In this comprehensive guide, we will discuss in detail the various signs that indicate your garage door needs repairs.

  1. Unusual Noises

One of the most common and noticeable signs that your garage door needs attention is unusual noises during operation. If you hear grinding, scraping, squeaking, or banging sounds when opening or closing the door, it’s likely that something is wrong. These noises can be caused by worn-out or damaged components such as rollers, springs, or cables. Ignoring these sounds can lead to more significant issues and potentially result in a complete garage door failure.

  1. Slow or Uneven Movement

A garage door should open and close smoothly and at a consistent speed. If you notice that your garage door is moving slower than usual or appears to be lopsided, it’s a clear sign that repairs are needed. Slow or uneven movement can be caused by a variety of issues, including worn-out rollers, damaged tracks, or problems with the garage door opener. These issues should be addressed promptly to avoid further damage.

  1. Difficulty Opening or Closing

If you find it increasingly difficult to open or close your garage door, it’s a sign of trouble. A properly functioning garage door should operate effortlessly. Difficulty in operation can be caused by a malfunctioning opener, damaged springs, or problems with the door’s alignment. Attempting to force the door open or closed can lead to more severe damage and safety hazards.

  1. Jerky or Shaky Movements

A garage door should move smoothly without jerking or shaking. If you notice that your door moves in a jerky or shaky manner during operation, it could be due to issues with the cables, rollers, or tracks. Jerky movements can increase the risk of accidents and injuries, making it crucial to address the problem promptly.

  1. Sagging or Warped Sections

Inspect your garage door for any visible signs of sagging or warping. Over time, garage doors can lose their structural integrity, leading to sections that appear uneven or distorted. This can be caused by weather exposure, water damage, or simply the natural aging of materials. A sagging or warped garage door not only affects its appearance but also compromises its functionality and security.

  1. Lack of Response from the Opener

When you press the button on your garage door opener, it should respond promptly. If you experience delays or a complete lack of response from the opener, it could indicate problems with the opener itself or the remote control. In some cases, the issue may be as simple as a dead battery in the remote control, but if the problem persists, professional repairs may be necessary.

  1. Visible Damage to Components

Regular visual inspections of your garage door can help you spot signs of damage. Look for cracks, dents, or rust on the door panels and inspect the hardware, such as hinges, springs, and cables, for any visible wear or damage. Damaged components not only affect the door’s appearance but can also compromise its structural integrity and safety.

  1. Inconsistent Auto-Reverse Function

The auto-reverse feature of your garage door opener is a crucial safety mechanism designed to prevent accidents and injuries. If your garage door doesn’t reverse direction when it encounters an obstacle, it poses a significant safety risk, especially if you have pets or children. Inconsistent or unreliable auto-reverse functionality may be due to sensor misalignment, sensor damage, or other issues that require immediate attention.

  1. High Energy Bills

Surprisingly, an increase in your energy bills can be an indirect sign that your garage door needs repairs. A poorly insulated or damaged garage door can allow cold or hot air to enter your home, causing your heating and cooling systems to work harder and consume more energy. Repairing or replacing your garage door with an energy-efficient model can help you save on energy costs in the long run.

  1. Fluctuating Garage Door Balance

A well-balanced garage door should stay in place when lifted manually and should not drop or rise unexpectedly. If you notice that your garage door is not maintaining its balance or seems heavy to lift, it could be due to issues with the springs or cables. Operating a garage door with imbalanced components can lead to accidents and further damage.

  1. Frequent Reversals

While the auto-reverse feature is essential for safety, frequent and unnecessary reversals can be frustrating and indicate problems with the garage door’s sensors. Dust, dirt, or misaligned sensors can trigger unnecessary reversals, making it difficult to operate the door smoothly. Regular sensor maintenance and cleaning can help resolve this issue.

  1. Excessive Vibration

A garage door in good condition should not produce excessive vibrations during operation. If you notice strong vibrations or shaking when the door is moving, it may indicate problems with the rollers, tracks, or other components. Vibrations can lead to further wear and tear, affecting the door’s overall performance and longevity.

  1. Cracked or Broken Glass Panels

If your garage door has windows or glass panels, inspect them regularly for cracks or breakage. Damaged glass not only affects the door’s aesthetics but can also compromise security and insulation. Replacing cracked or broken glass panels is essential to maintain the integrity of your garage door.

  1. Loose or Missing Hardware

Check for loose or missing hardware such as bolts, nuts, screws, or brackets. Over time, these components can become loose due to vibrations and the door’s constant movement. Loose hardware should be tightened, and missing hardware should be replaced to ensure the garage door’s stability and safety.

  1. Seals and Weatherstripping Damage

The seals and weatherstripping around your garage door play a crucial role in keeping out drafts, pests, and moisture. If you notice that the seals or weatherstripping are damaged, cracked, or missing, it’s essential to replace them promptly. This will help maintain a comfortable indoor environment and protect your belongings from potential water damage.

  1. Increased Maintenance Requirements

If you find yourself needing to perform frequent maintenance tasks on your garage door, it may be a sign that more extensive repairs are necessary. While routine maintenance is essential for the longevity of your door, an increase in the frequency or complexity of maintenance tasks can indicate underlying issues that need professional attention.

  1. Sudden or Unexpected Garage Door Reversals

In addition to the auto-reverse feature, some garage doors may experience sudden or unexpected reversals during operation. This can be a sign of electrical or sensor issues within the garage door opener system. If your door reverses unexpectedly, it’s crucial to have it inspected to ensure safe and reliable operation.

  1. Excessive Wobbling During Operation

Your garage door should move smoothly and without wobbling. If you notice excessive wobbling or swaying when the door is in motion, it could indicate problems with the tracks, rollers, or alignment. This issue not only affects the door’s performance but can also pose a safety risk.

  1. Visible Wear on Springs

The springs are an essential part of your garage door’s operation, and they are subject to a significant amount of stress. Inspect the springs for visible wear, such as cracks, rust, or gaps in the coils. Damaged or worn springs can lead to imbalances, causing the door to malfunction or become difficult to open. It’s important to address spring issues promptly, as they can be dangerous to work with and are best handled by a professional technician.

  1. Peculiar Odors

Unusual odors, such as burning or overheating smells, when you operate your garage door may indicate electrical problems within the opener or motor. These issues can be a fire hazard and should not be ignored. If you detect any strange odors, disconnect the opener and consult a professional technician immediately.

  1. Stuck or Jammed Garage Door

A garage door that becomes stuck or jammed at any point during its operation is a clear sign of trouble. There are several potential causes for this issue, including debris in the tracks, damaged rollers, or problems with the opener. Attempting to force the door open or closed when it’s jammed can result in costly damage and safety risks.

  1. Remote Control Malfunctions

If your garage door opener remote control is consistently malfunctioning or fails to work despite having fresh batteries, it could indicate issues with the opener’s receiver or the remote control itself. Remote control problems can affect your convenience and security, so it’s essential to diagnose and address these issues promptly.

  1. Intermittent Operation

Inconsistent or intermittent garage door operation can be frustrating and inconvenient. It may work correctly one moment and then fail to respond the next. This issue can be caused by a range of factors, including faulty wiring, worn-out components, or problems with the opener’s circuitry. Seeking professional help is crucial to determine the root cause and ensure reliable operation.

  1. Safety Concerns

Garage doors are heavy and powerful, and safety should always be a top priority. If you have concerns about the safety of your garage door, such as it not staying in place when lifted manually or making unusual movements, it’s essential to address these issues promptly. Safety hazards can lead to accidents and injuries.

  1. Age of the Garage Door

As with any mechanical system, garage doors have a limited lifespan. The average lifespan of a garage door is typically around 15 to 30 years, depending on the quality of materials and regular maintenance. If your garage door is approaching or has surpassed this age range, it’s wise to have it inspected by a professional. Older doors are more prone to wear and may benefit from repairs or replacement to ensure continued reliability and safety.

  1. Excessive Dust or Debris Buildup

Excessive dust, dirt, or debris buildup on the garage door’s tracks and components can hinder smooth operation. It can cause friction and damage to the moving parts, leading to operational problems. Regularly cleaning and lubricating the tracks and components can help prevent these issues.

  1. Visible Gaps or Cracks Around the Door

Inspect the area around your garage door for visible gaps or cracks. These gaps can allow pests, drafts, and moisture to enter your garage, affecting its insulation and security. Sealing gaps and cracks with appropriate weatherstripping or sealant is essential to maintain the integrity of your garage door system.

  1. Difficulty in Manually Operating the Door

In the event of a power outage or garage door opener failure, you should be able to open and close your garage door manually. If you encounter significant resistance or are unable to move the door manually, it may be due to issues with the springs, cables, or other components. Manually operating the door should be relatively easy, so any difficulty is cause for concern.

  1. Persistent Water Intrusion

If you notice water pooling inside your garage after rain or snow, it’s a sign of water intrusion. Damaged seals, gaps in the door, or improper drainage around the garage can all contribute to this problem. Persistent water intrusion can lead to water damage to your belongings and the garage structure, so it’s essential to address this issue promptly.

  1. Frequent Breakdowns

If your garage door is experiencing frequent breakdowns or requires repairs multiple times a year, it may be more cost-effective in the long run to consider replacing it. Frequent repairs can add up, and an aging door may continue to develop issues. Investing in a new, reliable garage door can provide peace of mind and reduce the inconvenience of ongoing repairs.

Conclusion:

Your garage door is a vital component of your home, providing security, convenience, and curb appeal. Recognizing the signs that your Garage Door Repair Anderson IN needs repairs is essential to ensure its continued functionality and safety. From unusual noises and slow movement to visible damage and safety concerns, addressing these issues promptly can prevent more significant problems and costly repairs in the future.

Anderson Gates & Garage Doors

2007 McKinley St, Anderson, IN 46016, United States

1-463-217-0904

How to Replace Garage Door Opener – Grapevine Gates & Garage Doors

Replacing a Garage Door Repair Grapevine,TX is a manageable DIY project for many homeowners.

This guide will take you through the process step by step, providing you with valuable insights and tips along the way. Before you begin, make sure you have the necessary tools and a new garage door opener kit ready.

Step 1: Safety First

Safety should always be your top priority when working on any DIY project. Ensure that the power to your garage door opener is disconnected. This typically involves unplugging it from the electrical outlet and turning off the circuit breaker. Additionally, wear safety goggles and work gloves to protect your eyes and hands.

Step 2: Gather Tools and Materials

Here’s a list of tools and materials you’ll need for the project:

  • New garage door opener kit
  • Screwdriver set
  • Adjustable wrench
  • Stepladder
  • Drill with bits
  • Socket and ratchet set
  • Safety goggles
  • Work gloves
  • Wire strippers and connectors
  • Pliers

Step 3: Remove the Old Opener

  1. Locate the power source and disconnect it as mentioned in Step 1.
  2. Unbolt and remove the brackets securing the opener to the ceiling and the wall.
  3. Disconnect the opener from the door by detaching the arm that connects them.
  4. Lower the opener gently to the ground and remove it from your garage.

Step 4: Install the New Opener

Follow the manufacturer’s instructions carefully for your specific garage door opener model. However, here is a general outline:

  1. Assemble the opener components according to the provided instructions.
  2. Attach the rail to the header bracket on the garage door using the supplied hardware.
  3. Install the motor unit to the ceiling, making sure it is level and securely fastened.
  4. Connect the rail to the motor unit, following the manufacturer’s instructions.
  5. Attach the trolley to the chain or belt, and then attach the trolley to the rail.
  6. Install the sensor system according to the manufacturer’s guidelines, ensuring that they are aligned correctly.
  7. Connect the wall control panel and safety sensors to the opener unit.

Step 5: Wiring and Electrical Connections

  1. Follow the wiring instructions in the opener’s manual to connect the power cord to the ceiling outlet.
  2. If necessary, use wire strippers and connectors to make secure electrical connections.
  3. Reconnect the power source to the opener, either by plugging it in or turning the circuit breaker back on.

Step 6: Adjust and Test the Opener

  1. Adjust the opener’s settings according to your garage door’s weight and height, as specified in the manufacturer’s instructions.
  2. Test the opener to ensure it’s functioning correctly. Operate the door using the wall control panel and remote control, if provided.
  3. Make any necessary adjustments to the opener’s settings until the door operates smoothly and safely.

Step 7: Secure the Opener

  1. Fasten the opener securely to the ceiling and the wall using the provided brackets and hardware.
  2. Ensure all cables and wires are neatly secured and out of the way to prevent accidents.

Step 8: Perform a Safety Check

  1. Test the safety features of the opener, such as the auto-reverse mechanism. Place an object in the door’s path, and the door should reverse when it touches the object.
  2. Check the photoelectric sensors to ensure they are aligned correctly and functioning as intended.

Step 9: Final Touches

  1. Organize and secure any excess wiring or cables.
  2. Consider installing a surge protector to protect your opener from power surges.
  3. Program your remote controls and keypad according to the manufacturer’s instructions.
  4. Read and retain the user manual for future reference.

Step 10: Cleanup and Maintenance

Dispose of the old opener and any packaging materials responsibly. Perform routine maintenance on your new garage door opener as recommended in the user manual to ensure it continues to function smoothly and safely.

In conclusion, replacing Garage Door Repair Grapevine, TX can be a rewarding DIY project. By following these steps and heeding safety precautions, you can successfully install a new garage door opener and enjoy the convenience and security it provides for your home. If you’re ever unsure about any aspect of the installation, consult the manufacturer’s instructions or seek professional assistance.

Grapevine Gates & Garage Doors

601 W Wall St, Grapevine, TX 76051, United States

1-817-631-6355

How to Open a Garage Door Manually From the Outside – Colleyville Gates & Garage Doors


Opening a garage door manually from the outside can be essential in situations where the power is out or the automatic opener is malfunctioning. This guide will provide you with detailed instructions on how to manually open different types of garage doors safely. It’s crucial to follow these steps carefully to avoid injury and ensure the door is operated correctly.

Before You Begin:

  1. Ensure that there are no obstructions in the garage door’s path, as manually opening it requires physical effort.
  2. Make sure all family members and pets are at a safe distance from the door.
  3. Locate the emergency release mechanism on your garage door. This is typically a red handle or cord hanging from the door’s trolley or opener carriage.

1. Identify Your Garage Door Type: Different types of garage doors have varying methods for manual operation. The most common types are:

A. Sectional Garage Door: These are the most prevalent type of garage doors, consisting of horizontal panels that roll up along tracks. To manually open a sectional garage door:

  1. Locate the emergency release handle, usually a red cord, hanging from the trolley carriage.
  2. Pull the release handle down firmly and towards the garage door. This will disengage the door from the automatic opener’s drive mechanism.

B. Up-and-Over Garage Door: These doors swing outward and then upward to open. To manually open an up-and-over garage door:

  1. Find the emergency release handle, which is typically a red cord, hanging from the center track or the release mechanism at the top of the door.
  2. Pull the release handle down firmly, ensuring it clicks into the open position.
  3. Lift the door from the bottom edge while standing inside the garage. Be cautious, as these doors can be heavy.

C. Roll-Up Garage Door: Roll-up garage doors consist of horizontal slats that roll up into a coil above the door opening. To manually open a roll-up garage door:

  1. Locate the emergency release handle, usually a red cord, near the top of the door or on the side.
  2. Pull the release handle down firmly and towards the door. This should disconnect the door from the motor.

2. Manually Lift the Garage Door: After disengaging the door from the opener, you can manually lift it. Keep in mind that garage doors can be heavy, so use proper lifting techniques to avoid injury:

  1. Stand facing the door, with your feet shoulder-width apart and knees slightly bent.
  2. Grasp the bottom of the door with both hands, placing your hands near the center of the door’s bottom edge.
  3. Lift the door slowly and steadily, using your legs and not just your back. Keep a straight back and use your leg muscles for power.
  4. Continue lifting until the door is fully open or at the desired height. Some garage doors have a lock or latch to hold them in place.

3. Securing the Garage Door: Once the garage door is manually open, it’s essential to secure it properly to prevent it from accidentally closing:

  • If your garage door has a locking mechanism, engage it to keep the door in place.
  • If there’s no lock, you can use C-clamps or vice grips on the tracks to prevent the door from rolling down.

4. Reconnecting the Garage Door Opener: When power is restored or you’ve fixed the issue with the automatic opener, you’ll need to reconnect the door to the opener:

  1. Ensure the garage door is fully open.
  2. Find the emergency release handle you pulled earlier.
  3. Push it back up towards the opener until it clicks back into place. This reengages the door with the automatic opener.

5. Testing the Automatic Opener: After reconnecting the door, it’s essential to test the automatic opener to ensure it’s functioning correctly:

  1. Press the garage door opener remote or wall-mounted button.
  2. Observe the door’s movement. It should open or close smoothly.
  3. If there are any issues, consult your garage door opener’s manual or consider calling a professional for repairs.

Safety Tips:

  • Always exercise caution when manually opening a garage door, especially if it’s heavy. Use proper lifting techniques to avoid straining your back.
  • Keep children and pets away from the garage door while operating it manually.
  • If you’re unsure about the process or encounter any difficulties, consult your garage door’s manufacturer manual or contact a professional technician for assistance.
  • Regular maintenance of your Garage Door Repair Colleyville TX and opener can help prevent the need for manual operation. Lubricate moving parts, inspect for wear and tear, and test the emergency release periodically.

In conclusion, manually opening a Garage Door Repair Colleyville TX from the outside requires identifying the type of door you have, locating the emergency release mechanism, and following the proper steps to safely lift and secure the door. Always prioritize safety and seek professional help if you’re unsure or encounter issues.

Colleyville Gates & Garage Doors

6508 Colleyville Blvd, Colleyville, TX 76034, United States

1-817-755-6231

How to Fix the Garage Door-First Call Garage Door of Missouri City

First Call Garage Door of Missouri City are an essential part of our homes, providing security and convenience. However, like any mechanical system, they can encounter issues over time.

Whether it’s a noisy door, a door that won’t open or close, or any other problem, knowing how to fix your garage door can save you time and money. In this article, we will guide you through the process of troubleshooting and fixing common garage door issues.

Understanding the Basics of Garage Doors

How Garage Doors Work

Garage doors operate on a simple mechanism involving springs, cables, and a motor. Understanding how these components work together is essential for troubleshooting issues effectively.

Common Types of Garage Doors

There are various types of garage doors, including sectional, roll-up, and swing-out doors. Each type has its unique features and common problems.

Safety First: Precautions Before You Begin

Gather the Necessary Tools

Before attempting any repairs, gather the tools and materials you’ll need. This includes wrenches, pliers, lubricant, and safety gear like gloves and safety glasses.

Disconnecting the Power

To avoid accidents, it’s crucial to disconnect the power source to the garage door opener.

Locking the Door in Place

Locking the door in place ensures it won’t accidentally open or close while you’re working on it, enhancing your safety.

Diagnosing the Problem

Identifying Noises

Noises like grinding or squeaking can indicate specific issues with the door’s components. Identifying these sounds helps pinpoint the problem.

Assessing Movement Issues

If your garage door moves unevenly or stalls, it’s essential to determine the cause to address it effectively.

Checking the Balance

An imbalanced garage door can put unnecessary strain on the opener and components. Learn how to test and adjust the balance.

Fixing Common Garage Door Problems

Lubricating Moving Parts

Regularly lubricating moving parts ensures smooth operation and prevents wear and tear.

Tightening Loose Hardware

Over time, nuts and bolts can become loose. Tightening them is a simple yet effective maintenance task.

Replacing Worn-Out Springs

Broken or worn-out springs can be dangerous. Learn how to safely replace them to keep your garage door functioning correctly.

Dealing with Sensor Problems

Garage door sensors play a vital role in safety. Troubleshoot and fix sensor issues to prevent accidents.

Garage Door Opener Troubleshooting

Resetting the Opener

Sometimes, a simple reset can resolve opener problems. Learn the steps to reset your garage door opener.

Adjusting the Opener’s Settings

Fine-tuning the opener’s settings can improve its performance and responsiveness.

Replacing the Opener

When all else fails, it may be time to replace your garage door opener. We’ll guide you through the process.

Regular Maintenance for Longevity

Cleaning and Painting the Door

Maintain the aesthetic appeal of your garage door by cleaning and painting it regularly.

Weatherstripping and Sealing

Weatherproofing your garage door helps keep your garage comfortable and energy-efficient.

Conclusion

Fixing your First Call Garage Door of Missouri City doesn’t have to be a daunting task. With the right knowledge and precautions, you can tackle common issues and keep your garage door functioning smoothly. Remember to prioritize safety and regular maintenance to extend the life of your garage door.

First Call Garage Door of Missouri City

1718 Crescent Oak Dr, Missouri City, TX 77459, United States

1-281-595-8036

Weatherproofing Your Garage Door for All Seasons – First Call Garage Door of Missouri City

As a homeowner who takes pride in maintaining my property, I’ve come to appreciate the importance of weatherproofing, especially when it comes to my garage door. Our garage doors often serve as the primary barrier between our homes and the ever-changing outdoor elements. Ensuring they are well-prepared for all seasons can make a significant difference in protecting our belongings, maintaining energy efficiency, and increasing the longevity of the door itself.

By following First Call Garage Door of Missouri City, I’ll share my insights and experiences on weatherproofing your garage door to withstand the challenges of all seasons.

The Importance of Weatherproofing

Weatherproofing your garage door is a crucial step in preserving the integrity of your home and garage. Here are some reasons why it’s essential:

  1. Protection from the Elements:
    • Weatherproofing helps shield your garage and its contents from rain, snow, sleet, hail, and extreme temperatures.
  2. Energy Efficiency:
    • A well-insulated and weatherproofed garage door can regulate the temperature inside your garage, making it more energy-efficient and reducing heating and cooling costs.
  3. Prevention of Water Damage:
    • Weatherproofing prevents water infiltration, which can lead to structural damage, mold, and mildew growth.
  4. Increased Longevity:
    • A garage door that is protected from the elements is likely to have a longer lifespan, saving you money on repairs and replacements.

Now, let’s explore some practical steps to weatherproof your garage door for all seasons.

  1. Insulate Your Garage Door

One of the most effective ways to weatherproof your garage door is by adding insulation. Insulation helps maintain a stable temperature inside the garage, making it more comfortable and energy-efficient throughout the year. Here’s how to go about it:

A. Choose the Right Insulation Material:

  • There are various insulation materials available, including polystyrene, polyurethane, and reflective foil. Choose the one that suits your budget and insulation needs.

B. Measure and Cut:

  • Measure the panels of your garage door and cut the insulation material to fit each panel precisely. Be sure to leave space for any hinges, brackets, or other hardware.

C. Install Insulation Panels:

  • Insert the cut insulation panels into the recessed areas of your garage door panels. They should fit snugly and be secured in place.

D. Seal the Edges:

  • Use weatherstripping or adhesive foam tape to seal the edges of the insulation panels, preventing air leaks.

E. Consider Professional Installation:

  • If you’re not comfortable with DIY insulation installation, consider hiring a professional to ensure proper insulation and weatherproofing.
  1. Inspect and Seal Cracks and Gaps

Over time, your garage door may develop cracks, gaps, or spaces where air and water can infiltrate. Inspecting and sealing these areas is a vital step in weatherproofing. Here’s what to do:

A. Check for Cracks and Gaps:

  • Examine the garage door for any visible cracks or gaps along the edges, between panels, or around the perimeter.

B. Seal Small Cracks and Gaps:

  • Use a silicone-based caulk to seal small cracks and gaps. Ensure that the caulk is waterproof and designed for outdoor use.

C. Replace Damaged Weatherstripping:

  • If your garage door has weatherstripping, check its condition. Worn or damaged weatherstripping should be replaced to maintain an effective seal.

D. Install Bottom Seal:

  • Ensure your garage door has a durable bottom seal (also known as a garage door threshold seal) to prevent water and drafts from entering beneath the door.
  1. Maintain and Lubricate Moving Parts

Regular maintenance of your garage door’s moving parts is essential for its smooth operation and weatherproofing. Here’s how to do it:

A. Lubricate Hinges, Rollers, and Springs:

  • Use a garage door lubricant to keep hinges, rollers, and springs well-lubricated. This reduces friction and noise and prevents wear and tear.

B. Check for Loose Hardware:

  • Periodically inspect and tighten any loose nuts, bolts, screws, or brackets. Loose hardware can cause misalignment and reduce the door’s effectiveness.

C. Inspect the Weatherstripping:

  • Check the weatherstripping around the perimeter of the garage door for wear and damage. Replace it if necessary to maintain a tight seal.
  1. Install Weather Seals

Weather seals, also known as garage door weather stripping, play a crucial role in preventing air and water infiltration. There are different types of weather seals designed for various areas of your garage door:

A. Top Seal:

  • Install a top seal or header seal along the top of the garage door to prevent rainwater and drafts from entering.

B. Side Seals:

  • Side seals, also known as jamb seals, create a tight seal on the sides of the door, blocking out air and moisture.

C. Bottom Seal:

  • As mentioned earlier, a durable bottom seal or garage door threshold seal prevents water, debris, and drafts from creeping under the door.

D. Retainer Strips:

  • Retainer strips hold the weather seals in place and ensure they effectively seal gaps and cracks.
  1. Consider a Garage Door Screen

In warmer seasons, you may want to enjoy the breeze without inviting bugs and pests into your garage. A garage door screen can provide the perfect solution. These screens allow fresh air to flow through while keeping unwanted pests out. They can be easily attached to the interior of your garage door and removed when not in use.

  1. Address Condensation Issues

Garage doors can be prone to condensation buildup, especially in humid climates. Excessive condensation can lead to mold and mildew growth and potentially damage the door’s structure. Here’s how to address condensation issues:

A. Improve Ventilation:

  • Ensure your garage is well-ventilated by installing vents or exhaust fans. This helps reduce humidity and condensation.

B. Use a Dehumidifier:

  • A dehumidifier can help maintain the right moisture levels inside your garage, reducing condensation.

C. Insulate and Seal:

  • Proper insulation and sealing can also help control condensation by regulating temperature and humidity.
  1. Prepare for Winter

Winter weather brings its own set of challenges, from freezing temperatures to snow and ice. To weatherproof your garage door for winter, consider these additional steps:

A. Insulate Water Pipes:

  • Insulate water pipes in your garage to prevent freezing and bursting during frigid temperatures.

B. Seal Cracks and Gaps:

  • Pay special attention to sealing cracks and gaps that may allow cold air and moisture to enter. Use weatherstripping and caulk as needed.

C. Check Garage Door Opener:

  • Ensure your garage door opener is operating smoothly in cold conditions. Lubricate it with a low-temperature grease if necessary.

D. Remove Snow and Ice:

  • Regularly remove snow and ice from the garage door and its surroundings to prevent buildup that can hinder operation.

Overall, as per First Call Garage Door of Missouri City, weatherproofing your garage door for all seasons is an essential aspect of maintaining your home’s functionality, energy efficiency, and overall curb appeal. By taking the time to insulate, seal, and maintain your garage door, you can enjoy a comfortable and well-protected space year-round. Whether you’re facing the scorching heat of summer or the freezing cold of winter, a well-weatherproofed garage door will ensure your home remains safe, comfortable, and efficient.

First Call Garage Door of Missouri City

1718 Crescent Oak Dr, Missouri City, TX 77459, United States

281-595-8036

Page 4 of 20

Powered by WordPress & Theme by Anders Norén