Get your Home in Perfect Harmony

Category: Garage Door Page 2 of 17

How to Replace Garage Door Opener – Grapevine Gates & Garage Doors

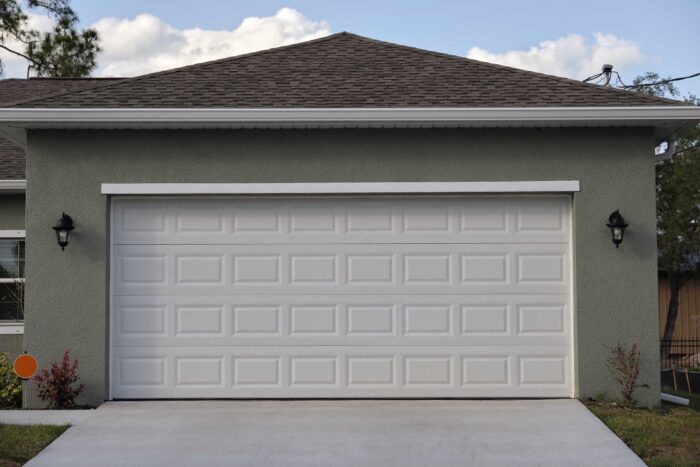
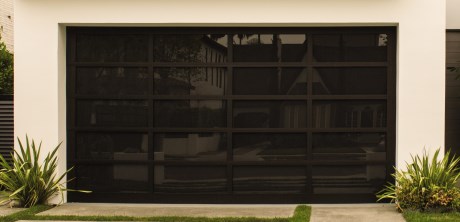
Replacing a Garage Door Repair Grapevine,TX is a manageable DIY project for many homeowners.

This guide will take you through the process step by step, providing you with valuable insights and tips along the way. Before you begin, make sure you have the necessary tools and a new garage door opener kit ready.

Step 1: Safety First

Safety should always be your top priority when working on any DIY project. Ensure that the power to your garage door opener is disconnected. This typically involves unplugging it from the electrical outlet and turning off the circuit breaker. Additionally, wear safety goggles and work gloves to protect your eyes and hands.

Step 2: Gather Tools and Materials

Here’s a list of tools and materials you’ll need for the project:

  • New garage door opener kit
  • Screwdriver set
  • Adjustable wrench
  • Stepladder
  • Drill with bits
  • Socket and ratchet set
  • Safety goggles
  • Work gloves
  • Wire strippers and connectors
  • Pliers

Step 3: Remove the Old Opener

  1. Locate the power source and disconnect it as mentioned in Step 1.
  2. Unbolt and remove the brackets securing the opener to the ceiling and the wall.
  3. Disconnect the opener from the door by detaching the arm that connects them.
  4. Lower the opener gently to the ground and remove it from your garage.

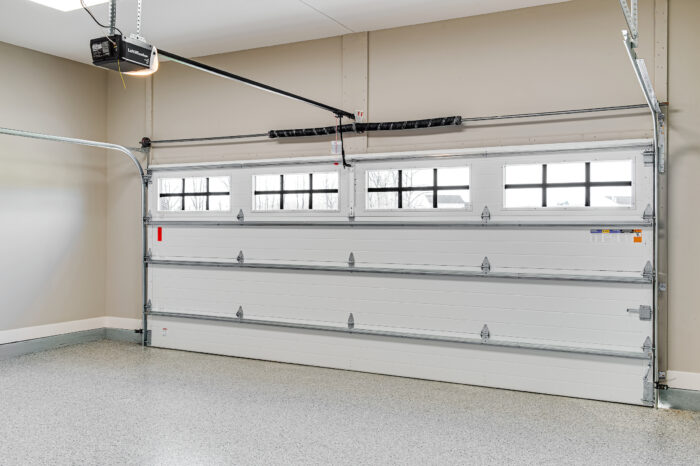
Step 4: Install the New Opener

Follow the manufacturer’s instructions carefully for your specific garage door opener model. However, here is a general outline:

  1. Assemble the opener components according to the provided instructions.
  2. Attach the rail to the header bracket on the garage door using the supplied hardware.
  3. Install the motor unit to the ceiling, making sure it is level and securely fastened.
  4. Connect the rail to the motor unit, following the manufacturer’s instructions.
  5. Attach the trolley to the chain or belt, and then attach the trolley to the rail.
  6. Install the sensor system according to the manufacturer’s guidelines, ensuring that they are aligned correctly.
  7. Connect the wall control panel and safety sensors to the opener unit.

Step 5: Wiring and Electrical Connections

  1. Follow the wiring instructions in the opener’s manual to connect the power cord to the ceiling outlet.
  2. If necessary, use wire strippers and connectors to make secure electrical connections.
  3. Reconnect the power source to the opener, either by plugging it in or turning the circuit breaker back on.

Step 6: Adjust and Test the Opener

  1. Adjust the opener’s settings according to your garage door’s weight and height, as specified in the manufacturer’s instructions.
  2. Test the opener to ensure it’s functioning correctly. Operate the door using the wall control panel and remote control, if provided.
  3. Make any necessary adjustments to the opener’s settings until the door operates smoothly and safely.

Step 7: Secure the Opener

  1. Fasten the opener securely to the ceiling and the wall using the provided brackets and hardware.
  2. Ensure all cables and wires are neatly secured and out of the way to prevent accidents.

Step 8: Perform a Safety Check

  1. Test the safety features of the opener, such as the auto-reverse mechanism. Place an object in the door’s path, and the door should reverse when it touches the object.
  2. Check the photoelectric sensors to ensure they are aligned correctly and functioning as intended.

Step 9: Final Touches

  1. Organize and secure any excess wiring or cables.
  2. Consider installing a surge protector to protect your opener from power surges.
  3. Program your remote controls and keypad according to the manufacturer’s instructions.
  4. Read and retain the user manual for future reference.

Step 10: Cleanup and Maintenance

Dispose of the old opener and any packaging materials responsibly. Perform routine maintenance on your new garage door opener as recommended in the user manual to ensure it continues to function smoothly and safely.

In conclusion, replacing Garage Door Repair Grapevine, TX can be a rewarding DIY project. By following these steps and heeding safety precautions, you can successfully install a new garage door opener and enjoy the convenience and security it provides for your home. If you’re ever unsure about any aspect of the installation, consult the manufacturer’s instructions or seek professional assistance.

Grapevine Gates & Garage Doors

601 W Wall St, Grapevine, TX 76051, United States

1-817-631-6355

How to Open a Garage Door Manually From the Outside – Colleyville Gates & Garage Doors


Opening a garage door manually from the outside can be essential in situations where the power is out or the automatic opener is malfunctioning. This guide will provide you with detailed instructions on how to manually open different types of garage doors safely. It’s crucial to follow these steps carefully to avoid injury and ensure the door is operated correctly.

Before You Begin:

  1. Ensure that there are no obstructions in the garage door’s path, as manually opening it requires physical effort.
  2. Make sure all family members and pets are at a safe distance from the door.
  3. Locate the emergency release mechanism on your garage door. This is typically a red handle or cord hanging from the door’s trolley or opener carriage.

1. Identify Your Garage Door Type: Different types of garage doors have varying methods for manual operation. The most common types are:

A. Sectional Garage Door: These are the most prevalent type of garage doors, consisting of horizontal panels that roll up along tracks. To manually open a sectional garage door:

  1. Locate the emergency release handle, usually a red cord, hanging from the trolley carriage.
  2. Pull the release handle down firmly and towards the garage door. This will disengage the door from the automatic opener’s drive mechanism.

B. Up-and-Over Garage Door: These doors swing outward and then upward to open. To manually open an up-and-over garage door:

  1. Find the emergency release handle, which is typically a red cord, hanging from the center track or the release mechanism at the top of the door.
  2. Pull the release handle down firmly, ensuring it clicks into the open position.
  3. Lift the door from the bottom edge while standing inside the garage. Be cautious, as these doors can be heavy.

C. Roll-Up Garage Door: Roll-up garage doors consist of horizontal slats that roll up into a coil above the door opening. To manually open a roll-up garage door:

  1. Locate the emergency release handle, usually a red cord, near the top of the door or on the side.
  2. Pull the release handle down firmly and towards the door. This should disconnect the door from the motor.

2. Manually Lift the Garage Door: After disengaging the door from the opener, you can manually lift it. Keep in mind that garage doors can be heavy, so use proper lifting techniques to avoid injury:

  1. Stand facing the door, with your feet shoulder-width apart and knees slightly bent.
  2. Grasp the bottom of the door with both hands, placing your hands near the center of the door’s bottom edge.
  3. Lift the door slowly and steadily, using your legs and not just your back. Keep a straight back and use your leg muscles for power.
  4. Continue lifting until the door is fully open or at the desired height. Some garage doors have a lock or latch to hold them in place.

3. Securing the Garage Door: Once the garage door is manually open, it’s essential to secure it properly to prevent it from accidentally closing:

  • If your garage door has a locking mechanism, engage it to keep the door in place.
  • If there’s no lock, you can use C-clamps or vice grips on the tracks to prevent the door from rolling down.

4. Reconnecting the Garage Door Opener: When power is restored or you’ve fixed the issue with the automatic opener, you’ll need to reconnect the door to the opener:

  1. Ensure the garage door is fully open.
  2. Find the emergency release handle you pulled earlier.
  3. Push it back up towards the opener until it clicks back into place. This reengages the door with the automatic opener.

5. Testing the Automatic Opener: After reconnecting the door, it’s essential to test the automatic opener to ensure it’s functioning correctly:

  1. Press the garage door opener remote or wall-mounted button.
  2. Observe the door’s movement. It should open or close smoothly.
  3. If there are any issues, consult your garage door opener’s manual or consider calling a professional for repairs.

Safety Tips:

  • Always exercise caution when manually opening a garage door, especially if it’s heavy. Use proper lifting techniques to avoid straining your back.
  • Keep children and pets away from the garage door while operating it manually.
  • If you’re unsure about the process or encounter any difficulties, consult your garage door’s manufacturer manual or contact a professional technician for assistance.
  • Regular maintenance of your Garage Door Repair Colleyville TX and opener can help prevent the need for manual operation. Lubricate moving parts, inspect for wear and tear, and test the emergency release periodically.

In conclusion, manually opening a Garage Door Repair Colleyville TX from the outside requires identifying the type of door you have, locating the emergency release mechanism, and following the proper steps to safely lift and secure the door. Always prioritize safety and seek professional help if you’re unsure or encounter issues.

Colleyville Gates & Garage Doors

6508 Colleyville Blvd, Colleyville, TX 76034, United States

1-817-755-6231

How to Fix the Garage Door-First Call Garage Door of Missouri City

First Call Garage Door of Missouri City are an essential part of our homes, providing security and convenience. However, like any mechanical system, they can encounter issues over time.

Whether it’s a noisy door, a door that won’t open or close, or any other problem, knowing how to fix your garage door can save you time and money. In this article, we will guide you through the process of troubleshooting and fixing common garage door issues.

Understanding the Basics of Garage Doors

How Garage Doors Work

Garage doors operate on a simple mechanism involving springs, cables, and a motor. Understanding how these components work together is essential for troubleshooting issues effectively.

Common Types of Garage Doors

There are various types of garage doors, including sectional, roll-up, and swing-out doors. Each type has its unique features and common problems.

Safety First: Precautions Before You Begin

Gather the Necessary Tools

Before attempting any repairs, gather the tools and materials you’ll need. This includes wrenches, pliers, lubricant, and safety gear like gloves and safety glasses.

Disconnecting the Power

To avoid accidents, it’s crucial to disconnect the power source to the garage door opener.

Locking the Door in Place

Locking the door in place ensures it won’t accidentally open or close while you’re working on it, enhancing your safety.

Diagnosing the Problem

Identifying Noises

Noises like grinding or squeaking can indicate specific issues with the door’s components. Identifying these sounds helps pinpoint the problem.

Assessing Movement Issues

If your garage door moves unevenly or stalls, it’s essential to determine the cause to address it effectively.

Checking the Balance

An imbalanced garage door can put unnecessary strain on the opener and components. Learn how to test and adjust the balance.

Fixing Common Garage Door Problems

Lubricating Moving Parts

Regularly lubricating moving parts ensures smooth operation and prevents wear and tear.

Tightening Loose Hardware

Over time, nuts and bolts can become loose. Tightening them is a simple yet effective maintenance task.

Replacing Worn-Out Springs

Broken or worn-out springs can be dangerous. Learn how to safely replace them to keep your garage door functioning correctly.

Dealing with Sensor Problems

Garage door sensors play a vital role in safety. Troubleshoot and fix sensor issues to prevent accidents.

Garage Door Opener Troubleshooting

Resetting the Opener

Sometimes, a simple reset can resolve opener problems. Learn the steps to reset your garage door opener.

Adjusting the Opener’s Settings

Fine-tuning the opener’s settings can improve its performance and responsiveness.

Replacing the Opener

When all else fails, it may be time to replace your garage door opener. We’ll guide you through the process.

Regular Maintenance for Longevity

Cleaning and Painting the Door

Maintain the aesthetic appeal of your garage door by cleaning and painting it regularly.

Weatherstripping and Sealing

Weatherproofing your garage door helps keep your garage comfortable and energy-efficient.

Conclusion

Fixing your First Call Garage Door of Missouri City doesn’t have to be a daunting task. With the right knowledge and precautions, you can tackle common issues and keep your garage door functioning smoothly. Remember to prioritize safety and regular maintenance to extend the life of your garage door.

First Call Garage Door of Missouri City

1718 Crescent Oak Dr, Missouri City, TX 77459, United States

1-281-595-8036

Weatherproofing Your Garage Door for All Seasons – First Call Garage Door of Missouri City

As a homeowner who takes pride in maintaining my property, I’ve come to appreciate the importance of weatherproofing, especially when it comes to my garage door. Our garage doors often serve as the primary barrier between our homes and the ever-changing outdoor elements. Ensuring they are well-prepared for all seasons can make a significant difference in protecting our belongings, maintaining energy efficiency, and increasing the longevity of the door itself.

By following First Call Garage Door of Missouri City, I’ll share my insights and experiences on weatherproofing your garage door to withstand the challenges of all seasons.

The Importance of Weatherproofing

Weatherproofing your garage door is a crucial step in preserving the integrity of your home and garage. Here are some reasons why it’s essential:

  1. Protection from the Elements:
    • Weatherproofing helps shield your garage and its contents from rain, snow, sleet, hail, and extreme temperatures.
  2. Energy Efficiency:
    • A well-insulated and weatherproofed garage door can regulate the temperature inside your garage, making it more energy-efficient and reducing heating and cooling costs.
  3. Prevention of Water Damage:
    • Weatherproofing prevents water infiltration, which can lead to structural damage, mold, and mildew growth.
  4. Increased Longevity:
    • A garage door that is protected from the elements is likely to have a longer lifespan, saving you money on repairs and replacements.

Now, let’s explore some practical steps to weatherproof your garage door for all seasons.

  1. Insulate Your Garage Door

One of the most effective ways to weatherproof your garage door is by adding insulation. Insulation helps maintain a stable temperature inside the garage, making it more comfortable and energy-efficient throughout the year. Here’s how to go about it:

A. Choose the Right Insulation Material:

  • There are various insulation materials available, including polystyrene, polyurethane, and reflective foil. Choose the one that suits your budget and insulation needs.

B. Measure and Cut:

  • Measure the panels of your garage door and cut the insulation material to fit each panel precisely. Be sure to leave space for any hinges, brackets, or other hardware.

C. Install Insulation Panels:

  • Insert the cut insulation panels into the recessed areas of your garage door panels. They should fit snugly and be secured in place.

D. Seal the Edges:

  • Use weatherstripping or adhesive foam tape to seal the edges of the insulation panels, preventing air leaks.

E. Consider Professional Installation:

  • If you’re not comfortable with DIY insulation installation, consider hiring a professional to ensure proper insulation and weatherproofing.
  1. Inspect and Seal Cracks and Gaps

Over time, your garage door may develop cracks, gaps, or spaces where air and water can infiltrate. Inspecting and sealing these areas is a vital step in weatherproofing. Here’s what to do:

A. Check for Cracks and Gaps:

  • Examine the garage door for any visible cracks or gaps along the edges, between panels, or around the perimeter.

B. Seal Small Cracks and Gaps:

  • Use a silicone-based caulk to seal small cracks and gaps. Ensure that the caulk is waterproof and designed for outdoor use.

C. Replace Damaged Weatherstripping:

  • If your garage door has weatherstripping, check its condition. Worn or damaged weatherstripping should be replaced to maintain an effective seal.

D. Install Bottom Seal:

  • Ensure your garage door has a durable bottom seal (also known as a garage door threshold seal) to prevent water and drafts from entering beneath the door.
  1. Maintain and Lubricate Moving Parts

Regular maintenance of your garage door’s moving parts is essential for its smooth operation and weatherproofing. Here’s how to do it:

A. Lubricate Hinges, Rollers, and Springs:

  • Use a garage door lubricant to keep hinges, rollers, and springs well-lubricated. This reduces friction and noise and prevents wear and tear.

B. Check for Loose Hardware:

  • Periodically inspect and tighten any loose nuts, bolts, screws, or brackets. Loose hardware can cause misalignment and reduce the door’s effectiveness.

C. Inspect the Weatherstripping:

  • Check the weatherstripping around the perimeter of the garage door for wear and damage. Replace it if necessary to maintain a tight seal.
  1. Install Weather Seals

Weather seals, also known as garage door weather stripping, play a crucial role in preventing air and water infiltration. There are different types of weather seals designed for various areas of your garage door:

A. Top Seal:

  • Install a top seal or header seal along the top of the garage door to prevent rainwater and drafts from entering.

B. Side Seals:

  • Side seals, also known as jamb seals, create a tight seal on the sides of the door, blocking out air and moisture.

C. Bottom Seal:

  • As mentioned earlier, a durable bottom seal or garage door threshold seal prevents water, debris, and drafts from creeping under the door.

D. Retainer Strips:

  • Retainer strips hold the weather seals in place and ensure they effectively seal gaps and cracks.
  1. Consider a Garage Door Screen

In warmer seasons, you may want to enjoy the breeze without inviting bugs and pests into your garage. A garage door screen can provide the perfect solution. These screens allow fresh air to flow through while keeping unwanted pests out. They can be easily attached to the interior of your garage door and removed when not in use.

  1. Address Condensation Issues

Garage doors can be prone to condensation buildup, especially in humid climates. Excessive condensation can lead to mold and mildew growth and potentially damage the door’s structure. Here’s how to address condensation issues:

A. Improve Ventilation:

  • Ensure your garage is well-ventilated by installing vents or exhaust fans. This helps reduce humidity and condensation.

B. Use a Dehumidifier:

  • A dehumidifier can help maintain the right moisture levels inside your garage, reducing condensation.

C. Insulate and Seal:

  • Proper insulation and sealing can also help control condensation by regulating temperature and humidity.
  1. Prepare for Winter

Winter weather brings its own set of challenges, from freezing temperatures to snow and ice. To weatherproof your garage door for winter, consider these additional steps:

A. Insulate Water Pipes:

  • Insulate water pipes in your garage to prevent freezing and bursting during frigid temperatures.

B. Seal Cracks and Gaps:

  • Pay special attention to sealing cracks and gaps that may allow cold air and moisture to enter. Use weatherstripping and caulk as needed.

C. Check Garage Door Opener:

  • Ensure your garage door opener is operating smoothly in cold conditions. Lubricate it with a low-temperature grease if necessary.

D. Remove Snow and Ice:

  • Regularly remove snow and ice from the garage door and its surroundings to prevent buildup that can hinder operation.

Overall, as per First Call Garage Door of Missouri City, weatherproofing your garage door for all seasons is an essential aspect of maintaining your home’s functionality, energy efficiency, and overall curb appeal. By taking the time to insulate, seal, and maintain your garage door, you can enjoy a comfortable and well-protected space year-round. Whether you’re facing the scorching heat of summer or the freezing cold of winter, a well-weatherproofed garage door will ensure your home remains safe, comfortable, and efficient.

First Call Garage Door of Missouri City

1718 Crescent Oak Dr, Missouri City, TX 77459, United States

281-595-8036

How to Relieve Tension on Garage Door Spring – First Call Garage Door of Sugarland

Garage doors are a vital component of our homes, providing security and convenience. They operate under immense tension, thanks to the garage door springs. These springs support the weight of the door, making it easier to open and close. However, over time, these springs can become worn or damaged, posing a safety hazard. Relieving tension on a garage door spring is a crucial maintenance task that should be performed cautiously and methodically.

In this comprehensive guide, we will walk you through the steps to safely and effectively relieve tension on your Garage Door Repair Sugar Land TX spring, ensuring the safety of both you and your property.

I. Understanding Garage Door Springs : Before we delve into the process of relieving tension on a garage door spring, it’s essential to understand the two main types of garage door springs: torsion springs and extension springs.

  1. Torsion Springs: Torsion springs are mounted above the garage door and are wound tightly with tension. They provide balanced support for the door’s weight. These springs are considered safer and more durable than extension springs.
  2. Extension Springs: Extension springs are located on both sides of the garage door and extend when the door is opened. They work by stretching and contracting to counterbalance the door’s weight.

II. Safety Precautions : Safety should always be your top priority when working with garage door springs. Failing to follow proper safety measures can result in severe injuries. Here are some crucial precautions:

  1. Protective Gear:
    • Wear safety glasses to protect your eyes from debris.
    • Use leather gloves to shield your hands from sharp edges and tension cables.
    • A hard hat can protect your head in case of accidental impacts.
  2. Tools and Equipment:
    • Ensure you have the necessary tools like winding bars, pliers, and a ladder.
    • Work with a partner if possible, as it can be safer and more efficient.
  3. Disconnect the Opener:
    • Disable the garage door opener to prevent any accidental openings while working.
  4. Release Tension Gradually:
    • Never try to unwind the spring completely; do it incrementally and cautiously.

III. Identifying the Problem : Before relieving tension on your garage door spring, it’s essential to identify the issue. Common signs of a problematic spring include:

  1. Loud noises when opening or closing the door.
  2. The door doesn’t stay in position but falls quickly.
  3. Gaps or misalignment in the spring.
  4. Visible wear and tear on the spring.

Inspect the spring carefully to determine whether it needs adjustment or replacement. If you’re unsure, consult a professional garage door technician.

IV. Relieving Tension on Torsion Springs : Relieving tension on torsion springs requires precision and care. Here’s a step-by-step guide:

  1. Safety Check:
    • Ensure all safety precautions are in place.
  2. Locate the Winding Cone:
    • Identify the winding cone at the end of the spring.
  3. Insert Winding Bars:
    • Insert winding bars into the holes on the winding cone.
  4. Steady the Bars:
    • Hold the winding bars firmly to prevent the spring from unwinding suddenly.
  5. Unwind the Spring:
    • Slowly and gradually turn the winding cone counterclockwise to release tension.
    • Make quarter-turns until all tension is relieved.
  6. Remove the Springs:
    • Once tension is released, you can safely remove and replace the springs if needed.

V. Relieving Tension on Extension Springs : Relieving tension on extension springs is slightly different from torsion springs:

  1. Safety Check:
    • Again, ensure you’ve taken all necessary safety precautions.
  2. Open the Door:
    • Open the garage door fully to release tension on the extension springs.
  3. Clamp the Door:
    • Use locking pliers or c-clamps to secure the door in place, preventing it from falling.
  4. Disconnect the Springs:
    • Carefully disconnect the extension springs from the pulley system on both sides of the door.
  5. Replace the Springs:
    • If the springs are worn or damaged, replace them with new ones of the same size and type.

Conclusion :

Relieving tension on a Garage Door Repair Sugar Land TX spring is a task that should not be taken lightly. Safety should always be your top priority, and it’s essential to have a clear understanding of your garage door’s spring system before attempting any maintenance or repairs. If you’re unsure or uncomfortable with the process, it’s best to consult a professional garage door technician.

Regular maintenance and occasional checks of your garage door springs can help prolong their lifespan and ensure the safe operation of your garage door. By following the steps outlined in this guide and exercising caution throughout the process, you can effectively relieve tension on your garage door springs, contributing to the safety and functionality of your garage door system.

First Call Garage Door of Sugarland

Sugar Land, TX

281-595-9431

How To Cut Hole In Garage Door – Temple Garage Door & Gate Repairs

Cutting a hole in a Temple Garage Door & Gate Repairs is a task that should be approached with caution and precision, as it can affect the structural integrity and security of the door. Typically, people cut holes in garage doors to install windows or vents, improve ventilation, or create access for various purposes.

In this comprehensive guide, I’ll provide step-by-step instructions on how to cut a hole in a garage door safely and effectively:

Before You Begin:

  1. Safety Gear: Ensure you have the following safety gear:
  • Safety glasses or goggles to protect your eyes.
  • Ear protection if you’re using power tools.
  • Work gloves to protect your hands.
  • Dust mask or respirator to prevent inhaling dust or debris.
  1. Tools and Materials:
  • Circular saw or jigsaw with a metal-cutting blade (for cutting the door).
  • Measuring tape and a straightedge or carpenter’s square.
  • Pencil or marker for marking cut lines.
  • Cordless drill or screwdriver (if installing hardware, such as a window frame).
  • Appropriate screws or bolts for securing hardware.
  • Silicone caulk or adhesive (if installing windows or vents).
  • Metal file or sandpaper (for smoothing sharp edges).
  • Safety supports (such as sawhorses) to hold the door during cutting.
  1. Window or Vent Kit (if applicable): If you’re installing a window or vent, ensure you have the kit with the necessary components, including the frame and any required fasteners.
  2. Garage Door Panel Replacement (if necessary): Be prepared to replace the cut panel with a new one if it’s damaged during the process.

Step-by-Step Guide to Cutting a Hole in a Garage Door:

1. Measure and Mark the Hole:

Determine the size and location of the hole you want to cut in your garage door. Use a measuring tape to mark the center point of the hole and measure the dimensions accurately. Ensure that the hole is at a suitable height and position to serve its intended purpose.

2. Create a Cutting Guide:

To ensure a straight and precise cut, create a cutting guide using a straightedge or a carpenter’s square. Position the guide along the marked lines to act as a reference for your cutting tool.

3. Secure the Garage Door:

For safety and stability, it’s crucial to secure the garage door in place before cutting. You can use safety supports like sawhorses to hold the door securely while you work.

4. Mark the Cutting Lines:

Transfer the measurements and location of the hole onto the garage door panel using a pencil or marker. Use the cutting guide to ensure that your lines are straight and accurate.

5. Wear Safety Gear:

Put on your safety glasses or goggles, ear protection, work gloves, and dust mask or respirator before proceeding.

6. Cut the Hole:

Use a circular saw or jigsaw equipped with a metal-cutting blade to cut along the marked lines. Slowly and carefully make the cuts, following the cutting guide. Ensure that you maintain a steady and controlled motion throughout the cutting process. Keep your hands and body away from the cutting area to prevent accidents.

7. Smooth Edges:

After cutting the hole, use a metal file or sandpaper to smooth any sharp or jagged edges around the hole. This step is essential for safety and to prevent injury.

8. Install Hardware (if applicable):

If you’re installing a window or vent, follow these steps:

  • Position the window or vent frame over the hole to ensure it fits properly.
  • Secure the frame in place using the provided screws or bolts. Make sure the frame is level and flush with the garage door panel.
  • Apply silicone caulk or adhesive around the edges of the frame to create a watertight seal and prevent air leakage.
  • Follow the manufacturer’s instructions for the specific window or vent kit you’re using, as installation methods may vary.

9. Test Operation (if applicable):

If you’ve installed hardware like a window that opens or a vent that has louvers, test their operation to ensure they function correctly.

10. Reattach the Garage Door:

If you removed the garage door from its supports, carefully reattach it to the garage door tracks or hardware according to your door’s specific design.

11. Final Inspection:

Inspect the hole and any installed hardware for any issues, such as loose screws, gaps in the sealant, or sharp edges. Address any concerns to ensure the hole is safe and functional.

12. Paint or Finish (if desired):

If you’ve exposed bare metal during the cutting process, consider painting or finishing the edges to protect against rust or corrosion. Use paint or an appropriate metal finish as needed.

13. Clean Up:

Dispose of any debris, dust, or waste material properly. Ensure the work area is clean and safe.

14. Safety Check:

Conduct a final

safety check to ensure that the garage door operates correctly and that all safety features (e.g., sensors, auto-reverse) are functioning as intended.

In conclusion, cutting a hole in a Temple Garage Door & Gate Repairs requires careful planning, precise measurements, and the use of the appropriate tools and safety gear. Whether you’re creating an opening for a window, vent, or other purposes, following these step-by-step instructions will help you complete the task safely and effectively. Always prioritize safety and accuracy when working on garage door modifications to maintain the door’s functionality and security.

Temple Garage Door & Gate Repairs

2610 Skyline Dr, Temple, TX 76504, United States

1-817-670-4643

How Can I Choose Replacement Windows That Complement My Home’s Aesthetics – Grapevine Siding & Window Replacement

Choosing Grapevine Siding & Window Replacement that complement your home’s aesthetics is a crucial decision that can enhance its curb appeal and overall appearance. Windows play a significant role in defining the architectural style and character of a house.

In this comprehensive guide, we’ll explore the steps to help you choose replacement windows that harmonize with your home’s aesthetics.

1. Understand Your Home’s Architectural Style

To select replacement windows that complement your home’s aesthetics, you first need to understand the architectural style of your house. Different architectural styles have distinct window preferences. Here are some examples:

  • Colonial: Colonial-style homes typically feature double-hung windows with evenly divided panes, often in a grid pattern. Symmetry is essential.
  • Cape Cod: Cape Cod homes often have symmetrical, double-hung windows with shutters. They may also include small, decorative windows in gable areas.
  • Craftsman: Craftsman-style homes favor casement or double-hung windows with wide, flat trim. Stained glass or art glass is common in Craftsman windows.
  • Modern/Contemporary: Modern homes prioritize large, expansive windows, often with clean lines and minimalistic frames. Picture windows, sliding windows, and fixed panels are prevalent.
  • Victorian: Victorian homes can have a variety of window styles, including bay and bow windows, stained glass windows, and decorative window trims.
  • Ranch: Ranch-style homes typically feature large picture windows, sliding windows, or casement windows. They emphasize a horizontal orientation.
  • Mediterranean: Mediterranean-style homes often incorporate arched windows, French doors, and windows with decorative ironwork or grilles.

Matching your window style to your home’s architectural style can create a harmonious and visually appealing look.

2. Consider Window Types and Styles

Once you understand your home’s architectural style, you can explore the window types and styles that are commonly associated with it. Here are some examples:

  • Single-Hung and Double-Hung Windows: These classic windows are versatile and suitable for various architectural styles. Double-hung windows, in particular, offer a timeless look and allow for better ventilation.
  • Casement Windows: Casement windows, with their clean lines and unobstructed views, work well in modern and contemporary homes.
  • Sliding Windows: Sliding windows are space-saving and practical, making them suitable for ranch-style homes and modern designs.
  • Picture Windows: Picture windows provide unobstructed views and are excellent for showcasing beautiful landscapes or architectural details.
  • Bay and Bow Windows: These projection windows add space, character, and elegance to a room, making them suitable for various home styles.
  • Geometric or Specialty Windows: Geometric or specialty windows, such as circles, arches, or triangles, can add visual interest and uniqueness to your home’s design.

3. Window Frame Materials and Colors

The frame material and color you choose can significantly impact the overall appearance of your windows. Consider the following options:

  • Vinyl: Vinyl windows are available in various colors and finishes. You can opt for classic white, beige, or explore wood-grain textures to mimic the appearance of wood.
  • Wood: Wooden windows offer a warm and natural appearance. You can paint or stain them in virtually any color to match your interior or exterior decor.
  • Fiberglass: Fiberglass windows come in various finishes, including smooth, textured, and wood-grain options. They can be painted to achieve your desired color.
  • Aluminum: Aluminum windows are often associated with modern and commercial designs. They are available in various powder-coated finishes to achieve a sleek look.
  • Composite: Composite windows combine different materials to offer unique customization options. They can be painted or stained to your liking.

Choose a frame material and color that align with your design preferences, maintenance requirements, and budget.

4. Grilles and Grids

Grilles, also known as grids or muntins, are decorative patterns that divide the window into smaller sections. They can enhance the aesthetics of your windows and complement your home’s style. Here are some common grille patterns:

  • Colonial Grilles: These grilles create a classic, evenly divided pattern with a single horizontal bar and single vertical bar, forming a grid of four squares.
  • Prairie Grilles: Prairie grilles feature a horizontal bar in the center and vertical bars extending only halfway up or down, creating a distinctive, horizontal pattern.
  • Diamond Grilles: Diamond grilles form a diamond-shaped pattern on the glass by intersecting diagonal bars.
  • Custom Grilles: Some manufacturers offer custom grille designs to match your unique preferences or architectural style.

Choose grille patterns that enhance your home’s character and suit your design preferences.

5. Window Trim and Casing

Window trim and casing play a vital role in framing your windows and enhancing their appearance. Customizing these elements can further complement your home’s aesthetics. Consider the following:

  • Profile: Select the profile or style of trim that complements your interior decor, whether it’s traditional, modern, or another style.
  • Finish: Choose a paint or stain color that coordinates with your window frames and interior color scheme.
  • Width: Customize the width of trim and casing to achieve the desired level of visual impact.

6. Outdoor Landscaping and Window Dressings

Consider how your landscaping and window dressings, such as curtains, blinds, or shades, will interact with your replacement windows. Well-placed landscaping can frame your windows beautifully and create a cohesive look. Similarly, window treatments should coordinate with the overall design scheme.

7. Visual Balance and Proportions

Maintaining visual balance and proportions is essential for achieving an aesthetically pleasing look. Ensure that the size and placement of your replacement windows align with the architectural features of your home. Avoid overcrowding or overwhelming your facades with oversized or undersized windows.

8. Test Samples and Visualize

Before making a final decision, request window samples or use digital visualization tools offered by window manufacturers. These tools allow you to see how different window styles, colors, and grille patterns will look on your home.

9. Seek Professional Advice

If you’re unsure about which replacement windows will best complement your home’s aesthetics, consider seeking professional advice from window designers, architects, or interior designers. They can provide valuable insights and recommendations based on your specific home and design goals.

10. Stay Within Your Budget

While aesthetics are crucial, it’s essential to balance your design aspirations with your budget. There are various window options available for different price points, so explore choices that align with your financial constraints.

Conclusion

Choosing Grapevine Siding & Window Replacement that complement your home’s aesthetics involves a thoughtful process that considers your home’s architectural style, window types, frame materials, colors, grilles, trim, and overall visual harmony. By taking these factors into account and seeking professional guidance when needed, you can select replacement windows that not only enhance your home’s appearance but also reflect your personal style and design preferences. The result will be an aesthetically pleasing and harmonious living space that you can enjoy for years to come.

Grapevine Siding & Window Replacement

2140 Hall – Johnson Rd #102, Grapevine, TX 76051, United States

1-817-508-9754

How To Reengage Garage Door – Rowlett Door and Gates

Reengaging a Garage Door Repair Rowlett TX that has been disengaged from its automatic opener is a straightforward process, but it requires careful execution to ensure your safety and the proper functioning of the door. Whether you’ve manually disconnected the door for maintenance or due to a power outage, reengaging it correctly is essential to avoid damage or injury.

In this guide, we’ll take you through the steps to reengage your garage door.

Step 1: Understand the Disengagement Mechanism
Before attempting to reengage your garage door, it’s important to understand how the disengagement mechanism works. Most garage doors have an emergency release cord or lever that disconnects the door from the automatic opener. This allows you to manually open and close the door in case of a power outage or opener malfunction.

Step 2: Gather Your Materials
You’ll need a few tools and materials to safely and effectively reengage your garage door:

  • Stepladder (if the emergency release is located high on the door)
  • Safety gloves and goggles (optional but recommended)

Step 3: Locate the Emergency Release Mechanism
The emergency release mechanism is typically a red cord or lever hanging from the garage door opener rail. This cord is often located near the top of the door, closer to the center of the garage. The emergency release lever might also be located on the garage door opener motor unit itself.

Step 4: Pull the Emergency Release Cord or Lever
If your garage door is disconnected from the opener, the emergency release cord or lever will be in the disengaged position. To reengage the door, gently pull down on the cord or lever. You might hear a click as it locks back into place. This step reconnects the garage door to the automatic opener’s drive mechanism.

Step 5: Manually Move the Door
After reengaging the door, you should be able to manually open and close it without significant resistance. Carefully lift the door using the handle or designated grip points. Make sure to lift evenly and smoothly. If the door feels unusually heavy or difficult to lift, stop immediately and assess the situation. It’s possible that there’s a problem with the door’s balance or other components.

Step 6: Operate the Door Using the Opener
Once you’ve manually moved the door to a partially open position, press the button on your garage door opener to test if it’s functioning correctly. The opener should smoothly take over the operation of the door and move it to its fully open or fully closed position.

Step 7: Test Safety Features
Modern garage door openers are equipped with safety features that prevent the door from closing if there’s an obstruction in its path. Test these safety features by placing an object (such as a box) in the door’s path and attempting to close it using the automatic opener. The door should stop and reverse if it comes into contact with the object.

Step 8: Regular Maintenance
Reengaging your garage door is often necessary during power outages or for maintenance purposes. However, it’s important to remember that the door is designed to be operated using the automatic opener. If you find yourself needing to manually open and close the door frequently, consider addressing any underlying issues that might be affecting the opener’s functionality.

Step 9: Safety Precautions
Throughout the reengagement process, prioritize safety. Use safety gloves and goggles to protect your hands and eyes. If you’re working at a height, use a stepladder and ensure it’s stable before using it. When manually moving the door, be cautious of your back and body posture to avoid strain.

Step 10: Seek Professional Help if Needed
If you encounter any difficulties during the reengagement process or if the door doesn’t operate as expected after reconnection, it’s recommended to seek professional assistance. Garage doors can be heavy and complex, and attempting to troubleshoot serious issues without proper expertise can lead to further problems.

In conclusion, reengaging a Garage Door Repair Rowlett TX involves understanding the emergency release mechanism, manually reconnecting the door to the automatic opener, and testing its functionality. By following these steps and prioritizing safety, you can successfully reengage your garage door and ensure it operates smoothly and safely.

Rowlett Door and Gates

5813 Cypress Dr, Rowlett, TX 75089, United States

1-469-920-8704

Do All Garage Door Openers Have a Learn Button – Anna’s Best Garage Door & Gates

In the realm of residential convenience and security, Garage Door Repair Anna TX openers have emerged as a quintessential innovation. These devices have undergone significant technological advancements since their inception, with the incorporation of a “Learn” button being a pivotal feature across many models. This Learn button, while not universally present in all garage door openers, has become a ubiquitous element in modern designs due to its role in enhancing safety, functionality, and user-friendly programming.

The Learn button is a small, often inconspicuous component located on the garage door opener motor unit. Its primary purpose is to facilitate the synchronization process between the opener and its accompanying remote controls. When a new remote control is acquired or when there’s a need to reprogram an existing one, the Learn button plays a crucial role. While not every garage door opener includes a Learn button, its prevalence in the majority of contemporary designs underscores its significance.

One of the chief advantages of the Learn button lies in its contribution to security. In traditional garage door openers, fixed codes were used for remote controls, which presented a vulnerability to unauthorized access. Hackers and malicious actors could potentially intercept these codes, compromising the security of homes and properties. The Learn button addresses this issue by allowing users to program rolling codes. Rolling codes generate a new security code each time the garage door is operated, rendering intercepted codes useless for future attempts at unauthorized access. This dynamic security feature is particularly critical in safeguarding homes against modern security threats.

Functionality is another paramount area where the Learn button shines. In the absence of this button, programming remote controls would be a cumbersome process involving manual adjustment of dip switches or fixed code inputs. The Learn button streamlines this process significantly. To pair a new remote control, the user simply presses the Learn button on the opener unit and then activates the remote. The opener learns and stores the unique code of the remote, allowing seamless operation thereafter. This ease of programming enhances user experience and reduces the likelihood of errors associated with manual code input.

The Learn button’s user-friendly interface extends beyond remote control programming. Many modern garage door openers integrate with smart home systems and mobile applications. The Learn button simplifies the process of connecting the opener to these systems. By following manufacturer instructions and activating the Learn button, users can effectively link their opener to their preferred smart home platform. This integration opens up a range of possibilities, from remote monitoring and control to integration with broader home automation routines.

While the Learn button has become a standard feature in many garage door openers, it’s important to note that not all models incorporate this technology. Some older or more basic openers may still rely on traditional programming methods, such as dip switches or manual code entry. However, the trend is undoubtedly moving toward Learn button-based systems due to their enhanced security, convenience, and compatibility with modern technology.

In conclusion, the Learn button has evolved into a cornerstone of modern Garage Door Repair Anna TX openers, revolutionizing the way users interact with these devices. Its role in bolstering security through rolling codes, simplifying programming procedures, and enabling integration with smart home systems highlights its indispensable nature. While not every garage door opener includes a Learn button, its widespread adoption underscores its transformative impact on the garage door opener industry. As technology continues to advance, it’s likely that the Learn button will remain a key component in shaping the future of garage door opener design and functionality.

Anna’s Best Garage Door & Gates

1009 Mathew Dr, Anna, TX 75049, United States

1-469-224-1335

How To Remove Oil Stains Fom garage Door – Lantana Gates & Garage Doors

Oil stains on a Garage Door Repair Lantana TX can be unsightly and challenging to remove, but with the right techniques and materials, you can effectively get rid of these stains.

Here’s a step-by-step guide on how to remove oil stains from a garage door:

Step 1: Gather Materials and Tools
Before you start, gather the necessary materials and tools:

  • Oil stain remover or degreaser (commercial or homemade)
  • Dishwashing liquid
  • Baking soda
  • Clean rags or towels
  • Soft-bristle brush or scrub brush
  • Bucket of warm water
  • Garden hose with spray nozzle
  • Safety goggles and gloves

Step 2: Act Quickly
The sooner you address the oil stain, the better chance you have of removing it completely. Try to treat the stain as soon as you notice it to prevent it from setting into the garage door material.

Step 3: Test a Small Area
Before applying any cleaning solution to the entire stain, test it on a small, inconspicuous area of the garage door to ensure that it doesn’t cause any damage or discoloration.

Step 4: Use Oil Stain Remover or Degreaser

  1. If you’re using a commercial oil stain remover or degreaser, follow the manufacturer’s instructions for application.
  2. Apply the product directly to the oil stain. Make sure the affected area is completely covered.
  3. Allow the stain remover or degreaser to sit on the stain for the recommended amount of time. This usually ranges from a few minutes to several hours, depending on the product and the severity of the stain.

Step 5: Scrub the Stain
Use a soft-bristle brush or scrub brush to gently scrub the stained area. This helps to agitate the oil and loosen it from the surface of the garage door.

Step 6: Wash with Dishwashing Liquid

  1. In a bucket of warm water, add a small amount of dishwashing liquid. Mix well to create a soapy solution.
  2. Dip a clean rag or scrub brush into the soapy water and gently scrub the stained area. Work in circular motions and apply gentle pressure.

Step 7: Rinse with Water
Rinse the garage door thoroughly with a garden hose equipped with a spray nozzle. Use high-pressure water to remove the oil stain remover, degreaser, and soapy residue. Make sure to rinse the area well to prevent any residue from drying on the surface.

Step 8: Repeat if Necessary
If the stain is still visible after the first attempt, you may need to repeat the process. Some stubborn stains may require multiple treatments to completely remove.

Step 9: Use Baking Soda Paste (Optional)
For persistent or older stains, you can create a baking soda paste to help lift the oil:

  1. Mix baking soda with enough water to create a thick paste.
  2. Apply the baking soda paste to the stain and let it sit for several hours or overnight.
  3. Gently scrub the area with a soft-bristle brush before rinsing with water.

Step 10: Dry the Area
After rinsing, use clean towels or rags to dry the cleaned area. This prevents any water spots or streaks from forming.

Step 11: Prevention
To prevent future oil stains on your garage door, consider using absorbent mats or pads underneath your vehicles to catch any oil drips. Regularly clean the garage door and address any spills or leaks promptly.

Removing oil stains from a Garage Door Repair Lantana TX requires patience and the right techniques. Depending on the severity of the stain, you may need to repeat the process multiple times. If you’re concerned about damaging the garage door material, consider seeking professional assistance or advice.

Lantana Gates & Garage Doors

1180 Central Way, Lantana, TX 76226, United States

1-940-400-3038

Securing Your Emergency Release Cord: Preventing Unwanted Access – Lantana Gates & Garage Doors

As a homeowner who takes the safety and security of my property seriously, I’ve come to realize that even the smallest details can have a significant impact. One often overlooked aspect that I’ve become particularly attentive to is the emergency release cord of my garage door. While this feature is undoubtedly helpful in emergencies, it can also be exploited by unauthorized individuals if not properly secured.

By following Lantana Gates & Garage Doors, I’m eager to share my insights into the importance of securing the emergency release cord and offer practical steps that I personally take to prevent any unwanted access to my home.

Understanding the Role of the Emergency Release Cord

The emergency release cord is an essential component of my garage door opener system. It allows me to manually disengage the garage door from the opener, which is incredibly useful during power outages or instances of malfunction. However, while this feature is designed to be a safety mechanism, it can also become a potential security risk if not handled with caution.

Recognizing the Risks of an Unsecured Emergency Release Cord

  1. Vulnerable Entry Point: Leaving the emergency release cord unsecured can provide easy access for intruders to enter my garage, potentially compromising the safety of my home.
  2. Bypassing Security Measures: Those who are aware of this vulnerability can manipulate the emergency release cord to circumvent the security measures of my garage door opener system.
  3. Silent and Quick Access: Intruders can quietly and swiftly enter my garage without triggering any alarms or alerts, increasing the risk of theft.
  4. Valuables at Risk: Once inside, burglars could target valuable possessions such as tools, bicycles, sports equipment, and even my vehicles.
  5. Threat of Home Invasion: If my garage is connected to my home, an intruder who gains access to the garage could potentially pose a threat to the safety of my family.

Securing the Emergency Release Cord: Steps I Take

  1. Install a Protective Cover or Guard

To prevent unauthorized access, I’ve installed a protective cover or guard over the emergency release cord mechanism. This physical barrier ensures that the cord cannot be accessed or tampered with from the outside.

  1. Utilize Zip Ties or Locks

One of the simplest and most effective methods I’ve adopted is using zip ties or locks. I thread the tie or lock through the holes of the release mechanism, securely preventing the cord from being pulled and disengaged.

  1. Position the Cord Strategically

When I engage the emergency release cord, I make sure it’s positioned high enough that it’s out of reach from potential intruders. This ensures that it’s not easily tampered with from the exterior.

  1. Educate My Household

I’ve made sure that every member of my household understands the significance of securing the emergency release cord. I’ve educated them on its proper use during emergencies and stressed the importance of keeping it safeguarded at all times.

  1. Regular Inspection for Tampering

As part of my routine maintenance, I regularly check the emergency release cord for any signs of tampering. If I notice any attempts to manipulate the cord, I take immediate action to reinforce its security.

  1. Consider Smart Garage Door Openers

In line with technological advancements, I’ve considered upgrading to a smart garage door opener. These systems offer additional security features that allow me to remotely monitor and control the garage door’s status, even when I’m away from home.

  1. Seek Professional Advice

Whenever I’m uncertain about the best practices for securing the emergency release cord, I reach out to garage door professionals for guidance. Their expertise ensures that I’m implementing the most effective security measures.

Overall, in reference to Lantana Gates & Garage Doors and as a homeowner, I’ve come to understand that safeguarding my home involves much more than traditional security measures. Taking steps to secure the emergency release cord of my garage door is a critical part of maintaining a secure living environment. By comprehending the potential risks, implementing practical measures like protective covers, locks, and strategic positioning, and educating my family on the importance of security, I can effectively prevent unauthorized access and potential threats to my property and loved ones. Prioritizing the protection of my home is a responsibility I hold dear, and securing the emergency release cord is a significant step toward achieving that goal.

Lantana Gates & Garage Doors

1180 Central Way, Lantana, TX 76226, United States

940-400-3038

Do it Garage Door Opener – Garage Door Experts of Mansfield

A garage door repair opener is a device designed to automate the process of opening and closing garage doors. It enhances convenience and security for homeowners, allowing them to operate their garage doors with ease from the comfort of their vehicles or homes. Garage door openers consist of several key components, including the motor unit, remote control, sensors, and drive mechanism.

The motor unit serves as the powerhouse of the garage door opener system. Typically installed on the ceiling of the garage, the motor unit houses an electric motor that generates the necessary force to move the garage door. This motor is connected to a drive mechanism, often a belt, chain, or screw drive, which transmits the motor’s power to the door’s lifting system.

Remote controls are integral to garage door openers, providing a convenient means for users to operate the door from a distance. These handheld devices use radio frequency (RF) signals to communicate with the motor unit. When a user presses a button on the remote control, it sends a signal to the motor unit to initiate the opening or closing process. Remote controls are often equipped with multiple buttons, allowing users to control multiple garage doors or even other devices, such as outdoor lights.

Safety features are crucial components of modern garage door openers. Sensors are installed near the bottom of the garage door’s track and emit an infrared beam across the door’s path. If an object or person interrupts this beam while the door is closing, the sensors detect the obstruction and halt the door’s movement, preventing accidents or damage. Additionally, garage door openers are equipped with a reversing mechanism that detects resistance when the door is closing. If resistance is detected, the opener reverses the door’s movement to avoid crushing any obstacles.

Installation and setup of a garage door opener involve mounting the motor unit to the ceiling, attaching the drive mechanism to the garage door, and programming the remote controls. Proper installation is essential to ensure the system operates smoothly and safely. It’s recommended to follow the manufacturer’s instructions and, if necessary, seek professional assistance.

Various types of garage door openers are available on the market. Chain drive openers use a metal chain to lift and lower the door and are known for their durability but can be noisy. Belt drive openers employ a rubber belt for quieter operation, making them suitable for attached garages. Screw drive openers use a threaded rod to move the door and are known for their reliability with fewer moving parts. Direct drive openers have the motor integrated into the trolley, resulting in quieter and smoother operation.

In recent years, technological advancements have led to the integration of smart features into garage door openers. Smart garage door openers can be controlled remotely through smartphone apps, allowing users to monitor their garage door’s status, receive alerts, and even open or close the door remotely. These systems often integrate with home automation platforms, enabling seamless control alongside other smart devices.

To conclude, a garage door repair opener is a motorized device that automates the process of opening and closing garage doors. It includes components such as the motor unit, remote control, sensors, and drive mechanism. Safety features, such as sensors and reversing mechanisms, are essential to prevent accidents and damage. Proper installation and maintenance are crucial for optimal performance and longevity. With advancements in technology, smart garage door openers offer enhanced convenience and control through smartphone apps and home automation integration, further improving the overall garage access experience.

Garage Door Experts of Mansfield

209 Main, Mansfield, TX 76063

817-769-244

Expert Strategies for Repairing Garage Door Springs – Mckinney Overhead & Garage Doors

Being a homeowner who loves to take care of my property, I’ve gained a deep appreciation for the mechanics that keep everything running smoothly. Recently, I encountered a challenging issue that highlighted the complexities of maintaining a well-functioning garage door: a problem with the garage door springs. These seemingly small components play a significant role in the door’s operation, and I was determined to understand and address the issue.

Drawing insights from professionals in the field, I’ve put together a comprehensive guide on expert strategies for repairing garage door springs according to Mckinney Overhead & Garage Doors.

Recognizing the Significance of Garage Door Springs

Before diving into the strategies, I realized that I needed to comprehend the crucial role garage door springs play. I spoke with Sarah Turner, a seasoned garage door technician, who explained, “Garage door springs counterbalance the weight of the door, making it manageable to open and close. They bear an immense load, ensuring the door operates safely and efficiently.”

Understanding the importance of these springs was a wake-up call to their significance in maintaining the proper functioning of the garage door.

Spotting the Telltale Signs of Spring Problems

Recognizing the signs of spring issues is the first step in addressing them effectively. David Carter, a knowledgeable garage door expert, pointed out some common indicators, saying, “Struggling to open the garage door, uneven movement, or unusual creaking sounds during operation can all be signs of spring problems.”

Paying attention to these signs empowers homeowners like me to take action before a minor issue turns into a major concern.

Navigating the Complexity of Spring Repairs

As I delved deeper into repairing garage door springs, I quickly learned that it’s a task best left to professionals. Sarah Turner stressed this point, saying, “Garage door springs are under extreme tension and can be dangerous to work with. Attempting repairs without the proper knowledge and tools can lead to serious injuries.”

With this understanding, I recognized the importance of seeking expert help when dealing with spring-related issues.

Unveiling Expert Strategies for Spring Repairs

With the insights I gained from professionals, I uncovered a range of strategies that experts employ when repairing garage door springs:

1. Thorough Assessment and Diagnosis: The process starts with a meticulous assessment of the springs and the entire door system. David Carter highlighted, “An experienced technician will carefully inspect the springs, cables, and other components to pinpoint the root cause of the problem.”

2. Selecting the Right Springs: If spring replacement is necessary, choosing the correct springs is essential. Sarah Turner explained, “Selecting springs that match the right size and tension rating ensures proper balance and safe operation.”

3. Handling Torsion Springs Safely: Torsion springs are wound tightly and can be hazardous to handle. David Carter emphasized, “Professionals have the expertise to safely release tension from torsion springs, making their replacement safe and effective.”

4. Precise Installation Matters: The accurate installation of springs is crucial for their effectiveness and longevity. Sarah Turner stated, “Experts ensure that springs are installed with precision, correct positioning, and secure attachment to maintain the necessary balance.”

5. Achieving Balance: Following spring replacement, the door must be balanced to avoid straining other components. David Carter explained, “Balancing involves adjusting spring tension and ensuring the door’s smooth and even movement.”

6. Prioritizing Safety: Professionals follow strict safety protocols during spring repairs. Sarah Turner assured, “Technicians utilize specialized tools and techniques to prevent accidents while working with springs.”

7. Ongoing Maintenance: Regular maintenance is key to prolonging the lifespan of repaired or replaced springs. David Carter recommended, “Regular lubrication and inspections can prevent future problems and catch potential issues early.”

The Value of Professional Assistance

Engaging professionals for garage door spring repairs brings numerous benefits. Sarah Turner summed it up, saying, “Experts have the experience, training, and tools to handle spring problems safely and efficiently. Their expertise ensures a job done right the first time.”

Conclusion

Based from Mckinney Overhead & Garage Doors and my journey into the world of repairing garage door springs highlighted the pivotal role these components play in a well-functioning garage door. Understanding their significance, recognizing signs of trouble, and acknowledging the complexity of spring repairs are vital lessons for homeowners. By following expert strategies, such as thorough assessment, proper spring selection, precise installation, and regular maintenance, we can ensure that our garage doors operate safely and efficiently. Ultimately, entrusting professionals with spring repairs guarantees the job is carried out with expertise, minimizing risks and preserving the longevity of the entire garage door system.

Mckinney Overhead & Garage Doors

3804 Landsdowne Dr, McKinney, TX 75072, United States

972-848-7414

Diagnosing and Repairing Off-Track Garage Doors: Expert Techniques – Lake Arlington Gates & Garage Doors

As a homeowner who takes pride in maintaining my space, encountering a malfunctioning garage door was quite a frustration. Among the common issues I faced was the dreaded off-track garage door – a situation where the door becomes misaligned and seems to have a mind of its own.

Determined to tackle this problem head-on, I delved into the world of garage door repairs and learned some invaluable expert techniques for diagnosing and fixing off-track garage doors by following Lake Arlington Gates & Garage Doors.

Understanding the Problem

My journey to repairing my off-track garage door began with understanding the root cause of the issue. Following the advice of Mark Davis, a seasoned garage door technician, I conducted a visual inspection. “Check for gaps between the rollers and the tracks, any bent tracks, or any objects that might be obstructing the door’s path,” he advised.

Upon careful inspection, I noticed that worn-out rollers, a slightly bent track, and loose hardware were contributing to the misalignment. Armed with this knowledge, I was ready to roll up my sleeves and tackle the repair.

Safety First

Before diving into repairs, I made sure to follow the safety precautions advised by Mark. Disconnecting the garage door opener and securing the door in its current position were critical steps to prevent unexpected movements that could lead to accidents. Donning safety glasses and gloves, I was prepared to embark on the repair journey with safety as my top priority.

Embarking on Repairs

I began the repair process with the following expert techniques in mind:

1. Clearing the Path: Following Mark’s advice, I cleared away any debris or obstacles that might hinder the door’s movement. A clean path is essential to prevent worsening the situation.

2. Realignment of Rollers: Gently nudging misaligned rollers back into the tracks was my next step. I used a pair of pliers to guide them into the grooves, ensuring they were properly seated.

3. Addressing Bent Tracks: The slightly bent track required attention. Armed with a rubber mallet, I patiently straightened the bent sections, taking care not to rush and cause further damage.

4. Tightening Loose Hardware: Loose bolts and screws were a common issue causing misalignment. With the appropriate tools, I carefully tightened all the hardware. However, I made sure not to overtighten and risk damaging the threads.

5. Replacing Worn-Out Rollers: I followed Mark’s suggestion to replace worn-out rollers with new ones. Opting for nylon rollers, which are quieter and less likely to cause friction, was a wise choice.

6. Knowing When to Seek Help: As I continued with the repairs, I realized the importance of knowing my limits. While I managed to tackle the misalignment, I understood that severe cases might necessitate professional intervention. Mark had wisely advised seeking expert help if uncertainty or a significant off-track situation arose.

Preventing Future Off-Track Woes

As I wrapped up my off-track garage door repair, I was determined to prevent such issues from cropping up in the future. Regular maintenance, including lubricating moving parts and conducting visual inspections, was the key to keeping the door functioning seamlessly. Following Mark’s guidance, I was prepared to address signs of wear or damage promptly.

Overall, as per Lake Arlington Gates & Garage Doors, my journey through diagnosing and repairing an off-track garage door was a valuable learning experience. Armed with expert techniques and the wisdom shared by Mark Davis, I successfully addressed the misalignment issue that had been causing me headaches. What I learned goes beyond just fixing the immediate problem – it’s about embracing regular maintenance and prioritizing safety to ensure that my garage door remains on track and operates reliably for years to come.

Lake Arlington Gates & Garage Doors

4101 W Green Oaks Blvd #305-318, Arlington, TX 76016, United States

817-993-6623

Cracked or Damaged Garage Door Panels: Repair or Replace? – Trophy Club Overhead & Garage Doors

Facing the dilemma of dealing with cracked or damaged garage door panels can be a real head-scratcher. As a homeowner, I’ve found myself pondering whether it’s better to repair or replace those unsightly and malfunctioning panels. It’s a decision that brings together factors like budget, aesthetics, and practicality.

Let me share some insights I’ve gathered on how to navigate this situation according to Trophy Club Overhead & Garage Doors:

Assessing the Extent of Damage: When I discovered a few dents and scratches on my garage door panels, my first step was to assess the damage. Minor blemishes that didn’t affect the door’s operation seemed like they could be repaired without much hassle. On the other hand, more serious damage like cracks or bending that compromised the door’s structure made me lean towards replacement.

Appearance vs. Functionality: I quickly learned that distinguishing between cosmetic and structural damage was key. If the damage was just skin-deep and didn’t hinder the door’s performance, repairs might be a reasonable solution. But when the damage started to interfere with the smooth opening and closing of the door, or worse, posed a security risk, I knew replacement was the way to go.

Considering the Age of the Door: Taking into account the age of my garage door played a significant role in my decision-making process. With a relatively new door, I found out that replacing individual panels was a viable option, as the panels were still in production and readily available. However, if the door had been in service for a long time and the panels were no longer being made, replacement might not be as straightforward.

Material Matters: The material of my garage door turned out to be a crucial factor. My steel door, prone to dents and visible damage, made me consider repairs to restore its appearance. Luckily, many steel doors can be fixed up by professionals skilled in garage door panel repairs. If it had been a wooden door, which can face issues like rot or other types of damage, replacement might have been more compelling.

Cost Comparison: Naturally, the financial aspect was a significant concern. I realized that simple repairs were usually less expensive than replacing entire panels. Yet, as I delved deeper, I realized that if multiple panels were damaged or if the repairs were intricate, the repair costs could add up, bringing me close to the expense of replacing panels.

Extent of Damage and Uniformity: When only a single panel was affected, repairing it seemed like a logical step to maintain the door’s appearance and save on costs. However, if numerous panels had suffered damage or if the overall condition of the door was deteriorating, replacement began to seem like a more practical choice.

Considering Aesthetics: The way my garage door looked had a direct impact on my home’s curb appeal. For visible damage that would stand out, replacing the panels was a more appealing option to maintain a cohesive and appealing exterior.

Energy Efficiency and Longevity: Thinking beyond the immediate concerns, I realized that damaged panels could impact the door’s insulation properties, affecting energy efficiency. If repair compromised insulation, replacing the panel might be the smarter choice, as it would contribute to my home’s long-term energy savings.

Expert Advice: At times, the decision can be tough to make alone. Seeking advice from a professional garage door technician proved invaluable. They could assess the situation, offer insights into the best course of action, and guide me through the specifics of my door’s condition.

Ultimately, based from Trophy Club Overhead & Garage Doors, deciding whether to repair or replace cracked or damaged garage door panels boils down to evaluating the damage extent, the age of the door, material considerations, costs, aesthetics, and long-term goals. By carefully weighing these factors, you can ensure that your decision aligns with your priorities and ensures the functionality, security, and overall appeal of your garage door for years to come.

Trophy Club Overhead & Garage Doors

2412 Trophy Club Dr, Trophy Club, TX 76262, United States

817-646-5315

Should You Leave Your Attic Door Open In Garage – Plano Overhead & Garage Doors

Leaving your attic Garage Door Repair Plano TX open in the garage can have both benefits and drawbacks, depending on various factors such as climate, insulation, and usage of the space.

Here’s a detailed explanation of the pros and cons to help you make an informed decision:

Benefits of Leaving the Attic Door Open in the Garage:

  1. Ventilation: If your attic space lacks proper ventilation, leaving the attic door open in the garage can allow air circulation. This can help prevent excess moisture buildup that could lead to mold or mildew growth.
  2. Temperature Regulation: In some climates, leaving the attic door open can help regulate the temperature in the attic space. During warmer months, it can prevent excessive heat buildup that could affect the insulation and the overall condition of the attic.
  3. Access to Storage: If your attic is used for storage, leaving the door open provides convenient access to stored items without needing to open the attic hatch every time.
  4. Reduced Moisture: If your attic has high humidity levels, leaving the attic door open in the garage can allow any excess moisture to dissipate, reducing the risk of condensation-related issues.
  5. Prevention of Odors: If your attic space occasionally has unpleasant odors due to lack of ventilation or stored items, leaving the door open can help prevent the buildup of odors.

Drawbacks of Leaving the Attic Door Open in the Garage:

  1. Energy Efficiency: Leaving the attic door open can affect the energy efficiency of your home, especially if the attic is not properly insulated. Heat or cool air from your living spaces could escape into the garage and then into the attic, causing temperature imbalances and increasing energy consumption.
  2. Air Quality: If your garage contains items that emit fumes or odors, leaving the attic door open could allow these odors to enter the attic and potentially affect the air quality.
  3. Insulation Efficiency: If your attic is insulated and leaving the door open exposes the insulation to unregulated temperatures, it could reduce the effectiveness of the insulation over time.
  4. Security: Leaving the attic door open in the garage might pose a security risk if your garage is accessible from outside. An open attic door could provide an entry point for unwanted guests or potential intruders.
  5. Pest Entry: An open attic door can also invite pests, insects, and rodents into your attic space, especially if your garage is not properly sealed against pests.

Considerations for Leaving the Attic Door Open:

  1. Climate: The decision to leave the attic door open might depend on your climate. In colder climates, leaving the door open could result in heat loss, while in warmer climates, it could help with ventilation and temperature regulation.
  2. Insulation: If your attic is properly insulated and sealed, leaving the door open might not significantly affect the energy efficiency of your home. However, if your attic lacks insulation, you might want to keep the door closed to prevent heat transfer.
  3. Usage: Consider how frequently you access the attic space. If you use the attic for storage and need regular access, leaving the door open might be more convenient.
  4. Security and Pests: Assess the security of your garage and the risk of pests. If you’re concerned about security or pests, keeping the door closed could be the better option.

Conclusion:

Leaving the attic Garage Door Repair Plano TX open in the garage is a decision that depends on your specific circumstances. While it can offer benefits such as ventilation and easy access to storage, it’s important to weigh these advantages against potential drawbacks like energy inefficiency and security concerns. Consider your climate, insulation, usage of the attic space, and overall home security when deciding whether to leave the attic door open or closed in the garage. If you’re unsure, consulting with a home improvement professional or energy expert can provide valuable insights tailored to your situation.

Plano Overhead & Garage Doors

Plano TX, United States

817-242-5042

How To Determine Garage Door Belt Size – Mckinney Overhead & Garage Doors

Determining the correct Mckinney Overhead & Garage Doors belt size is essential for ensuring smooth and efficient operation of your garage door opener system. The belt size refers to the length and width of the belt used in the opener’s mechanism.

If you’re replacing a worn-out belt or installing a new garage door opener, here’s a step-by-step guide to help you determine the appropriate belt size:

Tools and Materials You Might Need:

  • Measuring tape
  • Replacement belt (if available)
  • Garage door opener model number (for reference)

1. Identify the Garage Door Opener Model:

If you have the manual for your garage door opener or access to the model number, it can provide valuable information about the belt size and type required. The model number is usually located on the opener itself or in the owner’s manual.

2. Measure the Existing Belt (If Available):

If you’re replacing an existing belt, you can measure its length and width to determine the correct size. Here’s how:

2.1. Length Measurement:

  1. Extend the belt to its full length.
  2. Use a measuring tape to measure the length of the belt from end to end. Make sure to measure along the center of the belt.

2.2. Width Measurement:

  1. Use a measuring tape to measure the width of the belt. Measure the width at its widest point.

3. Consult the Manual or Manufacturer:

Check the garage door opener’s manual or the manufacturer’s specifications for information about the appropriate belt size. This information might be listed in the technical specifications section or within a parts diagram.

4. Contact the Manufacturer or Retailer:

If you’re unable to find the information you need, reach out to the manufacturer’s customer service or a retailer that specializes in garage door opener systems. Provide them with the model number of your garage door opener, and they can assist you in determining the correct belt size.

5. Consider the Opener’s Rail Length:

The length of the belt might also be influenced by the length of the rail or track on which it operates. Longer rails might require longer belts. If you’re unsure about the rail length, consult the manual or manufacturer for guidance.

6. Professional Assistance:

If you’re not comfortable determining the belt size on your own or if you encounter any difficulties, consider seeking professional assistance. A garage door technician or installer can accurately measure and determine the appropriate belt size for your specific opener system.

7. Benefits of Accurate Belt Sizing:

Choosing the correct belt size is crucial for the proper functioning of your garage door opener. An accurately sized belt ensures:

  • Smooth and efficient door operation.
  • Reduced wear and tear on the belt and other components.
  • Minimized risk of belt slippage or damage.
  • Enhanced safety and security.

8. Conclusion:

Determining the correct Mckinney Overhead & Garage Doors belt size involves measuring the existing belt (if available), consulting the opener’s manual or manufacturer’s specifications, and reaching out to customer service or retailers for assistance. Accurate belt sizing is essential for optimal garage door opener performance, ensuring your system functions properly and operates smoothly for years to come.

Mckinney Overhead & Garage Doors

3804 Landsdowne Dr, McKinney, TX 75072, United States3804 Landsdowne Dr, McKinney, TX 75072, United States

1-972-848-7414

Can Sunlight Interfere With Garage Door Sensors – Southlake Garage Door & Gate Repairs

Sunlight can interfere with the proper functioning of Southlake Garage Door & Gate Repairs sensors, particularly the safety sensors that are designed to prevent the door from closing if an obstruction is detected in its path. Garage door safety sensors play a crucial role in preventing accidents and ensuring the safe operation of the door. However, various external factors, including sunlight, can affect their performance.

Here’s how sunlight can interfere with garage door sensors and what you can do to address the issue:

1. Sunlight Glare and Reflections:

Sunlight can create glare and reflections that affect the sensors’ ability to communicate with each other. Safety sensors typically consist of a transmitter and a receiver, and they work by sending an invisible beam of light between them. If sunlight hits the sensors at a certain angle, it can cause the sensors to interpret the light beam as being interrupted, even if there’s no obstruction in the path.

2. False Positives:

Interference from sunlight can lead to false positives, where the sensors wrongly detect an obstruction and prevent the garage door from closing. This can be frustrating and might require manual intervention to override the safety system.

3. Reduced Sensitivity:

Sunlight interference can reduce the sensitivity of the sensors. If the sensors are not detecting obstructions as effectively as they should, it compromises the overall safety of the garage door system.

4. How to Address Sunlight Interference:

Here are some steps you can take to address sunlight interference with garage door sensors:

  • Adjust Sensor Alignment: Ensure that the sensors are properly aligned. If they are misaligned, they might be more susceptible to sunlight interference. Check the manufacturer’s guidelines for the correct alignment procedure.
  • Use Sun Shields: Some garage door sensor kits include sun shields or hoods that can be attached to the sensors. These shields can help block direct sunlight and reduce glare and reflections that might affect sensor performance.
  • Tinted Covers: Consider using tinted or shaded covers for the sensors to reduce the impact of direct sunlight.
  • Clean Sensors: Keep the sensors clean from dirt, dust, and debris. Dirty sensors might be more prone to sunlight interference.
  • Reposition Sensors: If possible, consider repositioning the sensors to minimize their exposure to direct sunlight. However, this should be done while still maintaining proper alignment.
  • Install Awnings: Installing awnings or shades above the sensors can help block sunlight and protect them from glare and reflections.

5. LED Lighting Interference:

It’s worth mentioning that some LED lighting systems can also emit light in a frequency that interferes with the operation of garage door sensors. If you’ve recently installed LED lights near your garage door, they might be contributing to the interference issue. In such cases, using different LED bulbs or adjusting the positioning of the lights might help.

6. Consult a Professional:

If you’ve tried the above steps and are still experiencing interference issues with your garage door sensors, consider consulting a professional garage door technician. They have experience dealing with sensor-related problems and can provide expert solutions.

Conclusion:

Sunlight interference can indeed affect the performance of Southlake Garage Door & Gate Repairs safety sensors, leading to false positives and compromised safety. Taking preventive measures, such as adjusting alignment, using sun shields, and keeping the sensors clean, can help mitigate the impact of sunlight. If you’re unable to resolve the issue on your own, seeking assistance from a professional technician is a recommended course of action to ensure the safe and reliable operation of your garage door system.

Southlake Garage Door & Gate Repairs

2106 E State Hwy 114 #105, Southlake, TX 76092, United States

1-817-587-0445

How Much Slack In Garage Door Chain – Lake Arlington Gates & Garage Doors

The slack in a Lake Arlington Gates & Garage Doors chain refers to the amount of loose or sagging chain between the motor unit and the trolley (carriage) that moves the garage door along the track. Proper tensioning of the chain is crucial for the smooth and efficient operation of the garage door opener. While the specific amount of slack can vary based on the manufacturer and model of the garage door opener, there are general guidelines you can follow to ensure that the chain is properly tensioned.

Here’s a comprehensive guide on how much slack should be in a garage door chain:

1. Consult the Manual:
Always refer to the manufacturer’s manual for your specific garage door opener model. The manual should provide detailed instructions on how to adjust and tension the chain properly. It will also indicate the manufacturer’s recommended amount of slack for the chain.

2. Check for Proper Alignment:
Before adjusting the chain tension, ensure that the track, trolley, and motor unit are properly aligned. Misalignment can lead to uneven wear and affect the performance of the garage door opener.

3. Measure the Slack:
As a general rule of thumb, most garage door openers should have around 1/2 to 3/4 inches of slack in the chain when the garage door is in the closed position. This means that when the garage door is fully closed, you can lift the chain slightly to achieve this amount of slack. However, this measurement can vary, so it’s important to consult your manual for the recommended slack.

4. Adjusting Chain Tension:
To adjust the chain tension, follow these steps:

a. Disconnect Power: Before making any adjustments, disconnect the power to the garage door opener to prevent accidental activation.

b. Locate Adjustment Points: Most garage door openers have adjustment points on the motor unit. These points allow you to tighten or loosen the chain.

c. Loosening the Chain: If the chain is too tight, causing excessive tension, you’ll need to loosen it. Loosen the lock nut on the tension adjustment bolt. Then, turn the adjustment bolt counterclockwise to create more slack in the chain. Once you’ve achieved the recommended amount of slack, tighten the lock nut.

d. Tightening the Chain: If the chain has too much slack, causing it to sag, tighten it. Loosen the lock nut and turn the adjustment bolt clockwise to reduce the slack. Again, make sure you achieve the proper amount of slack before tightening the lock nut.

5. Test the Door Operation:
After making adjustments to the chain tension, test the garage door to ensure that it operates smoothly and without any binding or excessive noise. The garage door should open and close evenly along the track.

6. Regular Maintenance:
Periodically check the chain tension as part of your garage door maintenance routine. Over time, factors such as temperature changes and wear can affect the chain’s tension. If you notice any unusual sounds or performance issues, it might be an indication that the chain needs adjustment.

7. Seek Professional Assistance:
If you’re unsure about adjusting the chain tension or if you encounter difficulties during the adjustment process, consider seeking the assistance of a professional garage door technician. They have the expertise and tools to ensure proper chain tension and optimal garage door opener performance.

In conclusion, the recommended amount of slack in a Lake Arlington Gates & Garage Doors chain is generally around 1/2 to 3/4 inches when the door is in the closed position. However, always refer to the manufacturer’s manual for your specific garage door opener model to get accurate guidelines on chain tension. Properly tensioning the chain is important for the smooth and efficient operation of your garage door opener, and regular maintenance can help ensure its longevity and reliable performance.

Lake Arlington Gates & Garage Doors

4101 W Green Oaks Blvd #305-318, Arlington, TX 76016, United States

1-817-993-6623

What Is The Quietest Garage Door Opener – Trophy Club Overhead & Garage Doors

Selecting the quietest Trophy Club Overhead & Garage Doors opener is a priority for many homeowners who want to minimize noise and disruptions while using their garage. A quiet garage door opener can enhance the overall comfort of your home and reduce disturbances to neighbors, especially if you have a living space near or above the garage.

In this guide, we’ll explore the factors that contribute to a quiet garage door opener, review some of the quietest models available, and provide insights into making an informed choice.

Factors Contributing to a Quiet Garage Door Opener:

  1. Motor Type: DC (direct current) motors are generally quieter than AC (alternating current) motors. DC motors provide smoother and more controlled operation, resulting in reduced noise.
  2. Drive Type: Belt-drive and screw-drive garage door openers tend to be quieter than chain-drive models. Belt-drive openers use a rubber belt to lift the door, while screw-drive openers use a threaded rod.
  3. Insulation and Vibration Dampening: Garage door openers that incorporate insulation and vibration dampening materials can help reduce noise from the motor and moving parts.
  4. Quality of Components: Higher-quality materials and precision engineering can result in quieter operation. Look for garage door openers with durable, well-constructed components.
  5. Soft Start and Stop: Some garage door openers feature soft start and stop mechanisms that reduce the impact and noise when the door begins to move and when it reaches the end of its travel.
  6. Horsepower: Choose an opener with the appropriate horsepower for your door’s weight. Overpowered openers can create unnecessary noise due to excessive force.

Some of the Quietest Garage Door Opener Models:

  1. Chamberlain B970 Ultra-Quiet Belt Drive Garage Door Opener: This model features a powerful yet quiet belt drive, DC motor, and Chamberlain’s MyQ technology for remote monitoring and control via a smartphone app.
  2. Genie SilentMax Connect Belt Drive Garage Door Opener: Known for its quiet operation, this model utilizes a belt drive system and includes integrated Aladdin Connect Wi-Fi technology.
  3. LiftMaster 8500W Elite Series Wall Mount Garage Door Opener: A unique option, this wall-mounted opener minimizes vibrations and noise while freeing up ceiling space. It features a direct current (DC) motor and various security features.
  4. Sommer Direct Drive Garage Door Opener: The direct drive technology in this opener eliminates belts, chains, and gears, resulting in quieter operation. It’s known for its durability and minimal maintenance needs.
  5. Overhead Door Odyssey 1000 Chain Drive Garage Door Opener: While chain drive openers tend to be louder, this model incorporates quiet operation technology for a smoother and quieter user experience.

Considerations When Choosing a Quiet Garage Door Opener:

  1. Type of Drive: Belt-drive and screw-drive openers are generally quieter than chain-drive models. Belt-drive openers are known for their smooth and quiet operation.
  2. Motor Power: Choose a garage door opener with an appropriate horsepower rating for your door’s weight. An overpowered motor can create unnecessary noise.
  3. Vibration Dampening: Look for features such as vibration-isolating mounts and dampening materials to reduce noise and vibrations.
  4. Insulation: Some models come with insulating materials that further reduce noise. Insulation can also help regulate temperature in your garage.
  5. Smart Features: Many quiet garage door openers offer smart features like smartphone control, remote monitoring, and scheduling. Ensure that the opener’s technology aligns with your preferences.
  6. Professional Installation: Proper installation is crucial for ensuring optimal performance and quiet operation. Consider hiring a professional to install your garage door opener.

Conclusion:

In conclusion, a quiet Trophy Club Overhead & Garage Doors opener can significantly enhance the comfort and convenience of your home by reducing noise disruptions. When choosing the quietest garage door opener, consider factors such as the type of drive, motor power, vibration dampening, insulation, and smart features. Investigate various models, read reviews, and compare specifications to find the best match for your needs. Remember that a quiet garage door opener is an investment in your home’s tranquility, and choosing the right one can provide lasting benefits for you and your neighbors.

Trophy Club Overhead & Garage Doors

2412 Trophy Club Dr, Trophy Club, TX 76262, United States

1-817-646-5315

Page 2 of 17

Powered by WordPress & Theme by Anders Norén