Get your Home in Perfect Harmony

Category: Garage Door Page 3 of 17

Do It Yourself Garage Door – Arlington Overhead & Garage Doors

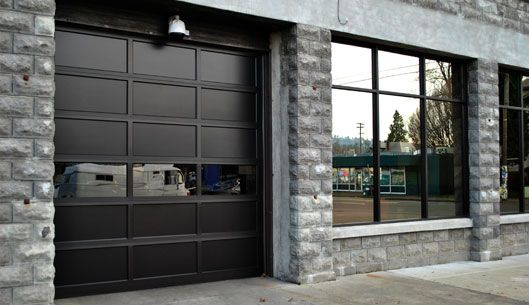
Creating a DIY Arlington Overhead & Garage Doors can be a rewarding project, allowing you to customize the design and save on costs compared to purchasing a pre-made door. However, it’s important to approach this project with careful planning and attention to detail to ensure a safe and functional result.

Here’s a step-by-step guide on how to build a DIY garage door:

1. Gather Your Tools and Materials:

  • Tape measure
  • Saw (circular saw or miter saw)
  • Drill
  • Screws and nails
  • Hinges and hardware
  • Insulation material (if desired)
  • Weatherstripping
  • Paint or stain
  • Garage door opener (if applicable)
  • Plywood or lumber for the door panels
  • Lumber for framing

2. Measure and Plan:

  • Measure the garage opening accurately to determine the size of your door panels.
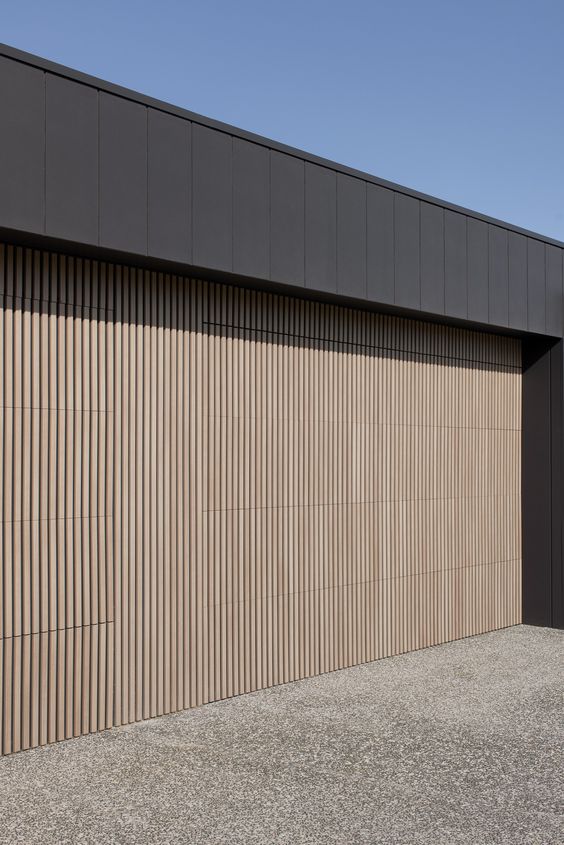
  • Plan the design of the door, including the style, number of panels, and any decorative elements.

3. Design the Panels:

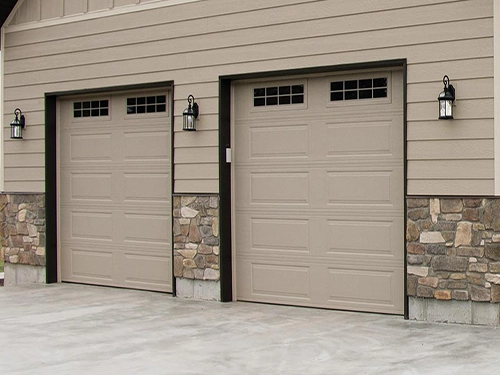
  • Decide on the design and number of panels you want for your door. Common designs include raised panels, flat panels, or a combination of both.

4. Frame Construction:

  • Construct a frame for the door using pressure-treated lumber. The frame should match the size of the door opening and accommodate the panels.

5. Cut and Assemble Panels:

  • Cut the plywood or lumber to create the individual panels. Sand the edges and surfaces to achieve a smooth finish.
  • Assemble the panels within the frame using screws and nails. Make sure the panels fit snugly within the frame.

6. Add Decorative Elements (Optional):

  • If desired, add decorative elements such as trim, molding, or lattice to enhance the appearance of the door.

7. Insulation (Optional):

  • If you want to insulate your garage, consider adding insulation material to the back of the panels before attaching them to the frame.

8. Paint or Stain:

  • Paint or stain the door panels and frame to protect the wood and enhance the appearance. Use exterior-grade paint or stain for durability.

9. Attach Hardware:

  • Attach hinges to the door frame and panels. Make sure the hinges are properly aligned to allow smooth movement.

10. Install Weatherstripping:

  • Attach weatherstripping to the bottom of the door to create a seal and prevent drafts and debris from entering the garage.
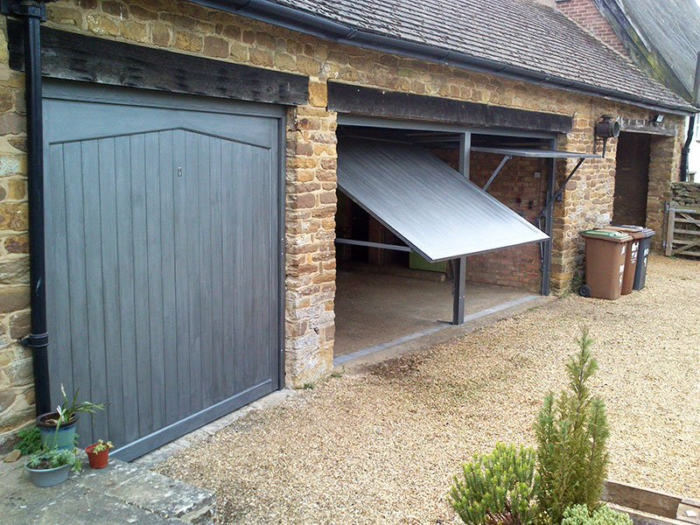
11. Hang the Door:

  • With the help of a friend or family member, position the door in the garage door opening.
  • Attach the hinges to the door jamb, ensuring the door is level and aligned.

12. Install Garage Door Opener (Optional):

  • If you’re installing a garage door opener, follow the manufacturer’s instructions to properly attach the opener to the door and the ceiling.

13. Test and Adjust:

  • Test the door by opening and closing it manually and using the garage door opener (if installed). Make any necessary adjustments to ensure smooth and proper operation.

14. Maintain and Care:

  • Regularly inspect and maintain your DIY garage door to prevent any issues. Lubricate moving parts, replace weatherstripping as needed, and touch up paint or stain when necessary.

Conclusion:

Building a DIY Arlington Overhead & Garage Doors can be a challenging but rewarding project. With careful planning, accurate measurements, and attention to detail, you can create a custom garage door that complements your home’s design. Keep safety in mind throughout the construction process and ensure that the door is properly balanced and functional. If you’re unsure about any aspect of the project, consider seeking guidance from experienced DIYers or professionals in the field.

Arlington Overhead & Garage Doors

700 Secretary Dr, Arlington, TX 76015, United States

1-817-646-2532

How Hard Is It To Replace A Garage Door Opener – Haslet Gates & Garage Doors

Replacing a Haslet Gates & Garage Doors opener is a moderately complex task that involves electrical wiring, mechanical adjustments, and careful installation. While it’s not extremely difficult, it does require some technical skills and a systematic approach. If you’re comfortable with DIY projects and have some basic tools, you may be able to replace a garage door opener yourself.

Here’s a comprehensive guide on the process and what to expect:

Materials You’ll Need:

  • New garage door opener
  • Mounting hardware
  • Wrenches and screwdrivers
  • Stepladder or ladder
  • Power drill and bits
  • Safety goggles and gloves
  • Wire stripper/cutter (if needed)
  • Circuit tester
  • Ceiling joist locator (if needed)
  • Garage door opener manual

Step-by-Step Guide:

1. Choose the Right Opener:

  • Before purchasing a new garage door opener, ensure that it’s compatible with your garage door type, weight, and size. Consider features such as horsepower, drive type (chain, belt, screw), and smart technology options.

2. Gather Tools and Equipment:

  • Collect all the necessary tools and equipment you’ll need for the installation. Read the garage door opener manual thoroughly before you begin.

3. Disconnect Power:

  • Turn off the power to the garage door opener system. This ensures your safety while working on electrical components.

4. Remove the Old Opener:

  • Follow these steps to remove the old garage door opener: a. Disconnect the opener from the door by releasing the emergency release mechanism.
    b. Disconnect all wires from the old opener, carefully labeling them for reconnection.
    c. Remove the old opener’s mounting hardware from the ceiling.

5. Prepare the Area:

  • Clean and clear the area around the opener installation spot. Ensure that the ceiling is free of obstructions and suitable for the new opener’s installation.

6. Install the Mounting Bracket:

  • Follow the manufacturer’s instructions to install the new garage door opener’s mounting bracket on the ceiling. Make sure it’s securely fastened to a ceiling joist.

7. Install the Rail:

  • Attach the opener’s rail to the mounting bracket, following the provided instructions. Assemble the rail sections if needed.

8. Attach the Motor Unit:

  • Mount the garage door opener’s motor unit to the ceiling bracket and secure it using the provided hardware. Make sure it’s level and centered over the garage door.

9. Install the Trolley and Drive Mechanism:

  • Attach the trolley to the rail and secure it properly. Attach the drive mechanism (chain, belt, or screw) as instructed in the manual.

10. Wire Connection:

  • Connect the wires from the opener to the appropriate terminals, following the wiring diagram in the manual. This includes connecting the power supply and safety sensors.

11. Adjustments and Settings:

  • Set the opener’s travel limits, force settings, and any other necessary adjustments according to the manual.

12. Test the Opener:

  • Test the garage door opener by opening and closing the door several times. Make sure the door operates smoothly and stops when it should.

13. Reconnect Emergency Release:

  • Reconnect the emergency release mechanism so you can manually operate the door if needed.

14. Secure Wiring:

  • Secure and route the wiring neatly along the rail and ceiling to prevent tangling or interference.

15. Power On:

  • Turn on the power to the garage door opener system.

16. Test Safety Features:

  • Test the safety features of the opener, such as the auto-reverse mechanism and the safety sensors, to ensure they are functioning properly.

17. Program Remote Controls:

  • Program any remote controls or wireless keypads that come with the new opener, following the instructions in the manual.

18. Troubleshoot (if needed):

  • If you encounter any issues or the door isn’t functioning as expected, refer to the troubleshooting section of the manual or seek professional help.

Conclusion:

Replacing a Haslet Gates & Garage Doors opener requires attention to detail, careful wiring, and the use of appropriate tools. While it’s not the most straightforward DIY project, it’s certainly manageable if you’re comfortable with home improvement tasks. If you’re uncertain about any step or aspect of the installation, or if you encounter unexpected challenges, consider seeking assistance from a professional garage door technician to ensure a smooth and successful installation.

Haslet Gates & Garage Doors

817-242-5042

How To Deprogram Garage Door Opener – Bedford Gates & Garage Doors

Deprogramming a Bedford Gates & Garage Doors opener involves removing the existing codes or remotes from the opener’s memory. This might be necessary if you’re moving to a new home, have lost a remote, or want to reset the system for security reasons. The process can vary depending on the brand and model of your garage door opener.

Below is a general guide on how to deprogram a garage door opener:

Materials You’ll Need:

  • Ladder (if needed)
  • Screwdriver
  • New remote (optional, for reprogramming)
  • Safety goggles and gloves

Step-by-Step Guide:

1. Identify Your Garage Door Opener Model:

  • Different garage door opener models have varying procedures for deprogramming. Refer to your garage door opener’s manual for specific instructions.

2. Locate the “Learn” Button:

  • Most modern garage door openers have a “Learn” or “Program” button. This button is typically located on the back of the motor unit, near the antenna wire.

3. Clear Existing Codes:

  • To clear the existing codes from the opener’s memory, press and hold the “Learn” button for a few seconds until the indicator light (LED) on the motor unit blinks or turns off. This indicates that the codes have been cleared.

4. Test the Opener:

  • After clearing the codes, test the garage door opener to ensure that none of the previously programmed remotes or devices can operate the door.

5. Reprogram Remotes (Optional):

  • If you intend to reprogram your existing remotes or add new ones, follow these steps:
  • Press the “Learn” button on the motor unit again. The indicator light will start blinking.
  • Press the button on the remote you want to program. The indicator light should stop blinking and remain solid or flash to confirm successful programming.
  • Test the remote to ensure it operates the garage door.

6. Reset Keypad Codes (if applicable):

  • If your garage door opener has a keypad, you might need to reset the codes by following similar steps as with the remote. Refer to your opener’s manual for keypad-specific instructions.

7. Consult the Manual:

  • If the steps above don’t work or if your garage door opener model has specific deprogramming instructions, refer to the manufacturer’s manual or contact customer support.

8. Safety Check:

  • Test the garage door opener to ensure it’s functioning correctly after deprogramming. Make sure the door opens and closes smoothly and that all safety features are operational.

9. Document Codes (Optional):

  • If you’ve cleared all codes, it’s a good idea to document the newly programmed remotes’ codes and the keypad code for future reference.

10. Seek Professional Help (if needed):

  • If you’re uncertain about deprogramming your garage door opener, or if you encounter difficulties during the process, consider seeking assistance from a professional garage door technician.

Conclusion:

Deprogramming a Bedford Gates & Garage Doors opener involves clearing existing codes or remotes from the opener’s memory. By following the general steps outlined above and referring to your garage door opener’s manual, you can successfully deprogram the opener to improve security, reset the system, or reprogram new remotes. Always prioritize safety and accurate execution during the process.

Bedford Gates & Garage Doors

2201 Harwood Rd, Bedford, TX 76021, United States

1-817-886-3064

How To Attach Garage Door Opener To Visor – Springtown Gates & Garage Doors

Attaching a Springtown Gates & Garage Doors opener remote to your car’s visor is a convenient way to keep the remote easily accessible while you’re inside the vehicle. Properly securing the remote helps ensure that it doesn’t fall off or get in the way while driving.

Here’s a step-by-step guide to help you understand how to attach a garage door opener to your car’s visor:

Materials You’ll Need:

  • Garage door opener remote
  • Velcro strips or adhesive strips (with hook and loop sides)
  • Rubbing alcohol
  • Clean cloth
  • Scissors (if needed)

Step-by-Step Guide to Attaching a Garage Door Opener to Your Car’s Visor:

1. Choose the Location:
Determine the best location on your car’s visor to attach the garage door opener remote. Choose a spot that is easily reachable for you while you’re seated in the driver’s seat.

2. Prepare the Visor:
Follow these steps to prepare the visor for attaching the remote:

  • Clean the area of the visor where you plan to attach the remote. Use rubbing alcohol and a clean cloth to remove any dirt, dust, or residue that might interfere with adhesion.

3. Prepare the Remote:
Check the back of the garage door opener remote to see if it has a hole or slot for attaching a keyring or clip. If not, you can attach adhesive strips directly to the back of the remote.

4. Apply Adhesive Strips:
If the remote has a hole or slot, you can use a small keyring or clip to attach it to the visor. If not, follow these steps to attach adhesive strips:

  • Cut small sections of adhesive strips (both hook and loop sides) to fit the back of the remote.
  • Peel off the backing from one side of an adhesive strip and firmly press it onto the back of the remote.
  • Peel off the backing from the other side of the adhesive strip and press the remote onto the prepared area of the visor. Press down firmly to ensure good adhesion.

5. Test the Attachment:
Gently tug on the remote to ensure that it is securely attached to the visor and won’t come loose during driving or use.

6. Organize the Visor:
If your visor has a built-in clip for holding items, you can use it to secure the remote. Alternatively, you can place the remote in a position that allows it to hang freely from the visor.

7. Test Accessibility:
Sit in the driver’s seat and test the accessibility of the remote. Make sure it’s easy to reach and use while driving.

Additional Tips:

  • Velcro Strips: Using Velcro or adhesive strips with hook and loop sides offers flexibility, as you can easily remove the remote when needed.
  • Secure Placement: Make sure the remote is securely attached to the visor to prevent it from falling while driving or obstructing your view.
  • Avoid Blocking Vision: Place the remote in a location that doesn’t obstruct your view of the road or interfere with your driving.
  • Clean Regularly: Periodically clean the adhesive area of the visor and the back of the remote to maintain adhesion.
  • Consider Remote Clips: Some garage door opener remotes come with clips that are designed to attach to the car’s visor. Check if your remote has this feature.

Conclusion:

Attaching a Springtown Gates & Garage Doors opener remote to your car’s visor provides easy access and convenience while driving. By following the steps outlined in this guide and using adhesive strips or Velcro, you can securely attach the remote to the visor without damaging either the remote or the vehicle’s interior. Always ensure that the remote is positioned in a way that doesn’t obstruct your view or interfere with safe driving.

Springtown Gates & Garage Doors

104 Adalida Ln, Springtown, TX 76082, United States

1-817-631-1036

How High Is A Standard Garage Door – Shelbyville Gates & Garage Doors

A standard Shelbyville Gates & Garage Doors height can vary based on factors such as the type of door, the size of the garage, and local building codes. However, there are common standard heights for residential garage doors. Understanding the standard height of a garage door is important for ensuring proper clearance, selecting the right door for your needs, and complying with building regulations.

Here’s a comprehensive guide to help you understand the standard height of a garage door:

Common Standard Heights for Residential Garage Doors:

  1. Single-Car Garage Door: A standard single-car garage door typically has a height of 7 to 8 feet. This height provides sufficient clearance for most vehicles and allows for convenient access to the garage space.
  2. Double-Car Garage Door: A standard double-car garage door commonly has a height of 7 to 8 feet as well. However, some double-car doors can be taller, especially if there’s extra vertical space in the garage.

Factors Influencing Garage Door Height:

  1. Type of Door: Different types of garage doors, such as overhead doors, roll-up doors, and sectional doors, may have variations in standard heights.
  2. Garage Size: The size of the garage itself can influence the height of the garage door. Larger garages may have taller doors to accommodate bigger vehicles.
  3. Local Building Codes: Local building codes and regulations might dictate minimum and maximum garage door heights. It’s important to check with your local authorities to ensure compliance.
  4. Vehicle Size: If you have specific vehicles that will be parked in the garage, consider their heights when selecting a garage door. Ensure that the door’s height allows for easy entry and exit of your vehicles.

Benefits of Standard Heights:

  1. Vehicle Compatibility: Standard garage door heights are designed to accommodate most vehicles, including cars, SUVs, and trucks. This ensures that vehicles can easily enter and exit the garage without clearance issues.
  2. Consistency: Standard heights help maintain a uniform and aesthetically pleasing look in residential neighborhoods.
  3. Functionality: Standard heights provide convenient access to the garage space for various activities, such as parking, storage, and DIY projects.

Selecting the Right Garage Door Height:

  1. Measure the Opening: Measure the height of the garage door opening from the floor to the header or lintel above the opening. This measurement will help you determine the available clearance.
  2. Consider Vehicle Height: If you have vehicles that are taller than average, make sure the garage door’s height provides sufficient clearance for them to enter and exit comfortably.
  3. Future Use: Consider any potential changes in your vehicle lineup or garage usage. If you plan to purchase larger vehicles in the future, opting for a slightly taller garage door might be beneficial.

Compliance with Building Codes:

  1. Local Regulations: Check with your local building department to understand the specific garage door height regulations and requirements in your area.
  2. Permits: Depending on the height of the garage door and any modifications you plan to make, you might need to obtain a building permit before installation.

Conclusion:

A standard Shelbyville Gates & Garage Doors height for residential purposes ranges from 7 to 8 feet for both single-car and double-car garage doors. Understanding the standard height, considering factors such as vehicle size and local regulations, and measuring the opening accurately will help you select the right garage door that meets your needs while ensuring proper clearance and compliance with building codes. If you’re unsure about the appropriate garage door height for your specific situation, consulting with a professional garage door installer or technician can provide valuable guidance.

Shelbyville Gates & Garage Doors

1567 Greenland Park Cir, Shelbyville, KY 40065

502-513-6328

How Do I Reprogram My Genie Intellicode Garage Door Opener – Anderson Gates & Garage Doors

Reprogramming your Genie Intellicode Garage Door Repair Anderson IN opener involves clearing the memory of the opener and then programming new remote controls, keypads, or other devices to operate it. Genie’s Intellicode technology ensures enhanced security by changing the access code every time the remote control is used, preventing unauthorized access.

Here’s a comprehensive guide on how to reprogram your Genie Intellicode garage door opener:

Step 1: Safety Precautions

  1. Disconnect Power: Before working on your garage door opener, disconnect power to the unit to prevent accidental activation.
  2. Safety Gear: Wear safety glasses and gloves to protect yourself during the process.

Step 2: Clear the Memory

  1. Locate the “Learn” Button: Find the “Learn” or “Program” button on the main control unit of your Genie Intellicode garage door opener. This button is usually located on the back of the opener motor unit or on the wall-mounted control panel.
  2. Press and Hold the Button: Press and hold the “Learn” button until the indicator light on the opener starts blinking or turns on. This action clears the memory of the opener.
  3. Release the Button: Release the “Learn” button once the indicator light is blinking or steady.

Step 3: Program New Devices

  1. Remote Control Programming: a. Press the Remote Button: Press and release the button on the remote control that you want to program. The indicator light on the opener will blink, indicating that it’s ready to receive the new code. b. Press the Remote Button Again: Press the same button on the remote control a second time. The indicator light on the opener will turn solid or stop blinking, confirming that the remote control has been programmed.
  2. Keypad Programming: a. Enter PIN: Enter the PIN code on the keypad that you want to program. b. Press the “Learn” Button: Press and release the “Learn” button on the main control unit of the opener. The indicator light will start blinking. c. Enter PIN Again: Enter the same PIN code on the keypad a second time. The indicator light on the opener will turn solid or stop blinking, indicating successful programming.
  3. Repeat for Other Devices: If you have multiple remotes, keypads, or devices that need to be programmed, repeat the programming process for each one.

Step 4: Test the Devices

  1. Test Remotes and Keypads: Test each newly programmed remote control and keypad to ensure they operate the garage door properly.

Step 5: Power On

  1. Reconnect Power: Once you’ve completed the reprogramming process, reconnect power to the garage door opener.

Additional Tips:

  • Consult the Manual: Refer to the specific instructions provided in your Genie Intellicode garage door opener’s manual. It will offer detailed information on programming and troubleshooting.
  • Factory Reset (Optional): If you encounter issues or want to start over, you can perform a factory reset on your Genie Intellicode garage door opener. This resets all codes and remotes to their default settings.
  • Clear All Codes: Some Genie Intellicode openers allow you to clear all codes at once. Consult your manual for instructions on this process.
  • Maintenance: Regular maintenance and testing of remote controls and keypads will ensure continued functionality.

Conclusion:

Reprogramming your Genie Intellicode Garage Door Repair Anderson IN opener involves clearing the memory of the opener and then programming new remote controls, keypads, or other devices. By following the steps outlined above and referring to your garage door opener’s manual, you can successfully reprogram your Genie Intellicode opener to ensure secure and convenient access to your garage. Regular testing and maintenance will contribute to the proper functioning of your garage door system.

Anderson Gates & Garage Doors

2007 McKinley St, Anderson, IN 46016, United States

1-463-217-0904

Professional Strategies for Repairing Garage Door Hinges – Redlands Garage Door & Gates

As a homeowner who takes immense pride in the functionality and appearance of my home, I’ve learned firsthand that a well-maintained garage door is essential for both convenience and curb appeal. Among the various components that contribute to a garage door’s smooth operation, hinges play a pivotal role. Over time, these hinges can encounter wear and tear, affecting the door’s movement and stability.

Through my experiences and according to Garage Door Repair, I’ve gained valuable insights into the professional strategies for repairing garage door hinges, and I’m excited to share this knowledge to help fellow homeowners tackle this task with confidence and expertise.

Understanding the Role of Garage Door Hinges

While garage door hinges might not be the most conspicuous parts of the system, they are undeniably vital. These unassuming components allow the garage door to glide effortlessly along its tracks, enabling panels to fold or swing as needed. By supporting the door’s weight and facilitating its movement, hinges ensure that the entire system operates seamlessly. However, with constant usage and exposure to weather conditions, hinges can develop issues over time. Addressing these problems in a timely manner is crucial to prevent further damage and maintain the longevity of the garage door.

Spotting the Telltale Signs of Hinge Issues

Recognizing when garage door hinges are in need of repair requires a keen eye and a proactive approach. Here are some common signs that suggest hinge problems might be at play:

  1. Unusual Noises: If you notice squeaking, grinding, or other unusual noises when operating your garage door, it’s likely that the hinges are experiencing friction-related issues due to wear or misalignment.
  2. Difficult Door Movement: A garage door that’s becoming increasingly difficult to open or close is often a clear indication of hinge problems. Rust or corrosion can contribute to this stiffness.
  3. Misalignment: Misaligned hinges can lead to an uneven or crooked garage door. This not only affects the door’s appearance but also its functionality.
  4. Visible Damage: Inspect the hinges closely for visible signs of damage, such as cracks, breaks, or bent components. Any such damage can compromise the hinge’s ability to perform effectively.

Applying Professional Repair Strategies

Repairing garage door hinges effectively requires a methodical approach and adherence to professional techniques. While some hinge issues can be addressed through DIY methods, complex problems might necessitate the expertise of a professional. Here’s a breakdown of the professional strategies for repairing garage door hinges:

1. Thorough Visual Inspection: Begin by conducting a comprehensive visual inspection of all the hinges on your garage door. Look for any signs of wear, damage, or misalignment. This step helps determine the extent of the problem and which hinges require attention.

2. Proper Lubrication: Adequate lubrication is crucial for resolving minor hinge issues. Utilize a silicone-based lubricant to coat the hinge’s moving parts, pivot points, and other components. Lubrication reduces friction, minimizes wear, and eliminates those annoying squeaks.

3. Tightening Loose Components: Loose bolts and screws can contribute to hinge-related problems. Carefully examine the hinges and tighten any loose hardware using the appropriate tools. Be cautious not to overtighten, as this could lead to further damage.

4. Repair or Replacement: Depending on the severity of the hinge problem, you may need to either repair or replace the hinges. If the hinges are beyond repair due to damage, replacing them with new ones is the optimal solution. For minor issues, hinge repair might involve straightening bent parts or welding cracks.

5. Aligning Misaligned Hinges: Misaligned hinges can lead to operational issues and impact the overall appearance of the garage door. Gently adjust misaligned hinges using a mallet and a wooden block. Make small adjustments, testing the door’s movement after each correction.

6. Removing Rust and Corrosion: Exposure to the elements can cause hinges to develop rust and corrosion, leading to stiffness and reduced functionality. Use a wire brush or sandpaper to remove rust and corrosion, and then apply a rust-inhibiting primer and paint to protect the hinges.

7. Seeking Professional Assistance: If the hinge problems are intricate or if you’re uncertain about your ability to address them, it’s advisable to seek professional help. Garage door technicians possess the knowledge and tools to handle complex hinge repairs and replacements safely and efficiently.

Sustaining Hinge Longevity Through Maintenance

Once you’ve successfully repaired or replaced garage door hinges, consistent maintenance is essential to ensure their extended lifespan and proper functioning. Here are some maintenance tips to keep your hinges in top condition:

  1. Regular Lubrication: Apply lubricant to the hinge components every few months to promote smooth movement and prevent friction-related issues.
  2. Routine Visual Inspections: Regularly inspect the hinges to detect any signs of wear, damage, or misalignment. Addressing minor problems early can prevent them from escalating.
  3. Keeping Clean: Maintain the hinges by keeping them clean and free from debris that could hinder their movement or cause damage over time.
  4. Professional Maintenance: Consider scheduling professional garage door maintenance at least once a year. This provides experts with the opportunity to thoroughly inspect and maintain all components, including the hinges.

In Conclusion: Expert Care for Seamless Operation

Overall, as per Garage Door Repair, repairing garage door hinges requires a combination of expertise, attention to detail, and a commitment to safety. By gaining an understanding of the role of hinges, being vigilant about common hinge problems, and implementing professional repair strategies, homeowners can ensure the continued smooth operation and longevity of their garage doors. Whether tackling minor issues with DIY techniques or seeking professional help for more complex problems, prioritizing hinge maintenance is an investment in both the functionality and aesthetics of your home. As a homeowner who values a well-maintained living space, I’ve grown to appreciate the importance of treating garage door hinge repair with the level of professionalism it demands.

Redlands Garage Door & Gates

1255 Devon Pl #7, Redlands, CA 92374, United States

909-675-1732

How To Adjust Garage Door Springs And Cables – Murphy Gates & Garage Doors

Adjusting Garage Door Repair Murphy TX springs and cables requires careful attention to safety procedures and precise adjustments to ensure the door operates smoothly and safely. Garage door springs play a crucial role in counterbalancing the weight of the door, and cables help guide and stabilize its movement. Improper adjustments can lead to dangerous situations and damage to the door.

Here’s a comprehensive guide on how to adjust garage door springs and cables:

Step 1: Prioritize Safety

  1. Disconnect Power: Disconnect power to the garage door opener to prevent accidental activation while working on the springs and cables.
  2. Safety Gear: Wear appropriate safety gear, including safety glasses, gloves, and a sturdy ladder.

Step 2: Identify the Spring System

  1. Torsion Spring System: Torsion springs are mounted horizontally above the garage door opening, parallel to the door. They are usually placed on a metal shaft and wind up to lift the door.
  2. Extension Spring System: Extension springs run vertically on each side of the door, stretching and contracting to assist with door movement.

Step 3: Adjusting Torsion Springs (With Caution)

  1. Release Tension: Before adjusting torsion springs, release tension from the springs. Use winding bars inserted into the winding cones to unwind the springs until there is no tension.
  2. Adjustment: To adjust torsion springs, make slight adjustments to the winding cone in the desired direction. Each quarter-turn adjustment affects the door’s balance. Clockwise adjustments increase tension, and counterclockwise adjustments decrease tension.
  3. Balancing: The goal is to achieve proper balance between the springs. Adjust both springs equally to maintain balance and prevent strain on the garage door opener.

Step 4: Adjusting Extension Springs (With Caution)

  1. Release Tension: Extension springs are under tension even when the door is fully closed. To release tension, disconnect the safety cables from the springs and the brackets.
  2. Adjustment: To adjust extension springs, move the “S-hook” to different holes on the track hanger or adjust the cable length by repositioning the cable clips. Moving the “S-hook” toward the door increases tension, while moving it away decreases tension.
  3. Balancing: Adjust both sides of the extension spring system equally to maintain balance.

Step 5: Inspect and Replace Cables

  1. Cable Inspection: Inspect the cables for signs of fraying, wear, or damage. If you notice any issues, it’s recommended to replace the cables to prevent potential safety hazards.
  2. Proper Installation: Ensure the cables are properly secured to the bottom bracket and drum. Follow the manufacturer’s guidelines for correct cable installation.

Step 6: Test the Door

  1. Operate the Door: After making adjustments, carefully test the door’s operation to ensure it moves smoothly and maintains proper balance.

Step 7: Consult Professional Help (If Needed)

  1. Complex Adjustments: If you’re unsure about adjusting springs and cables or if the adjustments seem too complex, consult a professional garage door technician. Garage door spring adjustments can be dangerous if not done correctly.

Step 8: Regular Maintenance

  1. Inspection: Regularly inspect the springs, cables, and other components of the garage door system for wear, damage, or signs of imbalance.
  2. Lubrication: Lubricate moving parts, such as rollers and hinges, to ensure smooth operation.

In conclusion, adjusting Garage Door Repair Murphy TX springs and cables requires careful attention to safety procedures and precision in making adjustments. Torsion and extension spring systems have their unique adjustment methods, and it’s crucial to achieve proper balance and tension to ensure the door operates safely and smoothly. If you’re unsure or uncomfortable making these adjustments, it’s recommended to consult a professional garage door technician to ensure the work is done correctly and safely.

Murphy Gates & Garage Doors

223 FM 544 #16, Murphy, TX 75094

469-425-7816

How To Prepare Metal Garage Door For Painting – Grapevine Gates & Garage Doors

Preparing a metal Garage Door Repair Grapevine TX for painting is a crucial step to ensure a smooth and long-lasting paint finish. Proper preparation helps the paint adhere well to the surface and prevents issues such as peeling, flaking, and rust formation.

Here’s a comprehensive guide on how to prep a metal garage door for painting:

Step 1: Gather Your Tools and Materials

Before you begin, gather all the necessary tools and materials:

Tools:

  • Safety glasses
  • Gloves
  • Screwdriver or drill
  • Wire brush or steel wool
  • Sandpaper (medium and fine grit)
  • Paint scraper
  • Tarp or drop cloth
  • Clean cloth or rag
  • Bucket of water with mild detergent
  • Masking tape or painters’ tape
  • Paintbrush or paint roller
  • Paint tray

Materials:

  • Exterior-grade paint stripper (if needed)
  • Rust converter (if rust is present)
  • Metal primer
  • Exterior-grade paint

Step 2: Safety Precautions

  1. Wear Safety Gear: Wear safety glasses and gloves to protect your eyes and hands during the prep process.

Step 3: Protect the Area

  1. Lay Down a Tarp: Place a tarp or drop cloth on the ground below the garage door to catch any debris, paint, or rust particles.

Step 4: Remove Hardware

  1. Remove Hardware: If possible, remove any hardware, handles, hinges, or other attachments from the garage door using a screwdriver or drill.

Step 5: Remove Old Paint

  1. Use Paint Stripper (If Necessary): If the garage door has old paint that’s flaking or peeling, you may need to use an exterior-grade paint stripper to remove it. Follow the manufacturer’s instructions for application and removal.

Step 6: Remove Rust

  1. Address Rust Spots: If you find any rust spots on the garage door, use a wire brush or steel wool to remove the rust particles. If the rust is extensive, consider using a rust converter to treat the affected areas.

Step 7: Sand the Surface

  1. Sand the Door: Use medium-grit sandpaper to sand the entire surface of the garage door. Sanding helps create a smooth surface and promotes paint adhesion.
  2. Smooth Edges: Feather the edges of the sanded area to blend it seamlessly with the surrounding surface.

Step 8: Clean the Surface

  1. Clean with Soapy Water: Mix mild detergent with water in a bucket. Dip a clean cloth or rag into the soapy water and use it to clean the sanded surface, removing dust, debris, and any remaining residue.

Step 9: Apply Primer

  1. Select Metal Primer: Choose a metal primer that is specifically designed for exterior use and is compatible with the type of paint you’ll be using.
  2. Apply Primer: Use a paintbrush or paint roller to apply a thin, even coat of metal primer to the entire surface of the garage door. Follow the manufacturer’s instructions for drying times.

Step 10: Masking

  1. Tape Off Areas: If there are sections of the garage door that you want to keep paint-free (e.g., windows, trim), use masking tape or painters’ tape to protect these areas from paint overspray.

Step 11: Paint the Door

  1. Select Exterior Paint: Choose an exterior-grade paint that is suitable for metal surfaces and matches your desired color.
  2. Apply Paint: Use a paintbrush or paint roller to apply the paint to the primed garage door. Apply thin, even coats, allowing each coat to dry before applying the next.
  3. Follow Drying Times: Follow the paint manufacturer’s instructions for drying times between coats and for the final cure time.

Step 12: Reattach Hardware

  1. Reattach Hardware: Once the paint is fully cured, reattach any hardware, handles, hinges, or other attachments that you removed earlier.

Step 13: Regular Maintenance

  1. Inspect and Clean: Regularly inspect the garage door for signs of wear, chipping, or peeling paint. Clean the surface to remove dirt and debris that could affect the appearance of the paint.

In conclusion, prepping a metal Garage Door Repair Grapevine TX for painting involves removing old paint, addressing rust, sanding the surface, cleaning, applying primer, masking off areas, and painting. By following these steps and taking proper safety precautions, you can ensure a smooth and successful paint application that enhances the appearance and protection of your metal garage door.

Grapevine Gates & Garage Doors

601 W Wall St, Grapevine, TX 76051, United States

1-817-631-6355

How To Install A Chamberlain Smart Garage Door Opener – Colleyville Gates & Garage Doors

Installing a Chamberlain smart Garage Door Repair Colleyville TX opener involves careful preparation, following instructions, and ensuring safety. Chamberlain offers various smart garage door opener models, so it’s essential to read and follow the specific instructions provided in your model’s manual.

Here’s a general guide on how to install a Chamberlain smart garage door opener:

Step 1: Gather Your Materials and Tools

Before you start the installation process, gather all the necessary materials and tools:

Materials:

  • Chamberlain smart garage door opener kit
  • Mounting hardware
  • Safety sensors
  • Wall control panel
  • Remote control (if included)
  • Wi-Fi connection information

Tools:

  • Screwdriver set
  • Wrenches
  • Power drill
  • Level
  • Ladder
  • Safety glasses
  • Pliers
  • Wire stripper

Step 2: Read the Manual

Carefully read the user manual that comes with your Chamberlain smart garage door opener. This manual contains specific instructions and diagrams for your model, including safety precautions, wiring diagrams, and step-by-step installation procedures.

Step 3: Prepare Your Garage Door

  1. Disconnect Power: Before beginning any installation steps, disconnect power to your existing garage door opener to ensure your safety.
  2. Check Compatibility: Verify that your garage door is compatible with the Chamberlain smart opener. Ensure your door is in good condition and functioning correctly.

Step 4: Install the Ceiling Bracket and Opener Unit

  1. Attach the Ceiling Bracket: Follow the manual’s instructions to attach the ceiling bracket securely to the ceiling or rafters.
  2. Install the Opener Unit: Hang the opener unit from the ceiling bracket, making sure it’s level. Attach the opener securely to the bracket using the provided hardware.

Step 5: Install the Rail and Trolley Assembly

  1. Assemble the Rail: Assemble the rail sections according to the manual. Slide the trolley onto the rail and attach it to the opener unit.
  2. Secure the Rail: Follow the instructions to secure the rail to the ceiling bracket and ensure proper alignment.

Step 6: Install Safety Sensors

  1. Attach Safety Sensors: Install the safety sensors on either side of the garage door, near the floor. These sensors ensure that the door doesn’t close if an object is obstructing the path.
  2. Align Sensors: Make sure the sensors are aligned properly and facing each other. The indicator lights on the sensors should be steady and not blinking.

Step 7: Connect Wiring

  1. Connect Power: Connect the power cord of the opener unit to a power outlet. Follow the manual for proper wiring instructions.
  2. Connect Safety Sensor Wires: Connect the safety sensor wires according to the manual. Typically, this involves connecting the wires to the opener unit’s terminals.
  3. Connect Wall Control Panel: Attach the wall control panel to the wall near the garage entry door. Connect the wires according to the instructions.

Step 8: Set Up the Smart Features

  1. Download the App: Download the Chamberlain MyQ app on your smartphone or tablet. This app allows you to control and monitor your garage door remotely.
  2. Create an Account: Create an account within the MyQ app. This account will link your garage door opener to your smartphone.
  3. Connect to Wi-Fi: Follow the app’s instructions to connect the opener to your home Wi-Fi network. This step is necessary for remote control and monitoring.

Step 9: Program the Opener and Remote Control

  1. Program the Opener: Follow the manual to program the opener to recognize your specific garage door and its movement.
  2. Program the Remote Control: If your Chamberlain smart garage door opener comes with a remote control, follow the instructions to program it to work with the opener.

Step 10: Test and Calibrate

  1. Test Operation: Test the opener’s operation by opening and closing the door a few times. Observe the safety sensors and make sure they’re functioning properly.
  2. Calibrate Limits: Follow the manual’s instructions to calibrate the open and close limits of the garage door to ensure accurate positioning.

Step 11: Install Smart Accessories (if applicable)

  1. Install Accessories: If you have additional smart accessories, such as smart lighting or smart locks, follow the manufacturer’s instructions to install and set them up.

Step 12: Safety Check and Final Steps

  1. Check All Fastenings: Double-check that all nuts, bolts, and screws are tightened securely.
  2. Safety Reversal Test: Perform a safety reversal test by placing a 2×4 board on the floor in the path of the closing door. The door should reverse when it touches the board.
  3. Final Adjustment: Make any necessary adjustments to the force settings and travel limits for optimal performance.

Step 13: Enjoy Smart Control

Now that your Chamberlain smart garage door opener is successfully installed, you can enjoy the convenience of remote control, monitoring, and automation through the MyQ app. Make sure to periodically perform maintenance and check for updates to ensure your opener’s continued functionality.

Remember, this guide provides a general overview of the installation process. Always follow the specific instructions provided in your Chamberlain smart Garage Door Repair Colleyville TX opener’s manual for accurate installation and safety procedures. If you’re unsure about any step, it’s best to seek professional assistance.

Colleyville Gates & Garage Doors

6508 Colleyville Blvd, Colleyville, TX 76034, United States

1-817-755-6231

How To Clean A Fiberglass Garage Door – BH Garage Doors and Gates

Cleaning a fiberglass Garage Door Repair Rockwall TX is a crucial maintenance task that not only enhances the curb appeal of your home but also prolongs the life of the door itself. Fiberglass garage doors are known for their durability and low maintenance requirements, but periodic cleaning is essential to remove dirt, grime, and environmental pollutants that can accumulate over time.

Follow these comprehensive steps to clean your fiberglass garage door effectively and keep it looking its best.

Step 1: Gather the Necessary Supplies
Before you begin cleaning, gather the following supplies:

  • Mild detergent or dish soap
  • Water bucket
  • Soft-bristle brush or sponge
  • Microfiber cloths or soft towels
  • Garden hose with a nozzle attachment
  • Plastic sheet or tarp (optional, to protect the ground from runoff)

Step 2: Preparing the Area
Place a plastic sheet or tarp on the ground under the garage door to catch any runoff during the cleaning process. This will help prevent any detergent or dirt from staining the ground or your driveway.

Step 3: Remove Loose Debris
Use a soft-bristle brush or a dry cloth to gently remove any loose dirt, cobwebs, or debris from the surface of the garage door. This step prevents scratching during the cleaning process.

Step 4: Prepare the Cleaning Solution
Fill a water bucket with water and add a small amount of mild detergent or dish soap. Mix the solution until it creates a soapy mixture that will effectively break down grime and dirt on the garage door.

Step 5: Wash the Garage Door
Dip a soft-bristle brush or sponge into the soapy water mixture and begin gently scrubbing the fiberglass garage door from top to bottom. Focus on one section at a time, applying light pressure to avoid scratching the surface. Pay extra attention to areas with visible dirt or stains.

Step 6: Rinse with Water
Use a garden hose with a nozzle attachment to rinse off the soapy water and loosened dirt from the garage door. Start at the top and work your way down to ensure thorough rinsing. Avoid using high-pressure settings on the hose, as they can potentially damage the fiberglass surface.

Step 7: Dry the Garage Door
Use a clean, soft microfiber cloth or towel to dry the garage door completely. Wipe away any remaining water droplets to prevent water spots and streaks from forming.

Step 8: Inspect for Stubborn Stains
If there are stubborn stains or areas that the regular cleaning process didn’t remove, you may need to use a mild abrasive cleaner or a specialized fiberglass cleaner. Always follow the manufacturer’s instructions and test the cleaner on a small, inconspicuous area before applying it to the entire door.

Step 9: Apply Wax (Optional)
Applying a high-quality automotive wax designed for fiberglass surfaces can help protect the garage door from future dirt buildup and UV damage. Follow the wax manufacturer’s instructions for application and buff the surface to a shine.

Step 10: Regular Maintenance
To maintain the cleanliness of your fiberglass garage door, consider establishing a regular cleaning schedule, especially in regions with high pollution, pollen, or other environmental factors that can lead to rapid dirt accumulation.

In conclusion, cleaning a fiberglass Garage Door Repair Rockwall TX involves a step-by-step process that focuses on gentle cleaning agents, proper tools, and attention to detail. By following these steps and maintaining a routine cleaning schedule, you can keep your fiberglass garage door looking pristine and extend its lifespan while boosting your home’s overall aesthetic appeal.

BH Garage Doors and Gates

1-972-807-7936

Battling Rust: Restoring Garage Door Panels Like a Pro – Palm Desert Garage & Overhead Doors

Being a homeowner who cares deeply about the appearance and functionality of my property, the sight of rust slowly creeping onto my garage door panels was disheartening. Rust not only mars the visual appeal but also poses a threat to the structural integrity of the door itself. Determined to restore my garage door panels to their former glory, I embarked on a mission to battle rust like a seasoned professional. In this comprehensive guide, I’ll take you through my journey, sharing step-by-step instructions and insights gathered from experts on how to effectively restore garage door panels that have fallen victim to rust.

By following these steps from Garage Door Repair, I successfully brought back their beauty and ensured their lasting endurance.

Step 1: Assessing the Rust Damage

My quest to restore my garage door panels began with a close inspection. It was essential to gauge the extent of the rust damage before deciding on the best course of action—whether to salvage the panels or opt for replacements.

Step 2: Gathering Tools and Materials

To tackle the challenge of rust restoration head-on, I equipped myself with the necessary tools and materials. This included sandpaper, wire brushes, rust converter, primer, paint, safety goggles, gloves, masking tape, and a drop cloth.

Step 3: Creating a Suitable Work Area

Before diving into the restoration process, I took the time to prepare a suitable workspace. Laying down a drop cloth and ensuring proper ventilation helped keep the environment controlled and safe from potential fumes.

Step 4: Rust Removal

1. Sanding and Wire Brushing: My first task was to sand the rusted areas using coarse sandpaper. For more stubborn rust spots, I relied on a wire brush to effectively remove the corrosion.

2. Application of Rust Converter: After eliminating the rust, I applied a rust converter to the affected areas. This treatment not only halted the rust’s progression but also transformed it into a stable compound.

Step 5: Preparing for Painting

1. Thorough Cleaning: Once the rust converter had dried, I meticulously cleaned the surface to remove any residual substances.

2. Primer Application: To ensure a smooth and adhesive surface for the paint, I coated the area with a rust-inhibiting primer. This crucial step promotes paint adhesion and guards against future rust development.

Step 6: Painting with Precision

1. Masking Off: Carefully using masking tape, I shielded the sections of the door that weren’t intended for paint.

2. Selecting the Right Paint: Opting for exterior-grade paint specifically formulated for metal surfaces was key in achieving a resilient, long-lasting finish.

3. Applying the Paint: I proceeded to apply the paint in thin, even coats, allowing each layer to dry before moving on. This approach ensured a polished and professional outcome.

Step 7: Adding the Final Touches

1. Detailed Inspection: Once the paint was fully dry, I meticulously inspected the panels to ensure the paint was uniform and devoid of imperfections.

2. Reassembling Components: With careful precision, I removed the masking tape and reattached any hardware that had been temporarily removed.

Preventing Future Rust Woes:

To safeguard my garage door panels from future rust encounters and prolong their lifespan:

1. Regular Cleaning: Making it a habit to clean the door panels regularly and remove any debris prevents moisture buildup and rust formation.

2. Application of Wax or Sealant: A layer of wax or a specialized sealant designed for metal surfaces acts as an extra protective barrier against moisture and rust.

Knowing When to Seek Expert Help:

While I was determined to take on rust restoration, there are scenarios where professional guidance is invaluable:

  • Severe Rust Damage: Extensive rust damage or panels that are significantly compromised may necessitate the expertise of a professional.
  • Complex Repairs: If rust-related issues have led to structural problems or if you’re unsure about the restoration process, consulting a professional is a prudent choice.

In summary, based from Garage Door Repair, the process of restoring garage door panels afflicted by rust is both gratifying and educational. By adhering to the steps and safety precautions I’ve outlined above, you can confidently embark on this journey and rejuvenate your garage door’s panels. Regular maintenance, preventive measures, and, when required, expert assistance guarantee that your garage door panels remain a testament to your dedication to upholding your property’s aesthetics and resilience. Armed with rust-free panels, I take pride in the enhanced appeal and durability of my garage door—an embodiment of my commitment to maintaining my home’s value and visual allure.

Palm Desert Garage & Overhead Doors

73210 Shadow Mountain Dr #3, Palm Desert, CA 92260, United States

760-493-7291

Solving Issues with Slow-Moving Garage Doors – Carlsbad Garage & Overhead Doors

As someone who values efficiency and convenience, experiencing a slow-moving garage door was a frustrating setback. The daily routine of waiting for the door to open or close at a snail’s pace was not only time-consuming but also left me wondering if there was an underlying problem. Determined to restore the swift operation of my garage door, I decided to tackle the issue head-on through a series of do-it-yourself (DIY) steps. Through trial, error, and careful observation, I successfully diagnosed the root causes and implemented practical solutions.

By following Garage Door Repair, I’m eager to share my experience and guide you through the process of identifying why your garage door might be moving slowly, understanding the importance of resolving the issue, and executing effective solutions to bring back the speed and efficiency you deserve.

Step 1: Identifying the Symptoms

My journey began by closely observing my garage door’s behavior. Did it move slower than usual when opening or closing? Was there a noticeable hesitation in its movement? Understanding the symptoms was the first step toward finding a solution.

Step 2: Clearing the Path

Inspecting the tracks, rollers, and hinges for any obstructions or debris was crucial. Even the smallest obstruction can hinder smooth movement. Clearing the path was a simple yet effective way to kick-start the repair process.

Step 3: A Touch of Lubrication

Lubrication played a key role in restoring the door’s movement. Armed with a silicone-based lubricant, I applied it to the rollers, hinges, tracks, and other moving parts. This simple step made a noticeable difference in the door’s performance.

Step 4: The Importance of Spring Tension

Recognizing the role of garage door springs in the door’s movement, I inspected their tension. If not properly tensioned, springs can lead to sluggish operation. To ensure safety, I knew it was wise to consult a professional for spring adjustment.

Step 5: A Thorough Opener Inspection

The heart of the garage door’s movement lies within the opener’s motor and components. I meticulously examined the opener for signs of wear, damage, or misalignment. Tightening loose bolts and ensuring all components were securely in place were essential tasks.

Step 6: Roller and Track Evaluation

Worn-out rollers and misaligned tracks can contribute to slow movement. Carefully assessing the rollers for wear and replacing them as needed, and making track adjustments, brought the door closer to its optimal performance.

Step 7: Balancing Act

I disconnected the opener and attempted to manually operate the door. If it was difficult to lift or lower, I recognized that the door might be out of balance. Professional adjustment was key to achieving proper balance.

Step 8: Focus on Limit Switches

Limit switches dictate the garage door’s opening and closing points. Misalignment or malfunction can result in slow movement. I checked the switches for alignment and condition, ensuring they were functioning as intended.

Step 9: The Wiring and Connection Check

Electrical issues can’t be overlooked. I inspected the wiring and connections of the opener, searching for signs of damage or corrosion. Securing all connections and addressing any wiring concerns was essential.

When to Seek Professional Help:

While DIY solutions can often do wonders, there are situations that warrant professional assistance:

  • Spring Adjustments: Tinkering with garage door springs is risky. Seeking professional help for spring adjustments ensures safety and proper tensioning.
  • Complex Opener Concerns: Extensive opener motor or component damage requires expertise. Consulting a professional is the best course of action.

In summary, as per Garage Door Repair and my journey in solving slow-moving garage door issues taught me the power of observation and proactive maintenance. By following the steps outlined above and keeping safety in mind, I managed to diagnose the problem and implement effective solutions. Regular maintenance, lubrication, and staying alert to potential issues are instrumental in preventing future slow-moving door challenges. With a garage door that operates efficiently and smoothly, I’ve regained the convenience and speed that my daily routine demands.

Carlsbad Garage & Overhead Doors

300 Carlsbad Village Dr 108a 205, Carlsbad, CA 92008, United States

760-350-3536

Fixing Garage Door Opener Remote Control Malfunctions – Denzel Garage Door Repair of Lake Worth

Dealing with a malfunctioning garage door opener remote control was an unexpected and aggravating experience I recently faced. It’s incredible how much we rely on the convenience of a simple button press to open and close our garage doors, and when that convenience is suddenly taken away, it can throw a wrench into your daily routine.

Going through this ordeal myself, I gained valuable insights into the common issues that can plague remote controls, learned how to troubleshoot effectively, and discovered solutions to restore the smooth functioning of my remote control by following Garage Door Repair.

Unveiling the Frustrating Remote Control Woes:

At first, the notion that my garage door opener remote control could be the source of the problem seemed almost too simple. However, I quickly learned that remote controls are more complex than they appear:

  1. Battery Troubles: The most common issue, and sometimes the easiest to overlook, is depleted or weak batteries in the remote control.
  2. Signal Interference: Radio frequency signals that remote controls use can be disrupted by various electronic devices, causing them to fail.
  3. Physical Damage: Dropping the remote, exposing it to moisture, or general wear and tear can lead to internal damage, resulting in unresponsiveness.
  4. Programming Glitches: Sometimes, the connection between the remote control and the opener can get lost or unprogrammed, causing communication breakdown.

Navigating Through Troubleshooting:

The key to tackling a malfunctioning remote control is to troubleshoot methodically, ruling out each potential issue one by one:

  1. Battery Power Check: Always begin with the simplest step – checking the batteries. Swapping out old batteries for new ones is often the solution.
  2. Inspection for Damage: Examining the remote control for visible damage such as cracks or signs of moisture can give you an idea of whether physical damage is the culprit.
  3. Test Multiple Remotes: If you have more than one remote control for your garage door opener, test them all. If only one remote is problematic, chances are it’s specific to that remote.
  4. Adjusting Proximity: Moving closer to the garage door opener can sometimes help. Signal strength can be affected by distance, so testing from various points can be revealing.
  5. Eliminating Interference: Temporarily turning off other electronic devices that could be causing signal interference – like cordless phones or Wi-Fi routers – can help diagnose signal-related issues.
  6. Reprogramming the Remote: If none of the above steps work, reprogramming the remote control might be the solution. Check your opener’s manual for guidance on reprogramming.

Effective Solutions for Remote Control Woes:

  1. Battery Replacement: The simplest and most crucial step is regular battery replacement. Making it a habit to change batteries at least annually, regardless of remote performance, can prevent many issues.
  2. Managing Signal Interference: Being mindful of where you use your remote control can help minimize signal interference. Keeping distance from other electronic devices is a good practice.
  3. Taking Care of the Remote: Treat your remote control with care. Avoid exposing it to moisture and consider using a protective case to prolong its lifespan.
  4. Replacement Consideration: When a remote control is beyond repair or consistently malfunctions, investing in a new remote control is a practical solution. Ensure compatibility with your opener model.
  5. Seeking Professional Assistance: For programming challenges or uncertainty about any troubleshooting steps, consulting a garage door technician is a smart move.

When Professional Help Is a Must:

While many remote control issues can be resolved through troubleshooting, some situations warrant professional intervention:

  • Complex Programming Concerns: If reprogramming your remote control proves challenging, don’t hesitate to let a professional handle the task accurately.
  • Internal Damage Suspicions: If you suspect internal damage to your remote control, attempting DIY repair might exacerbate the problem. Seek professional assessment for repair or replacement advice.

Preventing Future Remote Control Dilemmas:

To avoid future remote control troubles, consider these preventative measures:

  • Regular Battery Checks: Set reminders for regular battery replacements to ensure your remote control always has adequate power.
  • Signal Testing: Test your remote control from different distances periodically to ensure consistent signal strength.
  • Signal Interference Audit: Identify potential sources of signal interference around your garage door opener and take steps to minimize them.
  • Remote Control TLC: Treat your remote control gently to avoid damage from drops or moisture exposure.

In summary, as per Garage Door Repair, dealing with a remote control that’s on the fritz can be incredibly frustrating, but with a strategic approach to troubleshooting and the provided solutions, many common issues can be addressed. Always prioritize safety and accuracy, and if you’re uncertain about any steps, don’t hesitate to seek professional assistance. By adopting preventative measures and ensuring proper maintenance, you’ll not only resolve current remote control problems but also enjoy seamless access to your garage for years to come. The convenience and peace of mind that come with a properly functioning remote control are well worth the effort.

Denzel Garage Door Repair of Lake Worth

3469 S Congress Ave #29, Lake Worth, FL 33461, United States

561-264-5078

Installing Additional Garage Door Security Measures – Costa Mesa Garage Door Experts

As a homeowner who holds the safety and security of my family and property in high regard, I’ve taken proactive steps to ensure that my garage is a fortress against potential threats. Recognizing the vulnerabilities that garage spaces can pose, I’ve gone beyond the basics of locking mechanisms to install additional security measures that provide peace of mind.

I’m excited to share my journey of enhancing garage door security through various installations and practices based from Garage Door Repair, offering valuable insights for fellow homeowners seeking to fortify their garage spaces.

1. Reinforcing the Garage Door:

One of my initial priorities was to reinforce the physical strength of my garage door. I installed a metal bar along the interior to prevent the door from being kicked or forced open easily. This added layer of resistance acts as a powerful deterrent against unauthorized access.

2. Security Cameras for Surveillance:

Understanding the importance of monitoring activities around my garage, I strategically placed security cameras both inside and outside. These cameras offer high-definition video, motion detection, and the convenience of remote access via my smartphone. The real-time visibility they provide gives me a sense of control and vigilance.

3. Motion-Activated Lighting:

Aiming to eliminate the cloak of darkness that intruders often seek, I incorporated motion-activated lighting around the garage area. These lights illuminate the surroundings as soon as motion is detected, thwarting any attempt at covert activities.

4. Embracing Smart Garage Door Openers:

The introduction of a smart garage door opener transformed the way I approached garage security. With this technology, I can remotely control and monitor my garage door through my smartphone. This feature offers convenience while enabling me to receive alerts if the door is opened unexpectedly.

5. Leveraging Garage Door Sensor Alarms:

To detect any unauthorized entry attempts, I installed garage door sensor alarms. These sensors trigger an alarm if the garage door is opened without the proper authorization. The audible alert not only scares away potential intruders but also ensures that I’m immediately informed of any breach.

6. Integrating with the Home Security System:

To create a comprehensive security network, I integrated my garage into my home’s overall security system. Whenever the security system is armed, the garage is automatically included in the monitoring. This ensures a swift response in case of any security breach.

7. Opting for Keyless Entry Systems:

To eliminate the risk of lost keys falling into the wrong hands, I transitioned to a keyless entry system for my garage door. These systems use codes or even biometric features like fingerprints to grant access. It provides ease of use and allows me to change access codes when needed.

8. Strengthening with Additional Locks:

Supplementing the standard garage door locks, I installed extra deadbolts to heighten security. These deadbolts offer an extra layer of protection against forced entry attempts.

9. Securing Garage Windows:

Recognizing that windows can be potential weak points, I fortified my garage windows with security film or laminates. These enhancements make the windows more resistant to breaking and provide an added layer of protection.

10. Safeguarding Remote Access:

To prevent unauthorized access to my garage door opener, I’m vigilant about keeping remote controls secure. Storing remotes inside the house or using a keychain remote that remains with me helps mitigate the risk of unauthorized use.

11. Implementing a Garage Door Timer:

To prevent accidental or prolonged garage door openings, I set up a garage door timer. This timer automatically closes the garage door after a designated period, ensuring that it’s not left open inadvertently.

12. Introducing a Garage Door Lock Bar:

An additional layer of security is achieved by installing a lock bar on the inside of the garage door. This bar prevents the door from being lifted, even if an intruder manages to disengage the opener.

13. Displaying Security Signage:

I placed security signs or stickers near the garage to deter potential intruders. Indicating the presence of security systems, cameras, or alarms can discourage unauthorized entry attempts.

14. Selecting Secure Garage Door Materials:

When replacing my garage door, I opted for a sturdy material like steel. Steel doors are more resistant to breaches compared to other materials, providing an added level of security.

15. Locking Up Valuables:

To secure high-value items in my garage, I invested in lockable cabinets and shelving units. These storage solutions ensure that valuable tools, equipment, and belongings are protected.

Conclusion: A Haven of Safety

As stated from Garage Door Repair, taking the initiative to enhance garage door security has proven to be an investment in the safety and well-being of my household. By installing additional security measures beyond the conventional locking mechanisms, I’ve created a fortress that deters potential intruders and provides me with a sense of control. From reinforcing the garage door to incorporating smart technology and strategic lighting, each measure contributes to a comprehensive security strategy. Remember, a secure garage isn’t just about protecting your possessions; it’s about creating a haven where your family and property are safeguarded, allowing you to enjoy peace of mind day and night.

Costa Mesa Garage Door Experts

2930 Bristol St #21, Costa Mesa, CA 92626, United States

949-288-2182

Are Garage Doors Magnetic – Dedham Garage & Overhead Doors

Garage Door Repair Dedham MA are complex systems that involve various components to ensure their proper operation, security, and convenience. While garage doors themselves are not inherently magnetic, magnets can play a significant role in enhancing the functionality and safety of garage doors.

In this guide, we will explore the use of magnets in garage doors and their various applications:

1. Decorative Magnets:

One common use of magnets in relation to garage doors is for decorative purposes. Decorative garage door magnets are designed to add a touch of visual appeal to the exterior of the garage. These magnets are often designed in various shapes, sizes, and colors to mimic traditional hardware, such as hinges and handles. Homeowners can easily attach these magnets to the surface of the garage door to achieve a decorative effect without the need for permanent installation.

2. Magnetic Garage Door Hardware Kits:

In addition to decorative magnets, some manufacturers offer magnetic garage door hardware kits. These kits include magnetic hinges and handles that can be easily attached and removed from the garage door’s surface. The advantage of using these kits is that they provide a cost-effective way to update the appearance of the garage door without the need for drilling or permanent installation. This is particularly useful for homeowners who want to change the look of their garage door periodically.

3. Magnetic Sensors and Switches:

Magnetic sensors and switches are essential components of the safety and security systems in garage doors. These sensors use the principle of magnetism to detect the position of the door and to ensure that it operates safely. Here are some key examples:

  • Door Position Sensors: These sensors are typically installed at the top of the garage door tracks. They consist of a magnet and a sensor. As the garage door opens or closes, the magnet moves away from or toward the sensor, indicating the door’s position. This information is used to ensure that the door stops or reverses when an obstruction is detected.
  • Rolling Code Technology: Many modern garage door openers use rolling code technology to enhance security. Rolling code remote controls use a changing code with each use to prevent unauthorized access. This technology often involves magnetic components in the remote control and the opener unit to synchronize the codes securely.

4. Magnetic Door Contacts:

Magnetic door contacts are used in garage doors for security and safety purposes. These contacts consist of two components: a magnet and a switch. When the garage door is closed, the magnet and the switch are in close proximity, creating a closed circuit. If the door is opened without disengaging the garage door opener, the circuit is broken, triggering an alert or alarm to notify homeowners of the unauthorized access.

5. Tools and Equipment:

Magnets are also commonly used in tools and equipment used for garage door maintenance and repairs. Magnetic parts trays can hold screws, nuts, and bolts while you work on the door, preventing small items from getting lost. Magnetic pickup tools help retrieve metal objects from hard-to-reach places, such as within the tracks or around the garage floor.

6. Weather Stripping and Seals:

Magnetic weather stripping and seals can be used around the edges of garage doors to create a tight seal and prevent drafts, debris, and water from entering the garage. The magnetic property of these seals ensures a secure attachment to the door frame.

In Conclusion:

While Garage Door Repair Dedham MA themselves are not inherently magnetic, magnets play various roles in enhancing the appearance, safety, and security of garage doors. From decorative magnets and hardware kits to safety sensors and switches, the use of magnets contributes to the efficient and reliable operation of garage doors. Understanding the applications of magnets in garage doors can help homeowners make informed decisions about their garage door accessories and security systems.

Dedham Garage & Overhead Doors

3 Allied Dr #303, Dedham, MA 02026, United States

1-781-650-7642

Must-Have Garage Door Accessories for Convenience and Functionality – Kokomo Overhead & Garage Doors

As a homeowner who heavily relies on my garage for storage, security, and daily comings and goings, I’ve come to realize that the right accessories can greatly enhance the convenience and functionality of my garage door. From advanced technology to practical additions, these accessories have transformed my garage door into a smart, efficient, and user-friendly system.

Here are some must-have garage door accessories that have made a significant difference in my overall experience based from Garage Door Repair:

1. Smart Garage Door Opener: The smart garage door opener has truly revolutionized how I interact with my garage. With just a smartphone app, I can open or close the door from anywhere. This feature has been incredibly handy for granting access to family members, receiving deliveries, or ensuring the door is secure when I’m not at home.

2. Keyless Entry Keypad: No more fumbling for keys or remote controls. The keyless entry keypad allows me to enter a unique code to open the garage door. It’s perfect for guests, family members, or service providers who need temporary access.

3. Remote Control: While remote controls are nothing new, they remain a crucial accessory for garage door convenience. Having multiple remotes for different family members or vehicles ensures that everyone can operate the door effortlessly.

4. Battery Backup: Power outages are no longer a worry with a battery backup system. This feature ensures that my garage door remains operational even during unexpected power failures.

5. Wireless Garage Door Monitor: Staying updated on the status of my garage door is now a breeze with a wireless monitor. This device alerts me if the door is left open, allowing me to take action remotely.

6. Automatic Lights: I’ve installed motion-activated lights inside my garage, improving visibility and adding an extra layer of security. Lights that turn on automatically when the garage door is activated illuminate my path.

7. Garage Door Locks: While my garage door already provides security, I’ve added an extra layer of protection with manual or automatic locks. They give me added peace of mind against unauthorized access.

8. Safety Sensors: Safety sensors are absolute essentials that prevent accidents and injuries. These sensors detect obstacles and automatically reverse the door’s motion to prevent any harm.

9. Garage Door Timer: Setting my garage door to close automatically after a certain time is a fantastic feature. It ensures I never leave it open accidentally and enhances security.

10. Remote Garage Door Status Indicator: Worried about whether you closed the garage door? A remote status indicator lets me check the door’s position remotely, alleviating any concerns.

11. Garage Door Seals: Weather seals have proven invaluable in preventing drafts, water, and pests from entering my garage. They’ve improved insulation and helped maintain a comfortable environment.

12. Smart Home Integration: Integrating my garage door with my smart home ecosystem has been a game-changer. I can control the door using voice commands through platforms like Amazon Alexa or Google Assistant.

13. Parking Aids: I no longer worry about hitting walls or objects when parking in a tight garage, thanks to parking aids. These can be simple visual markers or more advanced laser-guided systems.

14. Garage Door Remote Holder: Keeping track of remote controls used to be a challenge. Now, a remote holder mounted near the garage entrance provides a dedicated place for them.

15. Garage Door Lubricant: While not high-tech, proper lubrication is essential for maintaining the smooth operation of my garage door’s moving parts.

16. Emergency Release Kit: In case of power failure or technical issues, an emergency release kit allows me to manually open and close the garage door.

17. Remote-Controlled Garage Heater or Fan: I’ve maintained a comfortable temperature in my garage by remotely controlling a heater or fan.

18. Garage Shelving and Storage: Accessories that enhance organization, like shelves, hooks, and storage systems, have maximized the functionality of my garage space.

19. Garage Door Reinforcement: I’ve reinforced the security of my garage door with accessories like door bars or locks that prevent forced entry.

20. Garage Door Decorative Hardware: For an aesthetic upgrade, I’ve added decorative hardware that enhances the look of my garage door.

In conclusion, according from Garage Door Repair, investing in the right garage door accessories has significantly improved the convenience and functionality of my garage door system. Whether it’s embracing smart technology or incorporating safety features like sensors and locks, these accessories have made my garage door experience safer, more efficient, and more enjoyable.

Kokomo Overhead & Garage Doors

1910 Valerie Ct, Kokomo, IN 46902, United States

765-945-2524

Garage Door Opener Motor Troubleshooting: Identifying Motor Issues – Arlington Overhead & Garage Doors

As a homeowner who relies on the convenience and functionality of my garage door opener, I’ve come to truly appreciate the role of its motor in ensuring seamless and reliable operation. Over time, I’ve encountered various issues that can affect the performance of the motor, and through my experiences, I’ve learned valuable troubleshooting techniques to identify and address these problems.

In this comprehensive guide I got from Garage Door Repair, I’ll share my insights into garage door opener motor troubleshooting, helping you navigate through potential motor-related issues and empowering you to keep your garage door opener in top-notch condition.

The Heart of the Operation: Understanding Garage Door Opener Motors

Understanding the essential role that a garage door opener motor plays is the first step in troubleshooting potential problems. The motor is the powerhouse behind the movement of the garage door, responsible for smoothly opening and closing it. When the motor encounters issues, it can lead to a range of problems, from sluggish door movement to complete failure to operate. Recognizing and addressing motor-related concerns promptly is crucial to prevent inconveniences and ensure the safety and security of your home.

Common Motor-Related Problems I’ve Encountered

Throughout my journey as a homeowner, I’ve encountered several common issues that can arise with garage door opener motors:

  1. No Response: Pressing the remote or wall-mounted button with no response from the motor is a telltale sign of a power supply or motor issue.
  2. Slow or Uneven Movement: If the garage door opens or closes unevenly or at a sluggish pace, it’s likely that the motor’s performance has been compromised. This could be due to worn-out motor components or misalignment.
  3. Excessive Noise: Unusual or excessive noise originating from the motor during operation can indicate worn-out or damaged parts that require attention.
  4. Door Reversal: When the garage door starts closing but quickly reverses, it could be due to problems with the motor’s safety features, such as the photo-eye sensors or the force settings.
  5. Overheating and Stalling: Motors that overheat or stall during operation may be experiencing electrical issues or internal damage.

Step-by-Step Troubleshooting Approach for Garage Door Opener Motors

Here’s a step-by-step guide based on my experiences to help you troubleshoot and identify motor-related problems with your garage door opener:

  1. Check the Power Supply: Start by ensuring that the garage door opener is properly connected to a power source. Look for tripped circuit breakers or blown fuses in the circuit supplying power to the opener.
  2. Inspect Remote and Wall Button: Test both the remote control and the wall-mounted button to ensure they are functioning correctly. If one control works while the other doesn’t, it could indicate a problem with the non-responsive control.
  3. Lubrication Check: Inadequate lubrication can lead to increased friction and strain on the motor. Make sure all moving parts, including the motor’s drive chain or belt, are well-lubricated.
  4. Visual Examination: Inspect the motor unit for any signs of damage, such as frayed wires, loose connections, or physical wear and tear. Tighten any loose components and replace damaged parts as needed.
  5. Test Force Settings: Many garage door openers allow you to adjust force settings, controlling how much force the motor uses to open and close the door. If the settings are too high, the motor may struggle or stall. Adjust the settings according to the manufacturer’s guidelines.
  6. Check Photo-Eye Sensors: If your garage door features photo-eye sensors, ensure they are properly aligned and free from debris. Misaligned or obstructed sensors can prevent the door from closing and cause the motor to reverse.
  7. Listen for Unusual Noises: During operation, pay close attention to any unusual or grinding noises originating from the motor. These noises could signal worn-out motor components in need of replacement.
  8. Inspect Safety Reverse Mechanism: Test the safety reverse mechanism by placing a small object, like a block of wood, in the door’s path while closing it. The door should automatically reverse upon contact with the object. Failure to do so may indicate a need for adjustment or repair of the motor’s safety features.

When Professional Help Is Needed

While troubleshooting can resolve many minor issues, there are instances where seeking professional assistance is the wisest choice:

  1. Electrical Problems: If you suspect electrical issues, such as wiring problems or motor overheating, it’s advisable to consult a professional technician with expertise in garage door opener systems.
  2. Motor Replacement: In cases of extensive motor damage or irreparable issues, a professional technician can guide you on whether a motor replacement is the most appropriate solution.
  3. Complex Repairs: For intricate motor repairs or replacements, relying on the skills of a qualified garage door technician ensures safe and proper installation.

Conclusion: Ensuring Optimal Garage Door Opener Motor Performance

Overall, based from Garage Door Repair, as a homeowner who values the convenience and reliability of a functional garage door opener, I’ve come to understand that a well-operating motor is the heart of the system. By familiarizing yourself with common motor-related problems and following a systematic troubleshooting approach, you can effectively identify and address issues that could hinder the smooth operation of your garage door opener. Routine maintenance, including lubrication and visual inspections, plays a pivotal role in preventing motor-related problems and prolonging the lifespan of your garage door opener. However, for more complex concerns or significant motor damage, seeking professional assistance from a qualified technician guarantees safe and effective repairs. By remaining vigilant and proactive in addressing motor-related challenges, you’ll be equipped to enjoy the convenience and peace of mind that a properly functioning garage door opener brings to your daily life.

Arlington Overhead & Garage Doors

700 Secretary Dr, Arlington, TX 76015, United States

817-646-2532

How To Get Dent Out Of Garage Door – Braintree Garage & Overhead Doors

Removing dents from a Garage Door Repair Braintree MA involves a combination of careful techniques, tools, and patience. While some minor dents can be repaired effectively, larger or more severe dents may require professional assistance.

Here’s a comprehensive guide on how to get a dent out of a garage door:

1. Assess the Damage:

  • Examine the dent to determine its size, depth, and location. This assessment will help you determine whether the dent can be repaired using DIY methods or if professional help is needed.

2. Gather Necessary Tools and Materials:

  • Plunger.
  • Heat gun or hairdryer.
  • Dry ice (for larger dents).
  • Soft rubber mallet.
  • Block of wood.
  • Towel or cloth.
  • Boiling water (if needed).
  • Dent repair kit (optional).

3. Safety Precautions:

  • Wear safety glasses and gloves to protect yourself while working with tools and materials.

4. Plunger Method:

a. If the dent is relatively small and accessible, you can try using a plunger to pop the dent out:

b. Moisten the edges of the plunger’s rubber cup to create a better seal.

c. Place the plunger over the dent and press it firmly against the door.

d. Push and pull the plunger to create suction, which may help pop the dent out.

e. Gently lift the plunger to release the suction and check if the dent has improved. Repeat as needed.

5. Heat and Cold Method:

a. For moderate-sized dents, you can use the contrast between heat and cold to help the metal expand and contract:

b. Use a heat gun or hairdryer to warm the dented area. Move the heat source back and forth to avoid overheating the metal.

c. Once the area is heated, quickly apply a piece of dry ice to the center of the dent. The rapid temperature change may help pop the dent out.

d. Use a soft rubber mallet or the back of a block of wood to gently tap the area around the dent, encouraging the metal to return to its original shape.

6. Boiling Water Method:

  • For plastic garage doors, you can use the boiling water method to soften the material and reshape the dent: a. Boil a pot of water and carefully pour it over the dented area. Be cautious to avoid burning yourself. b. Use a towel or cloth to immediately push and pull the dented area from the inside of the door. c. Continue shaping the plastic until the dent is minimized.

7. Dent Repair Kit:

  • Dent repair kits, available at auto parts stores or online, often include specialized tools for pushing out dents from metal surfaces. Follow the instructions provided with the kit for best results.

8. Professional Help:

  • If the dent is large, deep, or the above methods are unsuccessful, it’s advisable to seek the assistance of a professional garage door technician or a specialized auto body repair shop. They have the expertise and tools to handle more complex repairs.

9. Preventive Measures:

  • To prevent future dents, consider adding protective padding or bumpers to the inside of the garage door where it may come into contact with vehicles or objects.

10. Regular Maintenance:

  • Perform regular inspections and maintenance on your garage door to address any minor dents before they become more severe. Lubricate moving parts, tighten screws, and keep the door in good condition.

In conclusion, removing dents from a Garage Door Repair Braintree Ma requires careful assessment, appropriate tools, and suitable techniques. While some smaller dents can be repaired using DIY methods, larger or more complex dents may require professional intervention. Prioritize safety, and if you’re uncertain about any step or if the dent is significant, seeking professional assistance is recommended. By addressing dents promptly and maintaining your garage door, you can keep it looking and functioning well for years to come.

Braintree Garage & Overhead Doors

0 Campanelli Dr, Braintree, MA 02184, United States

1-781-678-4910

How To Program Clicker Garage Door Keypad – Hesperia Overhead & Garage Doors

Programming a Clicker Garage Door Repair Hesperia CA keypad allows you to set a personal PIN code that can be used to operate your garage door opener without the need for a remote control. Clicker keypads are commonly used to provide convenient access to your garage. The programming process can vary slightly depending on the model of the keypad and the type of garage door opener you have.

Here’s a comprehensive guide on how to program a Clicker garage door keypad:

1. Check Compatibility:

  • Ensure that your garage door opener is compatible with the Clicker keypad. Check the manufacturer’s compatibility chart or guidelines to confirm.

2. Gather Necessary Information:

  • The model number of your Clicker keypad and the manufacturer and model of your garage door opener.
  • Access to your garage door opener’s user manual.

3. Locate the Learn or Smart Button:

  • On your garage door opener unit, locate the “Learn” or “Smart” button. This button is usually located on the motor unit or the back of the opener.

4. Clear Previous Codes (if needed):

  • If you’re replacing an existing keypad or remote control, it’s a good practice to clear any previous codes from your garage door opener to avoid interference. Consult your garage door opener’s user manual for instructions on how to do this.

5. Prepare the Keypad:

  • If the Clicker keypad has a cover, remove it to access the programming buttons. Locate the “Program” or “Learn” button on the keypad.

6. Put the Opener into Programming Mode:

a. Press and release the “Learn” or “Smart” button on the garage door opener unit. The indicator light on the opener should start flashing.

b. You usually have about 30 seconds to complete the programming process after activating the programming mode on the opener.

7. Program the Keypad:

a. Enter the PIN code you want to program on the Clicker keypad.

b. Press and hold the “Program” or “Learn” button on the keypad while simultaneously pressing the number “0” on the keypad.

c. Release both buttons. The opener’s indicator light should flash, indicating that the keypad is in programming mode.

8. Send the Signal:

  • Press the “Enter” button on the Clicker keypad. The opener’s indicator light should respond by flashing or staying illuminated.

9. Test the Keypad:

  • Test the programmed PIN code by entering it on the keypad and pressing the “Enter” button. The garage door should respond by opening or closing.

10. Repeat for Additional Users (if applicable):

  • If you’re programming multiple PIN codes for different users, repeat steps 6 to 9 for each user.

11. Consult the User Manual:

  • Consult the user manual for your specific Clicker keypad model for any model-specific instructions or troubleshooting tips.

12. Seek Professional Help:

  • If you encounter difficulties during programming or are unsure about any step, consider seeking assistance from your garage door opener’s manufacturer or a professional garage door technician.

13. Regular Maintenance:

  • Periodically change your PIN code and perform maintenance on the Clicker keypad to ensure its proper functionality.

In conclusion, programming a Clicker Garage Door Repair Hesperia CA keypad involves entering the programming mode on the opener, programming the keypad with the desired PIN code, and testing its functionality. By following these steps and referring to the user manual for your specific Clicker keypad model, you can ensure that your keypad is properly programmed and provides convenient access to your garage. If you’re not experienced with garage door technology or encounter difficulties during the programming process, it’s recommended to seek the help of professionals who can assist you in programming the Clicker keypad correctly and ensure the security and functionality of your garage door system.

Hesperia Overhead & Garage Doors

18361 Bear Valley Rd # 4, Hesperia, CA 92345, United States

1-760-990-1054

Page 3 of 17

Powered by WordPress & Theme by Anders Norén