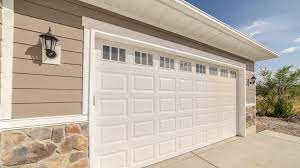
A malfunctioning or disengaged Garage Door Repair can be frustrating and inconvenient. However, re-engaging it is often a simple process that you can do on your own.

In this guide, we will provide you with a step-by-step explanation of how to re-engage a garage door. Please note that this guide assumes you have a standard overhead garage door with a release mechanism.
Step 1: Identify the Problem: Before attempting to re-engage the garage door, it is crucial to identify the underlying issue. Common reasons for a disengaged garage door include a power outage, a tripped circuit breaker, a broken spring, or a detached emergency release rope. Inspect the door and its components to determine the cause of the problem.
Step 2: Disconnect the Garage Door Opener: If you suspect a power outage or a tripped circuit breaker, disconnecting the garage door opener is the first step. Look for the power cord attached to the opener unit and unplug it from the electrical outlet. This will prevent accidental operation of the opener while you work on re-engaging the door manually.
Step 3: Locate the Emergency Release Cord: The emergency release cord is typically a red rope hanging from the garage door opener rail or the trolley mechanism. Find this rope and make sure it is accessible. If the rope is missing or damaged, consult the owner’s manual for your specific garage door opener model to locate an alternative release mechanism.
Step 4: Pull the Emergency Release Cord: Grasp the emergency release cord firmly and pull it straight down. This action will disengage the garage door from the opener mechanism. You may hear a clicking sound, indicating that the door is now disconnected.
Step 5: Test the Manual Operation: Gently lift the garage door by hand to ensure that it is indeed disconnected from the opener. The door should move freely and smoothly along the tracks. If you encounter resistance or the door feels unusually heavy, do not force it. Instead, consult a professional garage door technician to address any potential issues with the door’s springs or other components.
Step 6: Re-Engaging the Garage Door: To re-engage the garage door, lower it back down until it rests on the floor. Make sure it is fully closed and aligned with the weatherstripping. Then, lift the door slightly to release any tension on the tracks. Once the tracks are clear, pull the emergency release cord in the opposite direction, towards the opener. This will engage the door back into the opener mechanism.
Step 7: Testing the Automatic Operation: Once the door is re-engaged, plug the opener’s power cord back into the electrical outlet. Test the garage door’s automatic operation by pressing the opener’s remote or wall-mounted button. The door should open and close smoothly, responding to the commands.
Step 8: Lubrication and Maintenance: Regular maintenance is essential to ensure the smooth operation of your garage door. Lubricate the moving parts, such as hinges, rollers, and tracks, at least twice a year. Additionally, inspect the door’s springs for signs of wear or damage and replace them if necessary. Following these maintenance practices will help prevent future disengagement issues.
Conclusion: Re-engaging a Garage Door Repair is a relatively straightforward process that can be done without professional assistance in most cases. By following the step-by-step guide outlined above, you can quickly resolve the issue and restore the normal operation of your garage door. Remember to prioritize safety and consult a professional if you encounter any difficulties or suspect underlying mechanical problems.
Overhead Raleigh Doors
Raleigh, NC
1-919-500-1112
