Get your Home in Perfect Harmony

Category: GARAGE DOOR SUPPLIER Page 3 of 5

How Much Is A Garage Door Motor – Carlsbad Garage Door & Gate Repairs

A Garage Door Repair Carlsbad CA, often referred to as a garage door opener, plays a crucial role in the convenience and functionality of a modern garage.

In this essay, we will explore various aspects of garage door motors, including their importance, types, costs, installation, and maintenance.

Garage door motors have become an integral part of our daily lives, simplifying the task of opening and closing garage doors. Gone are the days of manually heaving heavy doors or struggling with their cumbersome mechanisms. The advent of garage door motors has made this process effortless and efficient. These devices are designed to automate the operation of garage doors, enhancing convenience, security, and safety.

There are several types of garage door motors available in the market, each catering to different needs and preferences. The most common types include chain-driven, belt-driven, and screw-driven openers. Chain-driven motors are known for their durability and affordability but tend to be noisy during operation. On the other hand, belt-driven motors offer a quieter alternative without compromising on performance. Screw-driven motors, with fewer moving parts, strike a balance between noise and cost, making them a popular choice.

When considering the cost of a garage door motor, it’s important to factor in various variables. The price can vary significantly depending on factors such as the type of motor, brand, features, and additional accessories. On average, a basic garage door motor can range from $150 to $400. However, high-end models with advanced features can cost upwards of $1,000 or more. Installation costs are typically separate and may vary depending on the complexity of the installation process and whether you choose to hire a professional technician or install it yourself.

The installation of a garage door motor requires careful planning and execution. It involves mounting the motor unit on the garage ceiling, attaching it to the door, and configuring the necessary settings. While some individuals opt for a DIY approach to save on installation costs, it’s crucial to emphasize that professional installation is recommended. Professionals have the expertise and tools needed to ensure the motor is installed correctly, preventing potential safety hazards and issues with the door’s operation.

Maintenance is a vital aspect of garage door motor ownership. Regular maintenance helps prolong the lifespan of the motor and ensures smooth and reliable operation. Maintenance tasks may include lubricating moving parts, inspecting and tightening bolts and screws, testing safety features like sensors, and checking for any unusual sounds or vibrations during operation. Neglecting maintenance can lead to costly repairs or premature motor failure.

In conclusion, a Garage Door Repair Carlsbad CA is a valuable addition to any garage, offering convenience, security, and safety. The cost of a garage door motor can vary depending on factors like type, brand, and features, with prices ranging from $150 to over $1,000. Proper installation by a professional is recommended to ensure optimal performance and safety. Regular maintenance is essential to keep the motor running smoothly and extend its lifespan. Overall, investing in a garage door motor is a wise choice for anyone looking to simplify their daily routine and enhance the functionality of their garage.

Denzel Garage Door of Carlsbad

300 Carlsbad Village Dr 108a 205, Carlsbad, CA 92008, United States

1-760-378-7470

Do Garage Doors Have Batteries – Keller Garage Door & Gate Repairs

Garage Door Repair Keller TX come a long way since their humble origins as manually operated wooden contraptions. Today, they are a staple in modern homes, providing convenience, security, and protection for our vehicles and belongings.

While most people understand the basic mechanics of garage doors, many may wonder if these essential components of our homes have batteries.

In this article, we will delve into the world of garage doors and explore the role of batteries in their operation. From automatic openers to backup power systems, batteries play a crucial role in ensuring that our garage doors function smoothly and reliably.

The Automatic Garage Door Opener

The most common type of garage door system in use today is the automatic garage door opener. This device is responsible for opening and closing the garage door with the push of a button, making it incredibly convenient for homeowners. But how does it work, and does it rely on batteries?

Automatic garage door openers are equipped with a motor that drives a trolley connected to the door itself. This motor, like any other, requires a power source. In the majority of cases, this power source is electrical, and the opener is directly wired to your home’s electrical system. However, this does not necessarily mean that the opener has no battery involvement.

Backup Batteries

One of the essential features of modern automatic garage door openers is their ability to function during power outages. This is where batteries come into play. Many garage door openers are equipped with backup batteries, typically 12-volt sealed lead-acid batteries, to ensure that you can still open and close your garage door even when the electricity is out.

These backup batteries are designed to activate automatically when the power goes out, ensuring that you can access your garage and, by extension, your vehicle. This feature not only provides convenience but also adds an extra layer of security by preventing unauthorized access during blackouts.

Battery Lifespan and Maintenance

While backup batteries are invaluable during power outages, they do require some maintenance to ensure their long-term reliability. Like all batteries, they have a limited lifespan and will eventually need replacement. The lifespan of a garage door opener battery can vary depending on factors such as usage frequency and environmental conditions. However, on average, they may last anywhere from two to five years.

Regular maintenance of your garage door opener, including battery checks and replacements as needed, is essential to ensure that it continues to operate smoothly. Most manufacturers provide guidelines on how to replace the battery, making it a relatively straightforward process for homeowners.

Wireless Keypads and Remote Controls

In addition to backup batteries for power outages, garage door openers often rely on batteries for other components of their operation. Wireless keypads and remote controls are prime examples. These devices allow you to open and close your garage door from outside the garage, providing added convenience.

Wireless keypads are typically mounted outside the garage and require a battery to power their operation. Similarly, remote controls, which you can keep in your car or carry on your person, also rely on batteries to transmit signals to the garage door opener.

The type and lifespan of the batteries used in wireless keypads and remote controls can vary, but they are generally easy to replace. Many modern remote controls use small coin cell batteries, which can last for several years before needing replacement.

Smart Garage Door Openers

With the advent of smart home technology, garage door openers have evolved to offer even greater convenience and control. Smart garage door openers can be operated through smartphone apps, and some are integrated into larger smart home ecosystems like Amazon Alexa or Google Home. Do these smart systems use batteries?

Smart garage door openers, like their traditional counterparts, are usually hardwired into your home’s electrical system for primary power. However, many of them include backup batteries as an additional feature to ensure continued operation during power outages.

These backup batteries are essential for maintaining the smart features of your garage door opener, allowing you to control it remotely even when the main power is down. This ensures that you can check the status of your garage door and control it from anywhere using your smartphone or smart home assistant.

Conclusion:

In summary, garage doors, particularly automatic Garage Door Repair Keller TX, rely on batteries in various ways to ensure their functionality and convenience. Backup batteries are crucial for allowing garage doors to operate during power outages, providing homeowners with continued access to their vehicles and belongings. Additionally, batteries power wireless keypads, remote controls, and smart features, enhancing the overall user experience.

To ensure the reliable operation of your garage door system, it’s essential to be aware of the battery components and their maintenance requirements. Regularly checking and replacing batteries when needed will help ensure that your garage door functions smoothly, providing you with the security and convenience you rely on every day. So, while you may not see batteries on the outside of your garage door, they are indeed an integral part of this modern home essential.

Keller Garage Door & Gate Repairs

1213 Hillside Dr, Keller, TX 76248, United States

1-817-769-3540

How To Program Ram 1500 Garage Door Opener – Corinth Gates & Garage Doors

Programming a Garage Door Repair Corinth TX for your RAM 1500 can be a convenient feature that allows you to open and close your garage door without getting out of your vehicle.

The process typically involves syncing your garage door opener’s remote with the vehicle’s built-in HomeLink system. Here, we’ll guide you through the steps to program your RAM 1500’s garage door opener in detail, using more than to ensure you have all the information you need.

Before You Begin

Before starting the programming process, ensure you have the following items ready:

  1. RAM 1500 vehicle with a HomeLink system (typically located on the driver’s sun visor or overhead console).
  2. Your garage door opener remote control.
  3. A ladder or step stool (if needed to access the garage door opener motor unit).

: Clear Existing Codes

If your HomeLink system has been previously programmed, it’s essential to clear any existing codes to prevent interference. Follow these steps:

  1. Turn the ignition of your RAM 1500 to the “ON” position without starting the engine.
  2. Locate the HomeLink buttons in your vehicle, typically on the driver’s sun visor or overhead console.
  3. Press and hold the two outside HomeLink buttons simultaneously for about 20 seconds. The indicator light will flash slowly, then rapidly. Release the buttons when the light flashes rapidly.

: Prepare Your Garage Door Opener Remote

Now, it’s time to prepare your garage door opener remote for programming:

  1. Take your garage door opener remote and find the “Learn” or “Program” button on it. This button is usually located on the motor unit of your garage door opener, near the antenna wire. Refer to your garage door opener’s manual if you can’t locate it.
  2. Press and release the “Learn” or “Program” button on your garage door opener motor unit. You have about 30 seconds to complete the next steps, so be ready.

: Program Your RAM 1500’s HomeLink System

Follow these steps to program your RAM 1500’s HomeLink system:

  1. In your RAM 1500, return to the HomeLink buttons.
  2. Choose which HomeLink button you want to program for your garage door opener. You can use any of the three buttons, but it’s best to start with the first one.
  3. Hold your garage door opener remote close to the HomeLink buttons, about 1-3 inches away.
  4. Simultaneously press and hold the HomeLink button you want to program and the garage door opener remote button you wish to use (e.g., “Button 1” on both) until the HomeLink indicator light begins to flash slowly.
  5. Release both buttons and watch the HomeLink indicator light. At first, it may flash slowly, then change to a rapid flash, and finally, it should turn solid. This process may take up to a minute.

: Test the HomeLink System

To ensure successful programming, you should now test the HomeLink system with your garage door opener:

  1. Stand inside your RAM 1500 with the engine off.
  2. Press the HomeLink button you just programmed and hold it. As you hold the button, you should see the garage door start to move (either opening or closing). Do not release the button until the door completes its movement.
  3. If the garage door moves, release the HomeLink button. Your RAM 1500’s HomeLink system is now successfully programmed with your garage door opener.

: Repeat for Additional Buttons

If you have more than one garage door or if you want to program the other HomeLink buttons for different devices (e.g., a gate or a second garage door), repeat steps 3 and 4 for the remaining HomeLink buttons.

: Finalize the Programming

After programming all desired HomeLink buttons, it’s essential to save the settings:

  1. Press and hold the two outside HomeLink buttons simultaneously for about 20 seconds until the HomeLink indicator light starts flashing rapidly. Release the buttons.
  2. Your RAM 1500’s HomeLink system is now fully programmed and ready for use.

Conclusion:

Programming your RAM 1500’s Garage Door Repair Corinth TX is a straightforward process that can enhance the convenience of your vehicle. By following these detailed steps, you can ensure that your HomeLink system works seamlessly with your garage door opener, allowing you to open and close your garage door with ease from the comfort of your vehicle. If you encounter any issues or need further assistance, consult your RAM 1500 owner’s manual or reach out to your garage door opener manufacturer for additional guidance. Enjoy the convenience of hassle-free garage access with your RAM 1500’s HomeLink system.

Corinth Gates & Garage Doors

940-461-6990

How To Program Garage Door Opener Genie Intellicode – Sanger Gates & Garage Doors

Programming a Genie Intellicode Garage Door Repair can vary slightly depending on the specific model you have.

However, I’ll provide you with a general step-by-step guide that should work for most Genie Intellicode garage door openers. This guide will be concise and well under, but it should cover all the necessary information.

Before you start:

  1. Ensure that your Genie Intellicode garage door opener is properly installed and powered.
  2. Make sure you have the remote control or keypad you want to program with you.

Programming the Remote Control:

  1. Locate the “Learn” or “Program” button on your Genie Intellicode garage door opener motor unit. This button is typically on the back or side of the unit and may be labeled as such.
  2. Press and release the “Learn” or “Program” button. You’ll usually have around 30 seconds to complete the next steps.
  3. Quickly press the button on your remote control that you want to program. Hold the remote control close to the motor unit.
  4. You may see or hear a confirmation, such as the garage door opener light flashing or the unit making a clicking sound. This indicates that the programming was successful.
  5. Test the remote control by pressing the button you just programmed to ensure it opens and closes the garage door.

Programming the Keypad (Wireless Entry System):

  1. Locate the cover of the keypad on the outside of your garage door. You’ll need to open this cover to access the programming buttons.
  2. Open the cover and find the “Learn” or “Program” button on the keypad.
  3. Press and release the “Learn” or “Program” button. The keypad’s backlight may turn on, indicating that it’s in programming mode.
  4. Enter a personal PIN code of your choice on the keypad. It’s typically a 4 to 6-digit code, and you may need to press “Enter” or “OK” after entering it.
  5. Wait for a confirmation, such as a light flashing on the keypad, to indicate that the programming was successful.
  6. Test the keypad by entering your PIN code and pressing “Enter” or “OK” to see if it opens and closes the garage door.

Erasing Old Codes (Optional):

If you want to remove any previously programmed remote controls or keypads, follow these steps:

  1. Press and hold the “Learn” or “Program” button on the garage door opener motor unit until the indicator light turns off (usually about 6-10 seconds).
  2. Release the button. This erases all previously programmed codes.
  3. Re-program your remote controls and keypads as described above.

Programming Additional Remote Controls or Keypads:

To program additional remote controls or keypads, follow the same steps as above, starting with pressing the “Learn” or “Program” button on the garage door opener motor unit.

Final Testing:

After programming your remote controls and keypads, be sure to test each one to make sure they open and close the garage door as expected.

That’s it! You’ve successfully programmed your Genie Intellicode Garage Door Repair. If you encounter any issues or have a different model, refer to your specific opener’s user manual for detailed instructions.

Sanger Gates & Garage Doors

940-748-1866

How To Paint A Steel Garage Door – Lantana Gates & Garage Doors

Painting a steel Garage Door Repair Lantana TX is an excellent way to enhance your home’s curb appeal while also protecting the door from the elements.

This comprehensive guide will walk you through the step-by-step process of painting a steel garage door, ensuring a professional-looking finish that will last for years to come.

Materials You’ll Need:

  1. Steel garage door
  2. Paint primer designed for metal surfaces
  3. Exterior-grade paint (latex or oil-based)
  4. Paintbrushes (high-quality synthetic bristle or foam brushes)
  5. Paint roller and tray
  6. Sandpaper (medium and fine grit)
  7. Painter’s tape
  8. Drop cloths or plastic sheeting
  9. Screwdriver or drill
  10. Soap and water (for cleaning)
  11. Rags or paper towels
  12. Respirator mask, safety goggles, and gloves (for safety)

: Preparation

a. Clear the area around the garage door to provide ample working space. b. Lay down drop cloths or plastic sheeting to protect the ground from paint drips. c. Remove any loose or peeling paint from the door’s surface using medium-grit sandpaper. Sand until the surface feels smooth. d. Clean the door thoroughly with a mixture of water and mild soap. Rinse with clean water and allow it to dry completely.

: Remove Hardware

a. Using a screwdriver or drill, remove any handles, locks, or other hardware from the garage door. This will ensure that you can paint every part of the door evenly.

: Apply Painter’s Tape

a. Use painter’s tape to mask off any areas you don’t want to paint, such as windows or weatherstripping. b. Take your time to ensure the tape is applied evenly and securely.

: Apply Primer

a. Start by applying a layer of primer specifically designed for metal surfaces. This will help the paint adhere better and provide additional protection. b. Use a paintbrush to apply primer to corners, edges, and any recessed areas. c. For the main surface of the door, use a paint roller for a smooth and even application. d. Follow the manufacturer’s instructions for drying time, usually a few hours to overnight.

: Sand the Primer

a. Once the primer is dry, lightly sand it with fine-grit sandpaper to create a smooth surface for the paint. Wipe away any dust with a clean, damp cloth.

: Apply the Paint

a. Stir the exterior-grade paint thoroughly before using it. b. Using a paintbrush, start by applying paint to the edges, corners, and any recessed areas. c. For the main surface of the door, use a paint roller for an even and efficient application. d. Apply paint in thin, even coats, working from top to bottom to minimize drips. e. Allow each coat to dry according to the manufacturer’s instructions (typically 2-4 hours) before applying the next coat. f. Apply a minimum of two coats for proper coverage, and additional coats may be needed for darker or more vibrant colors.

: Reattach Hardware

a. Once the final coat of paint is dry, reattach any hardware that was removed earlier.

: Clean Up

a. Remove painter’s tape carefully while the paint is still slightly tacky to avoid peeling. b. Clean brushes, rollers, and other tools with the appropriate solvent (water for latex, mineral spirits for oil-based paint). c. Dispose of paint cans and materials following local regulations.

Conclusion:

Painting a steel Garage Door Repair Lantana TX is a rewarding DIY project that can transform the appearance of your home. By following these steps and taking your time to prepare and paint properly, you can achieve a professional finish that will not only enhance curb appeal but also protect your garage door from the elements for years to come.

Lantana Gates & Garage Doors

1180 Central Way, Lantana, TX 76226, United States

1-940-400-3038

How To Lube Garage Doors – Garage Door Experts of Mansfield

Your Garage Door Repair Mansfield TX is an essential part of your home, providing security, convenience, and protection for your vehicles and belongings. To ensure it functions smoothly and quietly, regular maintenance is crucial.

One critical aspect of this maintenance is lubrication. In this comprehensive guide, we will walk you through the process of lubricating your garage door in detail, ensuring it remains in top-notch condition for years to come.

  1. Gather Your Supplies

Before you begin, gather the necessary supplies. You’ll need:

a. Silicone-based or lithium-based garage door lubricant. b. Clean cloth or rag. c. Safety goggles and gloves. d. A ladder. e. Wrench and pliers (if needed). f. Cleaning solution and a scrub brush (optional).

  1. Safety First

Always prioritize safety. Ensure the garage door is closed and disconnected from the opener to prevent accidents while working on it. Put on safety goggles and gloves to protect your eyes and hands during the process.

  1. Inspect the Door

Before applying lubricant, perform a visual inspection of your garage door and its components. Look for signs of wear, loose bolts, or damaged parts. If you notice any issues, address them before proceeding with lubrication.

  1. Clean the Tracks

Dirt and debris can accumulate in the tracks, hindering smooth door operation. Use a cleaning solution and a scrub brush to remove any dirt or obstructions from the tracks. Ensure they are clean and dry before lubricating.

  1. Lubricate the Springs

Springs play a vital role in balancing the garage door’s weight. Apply lubricant to the springs, focusing on the coils and connection points. Be cautious when working near springs, as they are under tension and can be dangerous if mishandled.

  1. Lubricate the Rollers

Rollers are responsible for the smooth movement of the door. Apply lubricant to the rollers and their bearings. Make sure to lubricate both the top and bottom rollers on each side of the door.

  1. Lubricate the Hinges

The hinges connect the sections of your garage door. Apply lubricant to all hinge points, ensuring even coverage. Open and close the door a few times to distribute the lubricant evenly.

  1. Lubricate the Tracks

Apply a small amount of lubricant to the tracks on either side of the door. Use a cloth or rag to spread the lubricant evenly along the track’s length. Avoid over-lubricating, as excess lubricant can attract dirt and debris.

  1. Lubricate the Lock

If your garage door has a lock, lubricate the lock cylinder and mechanism. This will ensure it operates smoothly and doesn’t get stuck.

  1. Lubricate the Opener’s Chain or Screw

If you have a chain or screw drive garage door opener, apply a light coating of lubricant to the chain or screw. This will reduce friction and noise during operation.

  1. Test the Door

After lubricating all the necessary parts, reconnect the garage door to the opener and test its operation. The door should move smoothly and quietly. If you notice any unusual sounds or issues, inspect the lubricated areas and make adjustments as needed.

  1. Wipe Off Excess Lubricant

After testing, use a clean cloth or rag to wipe off any excess lubricant that may have dripped onto the door or the floor. This will prevent dirt from sticking to the excess lubricant.

  1. Regular Maintenance Schedule

To keep your garage door in optimal condition, establish a regular maintenance schedule. Lubricate your garage door every six months or as recommended by the manufacturer. Regular maintenance will extend the life of your garage door and reduce the risk of costly repairs.

Conclusion:

Properly lubricating your Garage Door Repair Mansfield TX is a simple yet essential maintenance task that can significantly impact its performance and lifespan. By following the steps outlined in this comprehensive guide, you can ensure that your garage door operates smoothly, quietly, and safely for years to come. Regular maintenance and lubrication will save you time and money by preventing costly repairs and replacements in the future.

Mansfield Overhead & Garage Doors

2151 N Holland Rd, Mansfield, TX 76063, United States

1-817-769-2447

How Much For Garage Door – Plano Overhead & Garage Doors

Certainly, I can provide you with a article on the topic of Garage Door Repair Plano TX. Garage doors serve as a crucial element of any home or commercial property, offering security, convenience, and aesthetic appeal.

In this article, we will delve into various aspects of garage doors, including their types, materials, installation costs, maintenance, and the latest technological advancements in the field. So, let’s get started.

: Exploring Garage Doors: Types, Materials, Costs, and More

Garage doors are an integral part of modern homes and commercial properties, providing security, convenience, and curb appeal. Whether you’re building a new property or upgrading an existing one, choosing the right garage door is essential. In this comprehensive guide, we will explore different types of garage doors, materials used, installation costs, maintenance tips, and the latest technological innovations in the world of garage doors.

Types of Garage Doors

Garage doors come in various types, each offering unique advantages and aesthetics:

  1. Sectional Garage Doors: These are the most common type of garage doors, consisting of several horizontal panels that move upward when the door is opened. They are known for their durability and insulation properties.
  2. Roll-Up Garage Doors: Roll-up doors are commonly found in commercial settings. They consist of narrow horizontal slats that roll up into a coil when the door is opened. They are space-efficient and secure.
  3. Swing-Out Garage Doors: Swing-out doors operate like traditional carriage doors, swinging outward to open. They provide a classic and charming look but require space for the doors to swing.
  4. Slide-to-Side Garage Doors: These doors operate by sliding to the side, parallel to the garage wall. They are a good choice when headroom is limited.
  5. Tilt-Up Garage Doors: Tilt-up doors pivot on a hinge and move up as a single piece. They are simple in design but may not be as visually appealing as other types.

Materials Used in Garage Doors

The material you choose for your garage door impacts its aesthetics, durability, and maintenance requirements:

  1. Steel: Steel garage doors are known for their strength and durability. They are available in various designs and can be painted to match your home’s exterior.
  2. Wood: Wooden garage doors offer a timeless and elegant appearance. They can be customized with different stains and finishes but require regular maintenance to prevent rot and warping.
  3. Aluminum: Aluminum doors are lightweight and resistant to corrosion. They are a popular choice for contemporary homes and are low-maintenance.
  4. Fiberglass: Fiberglass garage doors are durable and resistant to rust and corrosion. They can mimic the look of wood without the maintenance requirements.
  5. Vinyl: Vinyl doors are low-maintenance and highly durable. They are resistant to dents and rust, making them a practical choice for many homeowners.

Garage Door Installation Costs

The cost of installing a garage door can vary widely depending on factors such as the type of door, material, size, and location. On average, homeowners can expect to spend between $700 and $2,500 for a standard garage door installation. High-end doors with custom designs and advanced features can cost significantly more.

It’s essential to consider additional costs, such as insulation, opener installation, and any necessary structural modifications to accommodate the new door.

Maintenance and Care

Proper maintenance is crucial to ensure the longevity of your garage door. Here are some maintenance tips:

  1. Regular Cleaning: Clean your garage door with a mild detergent to remove dirt and grime. Rinse with a hose and wipe it dry to prevent water spots.
  2. Lubrication: Apply lubricant to the moving parts, such as rollers, hinges, and springs, to keep them functioning smoothly.
  3. Inspect and Tighten: Periodically inspect the hardware and tighten loose bolts and screws.
  4. Weatherstripping: Replace damaged weatherstripping to maintain insulation and prevent drafts.
  5. Professional Inspection: Schedule an annual professional inspection to catch any potential issues early.

Technological Advancements

Garage door technology has come a long way. Modern garage doors can be equipped with various advanced features:

  1. Smart Openers: Smart garage door openers can be controlled remotely via a smartphone app, allowing you to open and close your garage door from anywhere.
  2. Security Features: Many garage doors come with built-in security features such as rolling code technology to prevent unauthorized access.
  3. Battery Backup: Some garage door openers have battery backup systems to ensure operation during power outages.
  4. Wi-Fi Connectivity: Wi-Fi-enabled garage door openers can integrate with your smart home ecosystem and provide real-time alerts.
  5. Camera Systems: Some garage doors have integrated camera systems for added security and convenience.

In conclusion, Garage Door Repair Plano TX play a vital role in the functionality and aesthetics of your property. Choosing the right type and material, considering installation costs, and investing in maintenance are all key factors in ensuring your garage door serves you well for years to come. With the advent of smart technology, garage doors are now more convenient and secure than ever before, offering peace of mind to homeowners and property managers alike.

Plano Overhead & Garage Doors

972-640-7299

A Garage Door And Gate Store – Mckinney Overhead & Garage Doors

A Garage Door Repair Mckinney TX is a place where homeowners and businesses can find a wide range of products and services related to garage doors and gates. These establishments play a crucial role in enhancing security, convenience, and aesthetics for properties of all types and sizes.

In this article, we will explore the significance of garage door and gate stores, the products and services they offer, and the benefits of investing in high-quality garage doors and gates.

Importance of Garage Door and Gate Stores

Garage door and gate stores are essential because they provide customers with access to products and services that are vital for the safety, functionality, and overall appeal of their properties. These stores cater to a diverse range of needs, from residential to commercial, and serve as a one-stop solution for anyone looking to upgrade or repair their garage doors or gates.

One of the primary reasons garage door and gate stores are so important is security. Garage doors and gates are the first line of defense for any property, and having high-quality, reliable ones is crucial for keeping intruders out and ensuring the safety of occupants and belongings. These stores offer a variety of security features, such as advanced locking mechanisms, access control systems, and surveillance options.

Additionally, garage door and gate stores offer a wide selection of styles and designs to enhance the aesthetic appeal of properties. Whether you want a traditional wooden garage door or a sleek, modern aluminum gate, these stores can provide options to match your architectural preferences and overall design.

Products Offered by Garage Door and Gate Stores

Garage door and gate stores offer an extensive range of products to cater to different needs and preferences. Some of the key products available include:

  1. Garage Doors: These stores offer various types of garage doors, including sectional, roll-up, swing-out, and sliding doors. Customers can choose from materials like steel, wood, aluminum, and fiberglass, depending on their requirements.
  2. Gate Systems: Gate stores provide a wide selection of gate types, including swing gates, sliding gates, and barrier arm gates. These gates can be automated for added convenience.
  3. Access Control Systems: Customers can find access control solutions such as keypads, remote controls, intercoms, and smartphone apps to manage their garage doors and gates securely.
  4. Security Features: These stores offer security enhancements like motion sensors, security cameras, and alarm systems to bolster the safety of properties.
  5. Maintenance and Repair Services: Many garage door and gate stores offer maintenance and repair services to ensure that customers’ existing systems continue to function optimally.
  6. Customization Options: Customers can often request custom designs, colors, and finishes to match their property’s unique style.

Benefits of Investing in High-Quality Garage Doors and Gates

Investing in high-quality garage doors and gates from a reputable store brings several benefits:

  1. Enhanced Security: High-quality doors and gates provide a robust barrier against unauthorized access, increasing the security of your property.
  2. Convenience: Automated systems make it easy to enter and exit your property without leaving your vehicle. Access control systems also allow you to monitor and control your doors and gates remotely.
  3. Curb Appeal: Stylish and well-maintained doors and gates can significantly improve the curb appeal and overall value of your property.
  4. Energy Efficiency: Insulated garage doors can help regulate temperature and reduce energy costs, especially if your garage is attached to your home.
  5. Longevity: Quality products are built to last, reducing the need for frequent replacements and repairs.
  6. Peace of Mind: Knowing that your property is well-protected and that your doors and gates are reliable provides peace of mind for homeowners and business owners alike.

In conclusion, Garage Door Repair Mckinney TX are invaluable for anyone seeking to improve the security, convenience, and aesthetics of their properties. With a wide range of products and services available, these stores cater to diverse needs, ensuring that customers can find the perfect solution for their specific requirements. Investing in high-quality garage doors and gates not only enhances property value but also provides peace of mind, knowing that your property is well-protected. So, when it comes to the safety and style of your property, a visit to a garage door and gate store can make all the difference.

Mckinney Overhead & Garage Doors

3804 Landsdowne Dr, McKinney, TX 75072, United States

1-972-848-7414

How To Replace Garage Door – Southlake Garage Door & Gate Repairs

Replacing a Garage Door Repair Southlake TX may seem like a daunting task, but with the right tools, materials, and a clear plan, it can be a manageable DIY project.

A new garage door can enhance your home’s curb appeal, improve security, and increase energy efficiency. In this comprehensive guide, we’ll walk you through the process of replacing your garage door step by step.

: Gather Your Tools and Materials

Before you begin, make sure you have all the necessary tools and materials:

  • New garage door and hardware kit
  • Tape measure
  • Level
  • Screwdriver
  • Wrench
  • Sawhorses
  • Safety glasses
  • Hammer
  • Nails and screws
  • Drill with masonry bit (if attaching to a masonry wall)

: Measure and Prepare

Measure your existing garage door carefully to ensure you purchase the correct size replacement. Take measurements of the width, height, and thickness. Additionally, measure the space between the door opening and the ceiling.

: Remove the Old Door

To remove the old garage door, follow these steps:

  1. Disconnect the garage door opener from the power source.
  2. Release the tension on the garage door springs using a wrench.
  3. Remove the brackets and hardware securing the door to the tracks.
  4. Carefully lift the door off the tracks with the help of a friend.

: Prepare the Opening

Inspect the opening for any damage or rot. Repair any issues before proceeding. Next, clean the area to ensure a smooth installation. Install weatherstripping along the bottom of the opening to prevent drafts and moisture infiltration.

: Install the Tracks and Hardware

Follow the manufacturer’s instructions to install the vertical and horizontal tracks. Make sure they are level and secure them with screws. Attach the hinges to the door panels, following the manufacturer’s guidelines. Then, attach the rollers to the hinges.

: Hang the Door Panels

With the help of a friend, carefully lift the door panels into place one at a time. Secure them to the tracks and each other using the provided hardware. Ensure that the panels are level and plumb as you go.

: Install the Springs

Follow the manufacturer’s instructions to install the torsion springs or extension springs, depending on your door type. Be extremely cautious when working with springs, as they are under high tension and can be dangerous if mishandled.

: Attach the Cables and Pulleys

Attach the lifting cables to the bottom of the door and thread them through the pulleys. Connect the cables to the bottom bracket and secure them tightly.

: Install the Garage Door Opener

If you’re installing a new garage door opener, follow the manufacturer’s instructions carefully. Ensure that the opener is securely fastened to the ceiling and that the drive system is properly connected to the door.

: Test and Adjust

Test the garage door to ensure it opens and closes smoothly. Make any necessary adjustments to the springs, cables, and tracks to ensure proper operation. Lubricate all moving parts as recommended by the manufacturer.

: Final Touches

Seal any gaps around the door with weatherstripping to improve insulation and weatherproofing. Paint or stain the door if necessary to match your home’s aesthetics.

: Safety First

Remember that garage doors can be heavy and pose safety risks. Always follow safety guidelines and consider consulting a professional if you’re unsure about any aspect of the installation.

Conclusion:

Replacing a Garage Door Repair Southlake TX can be a rewarding DIY project that enhances your home’s appearance and functionality. By carefully following these steps and adhering to safety precautions, you can successfully replace your garage door and enjoy the benefits of a fresh, secure, and energy-efficient entrance to your home.

Southlake Garage Door & Gate Repairs

817-587-0445

How To Reconnect Garage Door Chain – Lake Arlington Gates & Garage Doors

A Garage Door Repair Arlington TX plays a pivotal role in the operation of your garage door. Over time, it may become disconnected due to various reasons like wear and tear or improper maintenance.

Reconnecting the garage door chain is a manageable task that you can tackle on your own, saving both time and money. In this comprehensive guide, we will walk you through the process step by step, ensuring a successful reconnection.

Tools and Materials Needed:

Before you begin, gather the necessary tools and materials:

  1. Adjustable wrench
  2. Screwdriver (flathead and Phillips)
  3. Pliers
  4. Safety glasses
  5. Lubricating oil
  6. Replacement chain (if needed)

Safety Precautions:

Safety should be your top priority when working on any garage door components. Follow these precautions:

  1. Ensure the garage door is fully closed.
  2. Disconnect the power supply to the garage door opener.
  3. Wear safety glasses to protect your eyes from debris.
  4. Keep your hands and fingers away from moving parts.
  5. If in doubt, consult a professional technician.

: Inspect the Chain:

Start by visually inspecting the garage door chain. Look for any signs of damage, excessive rust, or wear. If the chain is severely damaged or worn, it’s advisable to replace it to ensure long-term functionality.

: Locate the Chain Ends:

Identify the two ends of the garage door chain. One end is attached to the trolley on the garage door opener, and the other end is connected to the door itself. The disconnected end may be hanging freely.

: Realign the Ends:

Use your pliers to grip the disconnected end of the chain. Carefully align it with the sprocket on the trolley attached to the garage door opener.

: Reconnect the Chain:

With the chain aligned with the sprocket, use your adjustable wrench to tighten the chain around the sprocket securely. Ensure it is snug but not overly tight. You should be able to move the chain slightly.

: Test the Connection:

Manually move the garage door up and down a few times to test the connection. Ensure that the chain moves smoothly and doesn’t bind or skip on the sprocket.

: Lubricate the Chain:

Apply lubricating oil to the entire length of the chain. Proper lubrication reduces friction and extends the life of the chain.

: Adjust Chain Tension (If Needed):

If the chain appears too loose or too tight during testing, use your adjustable wrench to adjust the tension. A well-tensioned chain should have about 1/4 inch of slack when you push or pull it at the midpoint.

: Reconnect the Power:

Once you are satisfied with the chain’s tension and operation, reconnect the power to the garage door opener.

: Test the Garage Door:

Operate the garage door using the opener to ensure that it opens and closes smoothly without any issues.

: Final Inspection:

Give the entire system one last visual inspection to make sure there are no loose bolts, nuts, or other components. Ensure that the chain is secure and properly aligned with the sprocket.

Conclusion:

Reconnecting a Garage Door Repair Arlington TX is a straightforward process that can be completed with basic tools and some patience. Regular maintenance and lubrication of the chain can help prevent future disconnections. However, if you encounter any difficulties or are unsure about any step, it’s always a good idea to consult a professional garage door technician for assistance. By following this guide and prioritizing safety, you can ensure your garage door functions smoothly for years to come.

Lake Arlington Gates & Garage Doors

4101 W Green Oaks Blvd #305-318, Arlington, TX 76016, United States

1-817-993-6623

How To Program Garage Door Remote Clicker Overhead Door – Trophy Club Overhead & Garage Doors

Programming a Garage Door Repair Trophy Club TX for an overhead door can vary depending on the specific model and brand of the garage door opener.

I’ll provide you with a general guide that covers the most common steps involved in programming a garage door remote clicker. Please consult your garage door opener’s manual for model-specific instructions, and ensure you follow all safety precautions.

: Gather Materials

Before you begin, make sure you have the following materials:

  1. Garage door remote clicker (new or existing).
  2. Ladder (if needed to reach the garage door opener).
  3. The garage door opener’s instruction manual.

: Access the Garage Door Opener

If your garage door opener has a cover or panel, remove it to access the programming buttons or switches. These buttons are typically located on the back or side of the opener motor unit.

: Clear Existing Codes (if necessary)

If you’re programming a new remote or need to reset the existing codes, look for a “Learn” or “Reset” button on the opener motor unit. Press and hold this button until the indicator light blinks or changes color, usually for about 10 seconds. This clears all previously programmed remote codes.

: Program the Remote

Now, it’s time to program the remote:

  1. Locate the “Program” or “Learn” button on the garage door opener motor unit. This button is usually near the antenna wire.
  2. Press and release the “Program” or “Learn” button. The indicator light should light up, indicating that the opener is in programming mode. You typically have about 30 seconds to complete the next steps.
  3. On your remote, press and hold the button you want to use to operate the garage door. Hold it until the indicator light on the opener flashes or changes, which indicates that the remote’s code has been accepted. This might take a few seconds.

: Test the Remote

After programming the remote, test it to ensure it operates the garage door correctly. Stand clear of the door’s path in case it doesn’t work as expected.

: Repeat (if necessary)

If you have multiple remotes to program, repeat Step 4 for each one within the allotted time.

: Replace Cover and Cleanup

Once all remotes are programmed and tested successfully, replace any covers or panels you removed from the garage door opener.

: Additional Features (if applicable)

Some garage door openers have advanced features like setting the remote’s range or enabling vacation mode. Refer to your garage door opener’s manual for information on these features.

Remember to follow all safety precautions, especially when testing the remote. Make sure no one is in the path of the closing garage door during testing, and always keep the remote out of reach of children.

Keep your Garage Door Repair Trophy Club TX manual handy for future reference and troubleshooting. If you encounter difficulties or your specific model has unique programming instructions, consult the manual or contact the manufacturer’s customer support for assistance.

Trophy Club Overhead & Garage Doors

2412 Trophy Club Dr, Trophy Club, TX 76262, United States

1-817-646-5315

How To Build Garage Doors – Kokomo Overhead & Garage Doors

Garage Door Repair Kokomo IN serve as an essential component of any home, providing security, convenience, and aesthetics. Whether you’re a homeowner looking to replace an old garage door or a DIY enthusiast eager to take on a challenging project, building your garage doors can be a rewarding endeavor.

In this comprehensive guide, we will take you through the step-by-step process of building garage doors from scratch. From planning and materials selection to construction and installation, we’ll cover everything you need to know to create durable and functional garage doors that enhance the curb appeal of your home.

I. Planning and Design:

  1. Measurements and Requirements: Begin by accurately measuring the dimensions of your garage opening. Consider factors such as height, width, and clearance requirements for your vehicles and any additional features like windows or insulation.
  2. Style and Design: Choose a garage door style that complements your home’s architecture. Options include traditional raised-panel, modern flush, or carriage house designs. Decide on the materials you’ll use, such as wood, steel, or aluminum.
  3. Insulation and Energy Efficiency: Depending on your climate, consider adding insulation to your garage doors for improved energy efficiency. This step is crucial if your garage is connected to your home.

II. Materials and Tools:

  1. Materials: Gather all the necessary materials, including the selected door panels, tracks, springs, hinges, rollers, and fasteners. Ensure that the materials are of high quality to ensure the durability of your garage doors.
  2. Tools: You’ll need a variety of tools, including a saw, drill, screwdriver, wrenches, and a level. Safety equipment like gloves, safety glasses, and ear protection is also essential.

III. Building the Frame:

  1. Frame Construction: Begin by constructing a sturdy frame to support the garage door. Typically, this frame is made from pressure-treated lumber and should match the dimensions of your garage opening.
  2. Header Installation: Install a header above the opening to distribute the door’s weight evenly. Properly secure the header to the framing.

IV. Assembling the Door Panels:

  1. Panel Assembly: Assemble the door panels according to the manufacturer’s instructions. Attach hinges and reinforcement struts as needed.
  2. Track and Spring Installation: Install the vertical and horizontal tracks on the frame. Next, mount the torsion or extension springs, ensuring they are properly tensioned for safe operation.

V. Finishing and Painting:

  1. Surface Preparation: Sand and prepare the door panels for painting or staining. Fill any imperfections and ensure a smooth surface.
  2. Paint or Stain: Apply a high-quality paint or stain to protect the wood and enhance the door’s appearance. Multiple coats may be necessary for optimal coverage.

VI. Installation:

  1. Hang the Door: With the help of a friend or a professional, carefully hang the door on the tracks, making sure it is level and aligned correctly.
  2. Test and Adjust: Test the door’s operation and adjust the springs and track alignment as needed for smooth, balanced movement.

Conclusion:

Building your Garage Door Repair Kokomo IN can be a challenging but rewarding DIY project. By following this comprehensive guide, you can create customized garage doors that not only enhance the functionality and security of your home but also add to its aesthetic appeal. Remember to prioritize safety and quality throughout the construction process for long-lasting results.

Kokomo Overhead & Garage Doors

1910 Valerie Ct, Kokomo, IN 46902, United States

1-765-945-2524

How Do I Program My Liftmaster Garage Door Opener – Arlington Overhead & Garage Doors

Programming a LiftMaster Garage Door Repair Arlington TX can vary depending on the model and type of opener you have.

However, I’ll provide you with a general guide that should work for most LiftMaster garage door openers. Please consult your opener’s user manual or LiftMaster’s official website for specific instructions for your model if needed.

Before you begin, here are a few important notes:

  1. Safety First: Ensure that your garage door is in good working condition and properly balanced before programming your opener. If your door is not balanced, it could cause damage or become a safety hazard.
  2. Clear the Memory: If you are reprogramming your opener, it’s a good practice to clear the memory of the opener first to remove any existing codes. Consult your user manual for instructions on how to do this.
  3. Remote Control: You will need a working remote control or a wireless keypad to program your opener. Make sure the remote control’s battery is in good condition.
  4. Find the Learn Button: Locate the “Learn” or “Program” button on your garage door opener motor unit. This button is typically colored and could be green, red, orange, or purple, depending on your model.

Now, let’s proceed with programming your LiftMaster garage door opener:

: Clear Existing Codes (if needed)

If you are reprogramming your opener or if it’s a new installation, clear any existing codes by pressing and holding the “Learn” or “Program” button on the opener for about 10 seconds until the indicator light next to the button goes off.

: Program the Remote Control

  • Stand within a few feet of the garage door opener.
  • Press the “Learn” or “Program” button on the opener. The indicator light will come on.
  • Within 30 seconds, press the button on your remote control that you want to program. Hold it until the indicator light on the opener flashes or clicks.
  • Release the button on the remote control. The opener should now recognize and store the remote’s code. Test the remote to ensure it operates the door.

: Program the Wireless Keypad (if applicable)

  • If you have a wireless keypad, you’ll need to program it next. The process is similar to programming a remote control.
  • Find the “Learn” or “Program” button on the opener and press it.
  • Enter your desired PIN on the keypad and then press the “Enter” or “Send” button.
  • The opener should acknowledge the keypad by flashing or clicking. Test the keypad by entering your PIN followed by the “Enter” or “Send” button.

: Test the Opener

  • Ensure that everything is working as expected. Test the remote control and keypad, and make sure the door opens and closes properly.

Additional Tips:

  • To program additional remotes or keypads, repeat the steps above for each one.
  • If you experience issues, consult your user manual or LiftMaster’s customer support for troubleshooting guidance.
  • Keep the remote controls and keypads in a secure location to prevent unauthorized access.

Remember that this is a general guide, and the exact steps may vary based on your specific LiftMaster Garage Door Repair Arlington TX model. Always consult your user manual for model-specific instructions if available.

Arlington Overhead & Garage Doors

700 Secretary Dr, Arlington, TX 76015, United States

1-817-646-2532

How To Replace Rollers On Garage Door – Haslet Gates & Garage Doors

Garage Door Repair Haslet TX are a crucial component of your garage door system. Over time, they can wear out and become noisy or even malfunction, causing inconvenience and potential safety hazards.

Replacing garage door rollers is a manageable DIY project that can save you money on repair costs and improve the overall performance of your garage door. In this guide, we will provide step-by-step instructions on how to replace the rollers on a standard residential garage door.

Tools and Materials You’ll Need:

  1. New garage door rollers (nylon or steel)
  2. A ladder
  3. A socket wrench set
  4. A pair of pliers
  5. A flat-head screwdriver
  6. Safety glasses
  7. A clamp or vice grips
  8. Lubricating spray
  9. Safety gloves

: Safety First

Before you begin, ensure your safety. Wear safety glasses to protect your eyes from any debris or dust that may fall during the process. You should also wear safety gloves to safeguard your hands while working on the garage door.

: Disconnect the Opener

To prevent any accidents, disconnect the garage door opener by pulling the release cord. This will disengage the door from the opener, allowing you to operate it manually.

: Open the Door

Raise the garage door to its highest position using the manual release handle. This will give you easy access to the rollers.

: Secure the Door

To prevent the garage door from accidentally falling, clamp or use vice grips on the tracks just below the rollers you are replacing. This ensures that the door remains in place throughout the process.

: Remove the Old Rollers

Using a socket wrench, carefully loosen the nuts securing the roller brackets to the door. Once the nuts are removed, use a flat-head screwdriver to gently pry the brackets apart, releasing the old rollers.

: Replace with New Rollers

Slide the new rollers into the brackets. Make sure they are positioned correctly and that the stem of the roller fits into the track. Tighten the nuts on the brackets to secure the new rollers in place.

: Lubricate the Rollers

Apply a generous amount of lubricating spray to the new rollers. This will ensure smooth and quiet operation. Roll the door up and down a few times to distribute the lubricant evenly.

: Test the Door

Release the clamps or vice grips and manually open and close the garage door to ensure the new rollers are functioning correctly. If there are any issues, recheck the installation and make necessary adjustments.

: Reconnect the Opener

Once you are satisfied with the roller replacement and the door’s operation, reconnect the garage door opener by pulling the release cord back into position.

: Clean Up

Dispose of the old rollers properly and clean up any debris or tools in your work area. Store any remaining lubricating spray for future maintenance.

Conclusion:

Replacing Garage Door Repair Haslet TX is a manageable DIY project that can improve the performance and longevity of your garage door. By following these step-by-step instructions and taking the necessary safety precautions, you can successfully replace your garage door rollers and enjoy a quieter and smoother-operating garage door. Regular maintenance, including lubrication, will help extend the lifespan of your new rollers and ensure the continued reliability of your garage door.

Haslet Gates & Garage Doors

817-482-3394

How Do You Reset Garage Door Sensors – Bedford Gates & Garage Doors

Resetting Garage Door Repair Bedford TX is a crucial maintenance task that ensures the safety and functionality of your garage door system. These sensors are designed to detect obstructions in the door’s path and prevent it from closing if something is in the way.

If your garage door sensors are malfunctioning or misaligned, it’s essential to reset them properly to avoid accidents and damage to your property. In this comprehensive guide, I’ll walk you through the steps to reset garage door sensors effectively.

Step 1: Safety First Before attempting to reset your garage door sensors, prioritize safety. Ensure that all objects, including vehicles, are clear of the door’s path. Disconnect the power to the garage door opener to prevent any accidental activations during the reset process. If your garage door is inoperable, do not attempt to reset it yourself. Consult a professional technician.

Step 2: Visual Inspection Start by visually inspecting your garage door sensors. Typically, there are two sensors located on either side of the door’s opening, near the floor. Each sensor consists of a transmitter (sending unit) and a receiver (receiving unit). Check for any obstructions or debris that may be blocking the sensors’ view of each other. Clean the sensors with a soft, dry cloth to remove dirt, dust, or spiderwebs that can interfere with their operation.

Step 3: Check the Sensor Alignment Proper alignment between the transmitter and receiver is crucial for the sensors to work correctly. Ensure that both sensors are facing each other and that their LED lights are on and not blinking. If one or both LEDs are blinking, it indicates a misalignment issue.

Step 4: Adjust Sensor Alignment To adjust sensor alignment:

  1. Loosen the mounting bracket or screw that holds the misaligned sensor in place.
  2. Gently move the sensor until the LED lights on both sensors are solid, not blinking.
  3. Retighten the mounting bracket or screw to secure the sensor in its corrected position.

Step 5: Test the Sensors Once the sensors are aligned correctly, it’s essential to test them to ensure they are working correctly. Reconnect the power to the garage door opener and operate the door using the opener or remote control. The door should close and then immediately reverse if an obstruction is detected. If it doesn’t reverse or still has issues, proceed to the next steps.

Step 6: Inspect Wiring and Connections Check the wiring between the sensors and the garage door opener for any damage or loose connections. Ensure that the wires are securely connected to the terminals on both the sensors and the opener unit. Repair or replace any damaged wires or connectors.

Step 7: Reset the Opener If the sensors are still not functioning correctly, you may need to reset the garage door opener. To do this:

  1. Locate the “Learn” or “Reset” button on the opener unit (usually on the back or side).
  2. Press and hold the “Learn” or “Reset” button until the indicator light on the opener blinks.
  3. Release the button.

This action will reset the opener’s memory, including the sensor settings.

Step 8: Realign and Test Again After resetting the opener, repeat the sensor alignment process as described in Steps 3 and 4. Once the sensors are properly aligned, test the garage door again to ensure it closes and reverses when an obstruction is present.

Step 9: Call a Professional If you’ve followed all the steps above and your garage door sensors still aren’t working correctly, it’s advisable to contact a professional garage door technician. There may be underlying issues with the sensors, opener, or other components that require expert diagnosis and repair.

In conclusion, resetting Garage Door Repair Bedford TX is a critical safety measure to ensure your garage door operates correctly and prevents accidents. By following these steps, you can often resolve sensor issues on your own. However, if problems persist, it’s always wise to seek professional assistance to avoid any further complications or safety hazards. Remember, safety should be your top priority when working with garage door systems.

Bedford Gates & Garage Doors

2201 Harwood Rd, Bedford, TX 76021, United States

1-817-886-3064

How Much is A New Garage Door – Springtown Gates & Garage Doors

A new Garage Door Repair Springtown, TX cost can vary significantly based on several factors, including the type of door, materials, size, design, insulation, and additional features.

To provide a comprehensive guide on garage door prices, I will break down the key factors that influence the cost and provide estimates for different scenarios.

1. Types of Garage Doors

There are several types of garage doors, each with its own price range:

  • Single Panel Garage Door: These are the most basic and affordable type, costing between $400 and $700 on average for the door alone.
  • Sectional Garage Door: These are more common and can range from $700 to $2,500 or more, depending on materials and features.
  • Roll-Up Garage Door: Typically found in commercial settings, roll-up doors can cost between $1,000 and $10,000 or more.

2. Garage Door Materials

The choice of materials significantly impacts the cost:

  • Steel Garage Doors: These are popular for their durability and range from $750 to $3,500 or more.
  • Wooden Garage Doors: They offer a classic look but can be more expensive, ranging from $1,200 to $4,000 or higher.
  • Aluminum Garage Doors: These doors are lightweight and rust-resistant, costing between $800 and $2,500 or more.
  • Fiberglass Garage Doors: These are less common and typically range from $1,000 to $2,500.

3. Size and Design

The size and design of the garage door will also affect the price. Standard single-car garage doors are cheaper than double-car doors or custom designs. Expect to pay more for intricate designs, windows, and decorative hardware. Prices can vary from $500 to $5,000 or more.

4. Insulation

Insulated garage doors help regulate temperature and energy costs. Insulation options include:

  • Single-Layer (Non-insulated): The most affordable option, ranging from $300 to $1,500.
  • Double-Layer (Polystyrene Insulated): Mid-range insulation, typically priced between $600 and $2,500.
  • Triple-Layer (Polyurethane Insulated): High insulation and soundproofing, costing between $800 and $4,000 or more.

5. Additional Features

Additional features like automatic openers, remote controls, and smart home integration can add to the cost. These accessories can range from $100 to $500 or more.

6. Installation Costs

Professional installation is crucial for safety and proper functioning. Installation fees range from $200 to $800, depending on complexity and location.

7. Location and Labor Costs

Labor costs can vary depending on your location and the availability of skilled garage door installers. Expect to pay more in areas with a higher cost of living.

8. Brand and Warranty

Reputable brands often come with higher price tags, but they may also offer better warranties and long-term reliability. Expect to pay a premium for well-known brands like Clopay, Amarr, and Wayne Dalton.

9. DIY vs. Professional Installation

While some homeowners opt for DIY installation to save money, it’s essential to consider the complexity and safety aspects. A professional installation ensures the door operates correctly and safely.

10. Maintenance Costs

Factor in ongoing maintenance costs, such as lubrication, periodic inspections, and potential repairs, to ensure the longevity of your garage door.

In conclusion, the cost of a new Garage Door Repair Springtown, TX can range from a few hundred dollars to several thousand dollars or more, depending on the factors mentioned above. On average, you can expect to spend between $700 and $3,000 for a standard sectional garage door with moderate insulation and features. However, for a more accurate estimate, it’s recommended to consult with local garage door dealers or contractors who can provide quotes based on your specific requirements.

Springtown Gates & Garage Doors

104 Adalida Ln, Springtown, TX 76082, United States

1-817-631-1036

What Are the Signs That My Garage Door Needs Repairs – Anderson Gates & Garage Doors

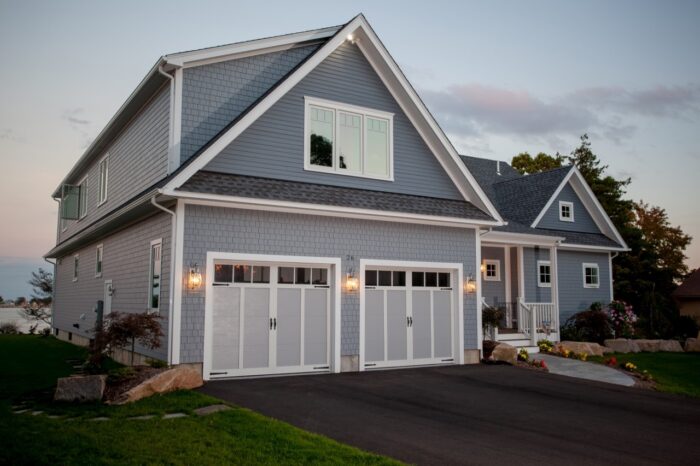
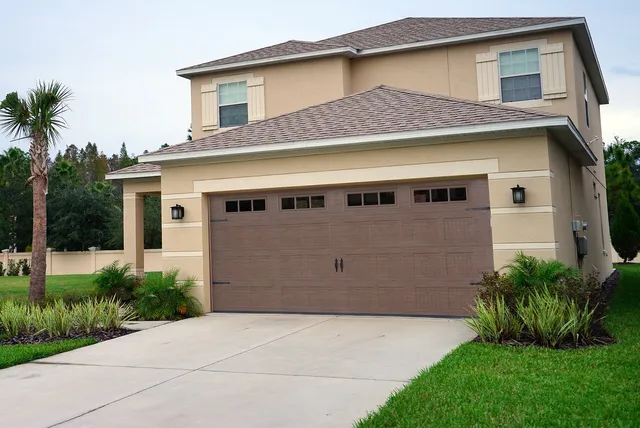
Your Garage Door Repair Anderson IN is an essential part of your home, serving not only as a protective barrier for your vehicles and belongings but also as a key element in your home’s security and curb appeal. Over time, wear and tear can take a toll on your garage door, leading to various issues that may require repairs. Recognizing the signs of garage door problems early on can save you from costly repairs and ensure the safety of your family and property.

In this comprehensive guide, we will discuss in detail the various signs that indicate your garage door needs repairs.

  1. Unusual Noises

One of the most common and noticeable signs that your garage door needs attention is unusual noises during operation. If you hear grinding, scraping, squeaking, or banging sounds when opening or closing the door, it’s likely that something is wrong. These noises can be caused by worn-out or damaged components such as rollers, springs, or cables. Ignoring these sounds can lead to more significant issues and potentially result in a complete garage door failure.

  1. Slow or Uneven Movement

A garage door should open and close smoothly and at a consistent speed. If you notice that your garage door is moving slower than usual or appears to be lopsided, it’s a clear sign that repairs are needed. Slow or uneven movement can be caused by a variety of issues, including worn-out rollers, damaged tracks, or problems with the garage door opener. These issues should be addressed promptly to avoid further damage.

  1. Difficulty Opening or Closing

If you find it increasingly difficult to open or close your garage door, it’s a sign of trouble. A properly functioning garage door should operate effortlessly. Difficulty in operation can be caused by a malfunctioning opener, damaged springs, or problems with the door’s alignment. Attempting to force the door open or closed can lead to more severe damage and safety hazards.

  1. Jerky or Shaky Movements

A garage door should move smoothly without jerking or shaking. If you notice that your door moves in a jerky or shaky manner during operation, it could be due to issues with the cables, rollers, or tracks. Jerky movements can increase the risk of accidents and injuries, making it crucial to address the problem promptly.

  1. Sagging or Warped Sections

Inspect your garage door for any visible signs of sagging or warping. Over time, garage doors can lose their structural integrity, leading to sections that appear uneven or distorted. This can be caused by weather exposure, water damage, or simply the natural aging of materials. A sagging or warped garage door not only affects its appearance but also compromises its functionality and security.

  1. Lack of Response from the Opener

When you press the button on your garage door opener, it should respond promptly. If you experience delays or a complete lack of response from the opener, it could indicate problems with the opener itself or the remote control. In some cases, the issue may be as simple as a dead battery in the remote control, but if the problem persists, professional repairs may be necessary.

  1. Visible Damage to Components

Regular visual inspections of your garage door can help you spot signs of damage. Look for cracks, dents, or rust on the door panels and inspect the hardware, such as hinges, springs, and cables, for any visible wear or damage. Damaged components not only affect the door’s appearance but can also compromise its structural integrity and safety.

  1. Inconsistent Auto-Reverse Function

The auto-reverse feature of your garage door opener is a crucial safety mechanism designed to prevent accidents and injuries. If your garage door doesn’t reverse direction when it encounters an obstacle, it poses a significant safety risk, especially if you have pets or children. Inconsistent or unreliable auto-reverse functionality may be due to sensor misalignment, sensor damage, or other issues that require immediate attention.

  1. High Energy Bills

Surprisingly, an increase in your energy bills can be an indirect sign that your garage door needs repairs. A poorly insulated or damaged garage door can allow cold or hot air to enter your home, causing your heating and cooling systems to work harder and consume more energy. Repairing or replacing your garage door with an energy-efficient model can help you save on energy costs in the long run.

  1. Fluctuating Garage Door Balance

A well-balanced garage door should stay in place when lifted manually and should not drop or rise unexpectedly. If you notice that your garage door is not maintaining its balance or seems heavy to lift, it could be due to issues with the springs or cables. Operating a garage door with imbalanced components can lead to accidents and further damage.

  1. Frequent Reversals

While the auto-reverse feature is essential for safety, frequent and unnecessary reversals can be frustrating and indicate problems with the garage door’s sensors. Dust, dirt, or misaligned sensors can trigger unnecessary reversals, making it difficult to operate the door smoothly. Regular sensor maintenance and cleaning can help resolve this issue.

  1. Excessive Vibration

A garage door in good condition should not produce excessive vibrations during operation. If you notice strong vibrations or shaking when the door is moving, it may indicate problems with the rollers, tracks, or other components. Vibrations can lead to further wear and tear, affecting the door’s overall performance and longevity.

  1. Cracked or Broken Glass Panels

If your garage door has windows or glass panels, inspect them regularly for cracks or breakage. Damaged glass not only affects the door’s aesthetics but can also compromise security and insulation. Replacing cracked or broken glass panels is essential to maintain the integrity of your garage door.

  1. Loose or Missing Hardware

Check for loose or missing hardware such as bolts, nuts, screws, or brackets. Over time, these components can become loose due to vibrations and the door’s constant movement. Loose hardware should be tightened, and missing hardware should be replaced to ensure the garage door’s stability and safety.

  1. Seals and Weatherstripping Damage

The seals and weatherstripping around your garage door play a crucial role in keeping out drafts, pests, and moisture. If you notice that the seals or weatherstripping are damaged, cracked, or missing, it’s essential to replace them promptly. This will help maintain a comfortable indoor environment and protect your belongings from potential water damage.

  1. Increased Maintenance Requirements

If you find yourself needing to perform frequent maintenance tasks on your garage door, it may be a sign that more extensive repairs are necessary. While routine maintenance is essential for the longevity of your door, an increase in the frequency or complexity of maintenance tasks can indicate underlying issues that need professional attention.

  1. Sudden or Unexpected Garage Door Reversals

In addition to the auto-reverse feature, some garage doors may experience sudden or unexpected reversals during operation. This can be a sign of electrical or sensor issues within the garage door opener system. If your door reverses unexpectedly, it’s crucial to have it inspected to ensure safe and reliable operation.

  1. Excessive Wobbling During Operation

Your garage door should move smoothly and without wobbling. If you notice excessive wobbling or swaying when the door is in motion, it could indicate problems with the tracks, rollers, or alignment. This issue not only affects the door’s performance but can also pose a safety risk.

  1. Visible Wear on Springs

The springs are an essential part of your garage door’s operation, and they are subject to a significant amount of stress. Inspect the springs for visible wear, such as cracks, rust, or gaps in the coils. Damaged or worn springs can lead to imbalances, causing the door to malfunction or become difficult to open. It’s important to address spring issues promptly, as they can be dangerous to work with and are best handled by a professional technician.

  1. Peculiar Odors

Unusual odors, such as burning or overheating smells, when you operate your garage door may indicate electrical problems within the opener or motor. These issues can be a fire hazard and should not be ignored. If you detect any strange odors, disconnect the opener and consult a professional technician immediately.

  1. Stuck or Jammed Garage Door

A garage door that becomes stuck or jammed at any point during its operation is a clear sign of trouble. There are several potential causes for this issue, including debris in the tracks, damaged rollers, or problems with the opener. Attempting to force the door open or closed when it’s jammed can result in costly damage and safety risks.

  1. Remote Control Malfunctions

If your garage door opener remote control is consistently malfunctioning or fails to work despite having fresh batteries, it could indicate issues with the opener’s receiver or the remote control itself. Remote control problems can affect your convenience and security, so it’s essential to diagnose and address these issues promptly.

  1. Intermittent Operation

Inconsistent or intermittent garage door operation can be frustrating and inconvenient. It may work correctly one moment and then fail to respond the next. This issue can be caused by a range of factors, including faulty wiring, worn-out components, or problems with the opener’s circuitry. Seeking professional help is crucial to determine the root cause and ensure reliable operation.

  1. Safety Concerns

Garage doors are heavy and powerful, and safety should always be a top priority. If you have concerns about the safety of your garage door, such as it not staying in place when lifted manually or making unusual movements, it’s essential to address these issues promptly. Safety hazards can lead to accidents and injuries.

  1. Age of the Garage Door

As with any mechanical system, garage doors have a limited lifespan. The average lifespan of a garage door is typically around 15 to 30 years, depending on the quality of materials and regular maintenance. If your garage door is approaching or has surpassed this age range, it’s wise to have it inspected by a professional. Older doors are more prone to wear and may benefit from repairs or replacement to ensure continued reliability and safety.

  1. Excessive Dust or Debris Buildup

Excessive dust, dirt, or debris buildup on the garage door’s tracks and components can hinder smooth operation. It can cause friction and damage to the moving parts, leading to operational problems. Regularly cleaning and lubricating the tracks and components can help prevent these issues.

  1. Visible Gaps or Cracks Around the Door

Inspect the area around your garage door for visible gaps or cracks. These gaps can allow pests, drafts, and moisture to enter your garage, affecting its insulation and security. Sealing gaps and cracks with appropriate weatherstripping or sealant is essential to maintain the integrity of your garage door system.

  1. Difficulty in Manually Operating the Door

In the event of a power outage or garage door opener failure, you should be able to open and close your garage door manually. If you encounter significant resistance or are unable to move the door manually, it may be due to issues with the springs, cables, or other components. Manually operating the door should be relatively easy, so any difficulty is cause for concern.

  1. Persistent Water Intrusion

If you notice water pooling inside your garage after rain or snow, it’s a sign of water intrusion. Damaged seals, gaps in the door, or improper drainage around the garage can all contribute to this problem. Persistent water intrusion can lead to water damage to your belongings and the garage structure, so it’s essential to address this issue promptly.

  1. Frequent Breakdowns

If your garage door is experiencing frequent breakdowns or requires repairs multiple times a year, it may be more cost-effective in the long run to consider replacing it. Frequent repairs can add up, and an aging door may continue to develop issues. Investing in a new, reliable garage door can provide peace of mind and reduce the inconvenience of ongoing repairs.

Conclusion:

Your garage door is a vital component of your home, providing security, convenience, and curb appeal. Recognizing the signs that your Garage Door Repair Anderson IN needs repairs is essential to ensure its continued functionality and safety. From unusual noises and slow movement to visible damage and safety concerns, addressing these issues promptly can prevent more significant problems and costly repairs in the future.

Anderson Gates & Garage Doors

2007 McKinley St, Anderson, IN 46016, United States

1-463-217-0904

Why Does my Garage Door Squeak-Keller TX Garage Door

The familiar sound of a squeaky Garage Door Repair Keller TX can be both annoying and concerning to homeowners. It’s one of those everyday noises that we often ignore until it becomes a constant annoyance. The root causes of a squeaky garage door can vary, ranging from simple issues like lack of lubrication to more complex problems related to the garage door system.

In this article, we’ll explore the various factors that can lead to a squeaky garage door and discuss potential solutions to bring back that smooth, silent operation we all desire.

  1. Insufficient Lubrication

One of the most common reasons for a squeaky garage door is a lack of proper lubrication. Over time, the various moving parts of the garage door, such as hinges, rollers, and tracks, can wear down due to friction. As a result, they create an irritating squeaking sound when the door is opened or closed. Lubricating these components regularly with a suitable garage door lubricant can significantly reduce or eliminate the squeaks.

  1. Weather Conditions

Extreme weather conditions can also contribute to the squeaking of garage doors. In areas with frequent temperature fluctuations or high humidity, the materials in the garage door may expand and contract, causing misalignments and friction between different components. Proper weatherstripping and insulation can help mitigate the impact of weather on your garage door and reduce squeaking.

  1. Misaligned Tracks

The smooth functioning of a garage door heavily relies on the alignment of its tracks. If the tracks become misaligned due to accidental bumps or gradual wear, the garage door may start to squeak as it moves along the tracks. Ensuring the tracks are straight and aligned is essential for preventing such noise issues.

  1. Worn-out Rollers

The rollers that help the garage door slide along the tracks can wear down over time, especially if they are made of plastic. As they deteriorate, the friction between the rollers and tracks increases, resulting in squeaks. Replacing worn-out rollers with high-quality, ball-bearing rollers can make a significant difference in reducing noise.

  1. Loose Hardware

A loose garage door can cause a cacophony of squeaking noises. The constant movement of the door can gradually loosen the nuts, bolts, and other hardware holding the garage door system together. Regularly inspecting and tightening the hardware can prevent this issue and ensure a quieter operation.

  1. Lack of Regular Maintenance

Like any other mechanical system, a garage door requires regular maintenance to function optimally. Unfortunately, many homeowners neglect this aspect until they are faced with a squeaky or malfunctioning garage door. Performing routine maintenance, such as cleaning, lubricating, and inspecting the garage door, can help prevent squeaking and extend the door’s lifespan.

  1. Torsion Spring Issues

Garage doors equipped with torsion springs can develop squeaks if the springs are worn out or improperly adjusted. The tension in the springs allows the door to open and close smoothly, and any problems in the springs can lead to noisy operation. Torsion spring issues are best left to professional garage door technicians, as they require specialized knowledge and tools to address.

  1. Poor Garage Door Installation

If your garage door was not installed correctly in the first place, it could lead to several operational problems, including squeaking. An improperly installed garage door may experience premature wear and misalignment, leading to noise issues. Hiring a reputable garage door installation service can ensure that the door is set up correctly and prevent future squeaks.

Conclusion

A squeaky Garage Door Repair Keller TX is a common nuisance faced by homeowners, but it’s not a problem without a solution. Understanding the potential causes, such as insufficient lubrication, misaligned tracks, worn-out rollers, loose hardware, and weather conditions, can help you identify and address the issue effectively. Regular maintenance and proper care of your garage door can go a long way in ensuring smooth and silent operation for years to come. If the squeaking persists despite your efforts, don’t hesitate to seek professional help from experienced garage door technicians who can diagnose and fix the problem accurately. With the right approach, you can bid farewell to the annoying squeaks and enjoy the quiet convenience of a fully functional garage door.

Keller TX Garage Door

Keller, TX

1-817-697-2922

Are Raynor Garage Doors Good-Tarrant County Door & Gate

Raynor Garage Door Repair Tarrant TX is a well-known brand in the garage door industry, offering a wide range of residential and commercial garage doors. With over 75 years of experience, Raynor has established itself as a reliable and trusted manufacturer.

In this article, we will examine the various aspects of Raynor Garage Doors to determine if they are a good choice for your garage door needs.

Quality and Durability: One of the key factors to consider when evaluating the performance of any garage door is its quality and durability. Raynor Garage Doors has a reputation for producing high-quality doors that are built to last. They use premium materials and employ advanced manufacturing techniques to ensure their doors can withstand the rigors of daily use and the elements. Raynor doors are known for their sturdiness, resilience, and resistance to dents and scratches. This durability ensures that your investment in a Raynor Garage Door will provide long-term value and protection for your property.

Design and Aesthetics: In addition to functionality, the design and aesthetics of a garage door play a significant role in enhancing the overall curb appeal of a property. Raynor offers a wide array of design options, allowing homeowners to choose from various styles, colors, and finishes that complement their home’s architectural style. Whether you prefer a traditional, carriage house, or contemporary design, Raynor provides options to suit diverse tastes and preferences. The attention to detail and craftsmanship in their designs contribute to the overall appeal of their doors, making them an excellent choice for homeowners seeking both functionality and aesthetics.

Security Features: A garage door is a crucial entry point to your home, and ensuring the security of your property is of paramount importance. Raynor Garage Doors understands this concern and incorporates several security features into their products. Many of their doors come equipped with robust locking mechanisms, reinforced panels, and tamper-resistant hardware, offering enhanced protection against forced entry. Additionally, Raynor offers optional security accessories such as keypad entry systems and smartphone-controlled remote access, further bolstering the security of your garage.

Insulation and Energy Efficiency: Garage doors can significantly impact the energy efficiency of a home. Raynor recognizes the importance of insulation and offers doors with varying levels of insulation options to suit different climate conditions and energy efficiency needs. Their insulated doors help prevent heat loss during winter and minimize heat gain during summer, resulting in reduced energy consumption and lower utility bills. The insulation also helps to dampen noise, creating a quieter and more comfortable garage space.

Warranty and Customer Support: When investing in a garage door, it’s essential to consider the warranty offered by the manufacturer and the level of customer support provided. Raynor Garage Doors stands behind the quality of their products and offers limited warranties on their doors, giving homeowners peace of mind in case of any manufacturing defects. Additionally, Raynor has an extensive network of authorized dealers and service providers, ensuring prompt and reliable customer support when needed.

Overall Reputation and Customer Satisfaction: A company’s reputation and customer satisfaction are key indicators of the quality and reliability of their products. Raynor Garage Doors has built a strong reputation over the years, with numerous satisfied customers attesting to the performance and longevity of their doors. Positive reviews often highlight the durability, aesthetics, and functionality of Raynor doors, further solidifying their position as a reputable brand in the industry.

In conclusion, Raynor Garage Door Repair Tarrant TX is a highly regarded manufacturer that offers a range of high-quality and durable garage doors. Their commitment to craftsmanship, design versatility, security features, insulation options, and customer support make them an excellent choice for homeowners looking for reliable and aesthetically pleasing garage doors. With Raynor Garage Doors, you can expect a combination of functionality, durability, and curb appeal, making them a good option for your garage door needs.

Tarrant County Door & Gate

Tarrant County Door & Gate
6408 Marlette Court,
North Richland Hills, TX

817-456-2958

Are Clopay Garage Doors Any Good-Temple Garage Doors & Gate

Clopay Garage Door Repair Temple TX are known for their quality, durability, and variety of options, making them a popular choice among homeowners. With over 50 years of experience in the industry, Clopay has established itself as a trusted brand when it comes to garage doors.

In this article, we will delve into the reasons why Clopay garage doors are considered to be a reliable and reputable choice for residential garages.

One of the key factors that contribute to Clopay’s reputation is their commitment to quality craftsmanship. Clopay garage doors are constructed using high-quality materials, ensuring their longevity and ability to withstand the test of time. Whether you choose a steel, wood, or composite door, you can expect a sturdy and well-built product that will enhance the security and aesthetics of your home.

Clopay offers a wide range of garage door styles, designs, and customization options, allowing homeowners to find the perfect fit for their unique preferences and architectural style. From traditional raised panel doors to contemporary full-view glass doors, Clopay offers a diverse selection that caters to different tastes. This level of customization allows homeowners to personalize their garage doors and create a cohesive look that complements the overall design of their home.

In addition to their aesthetic appeal, Clopay garage doors are designed with functionality in mind. The doors feature innovative technologies and engineering, such as Intellicore insulation and WindCode reinforcement, which enhance energy efficiency and provide protection against extreme weather conditions. These features not only help to regulate temperature and reduce energy costs but also contribute to the overall durability and strength of the doors.

Safety is another area where Clopay excels. Their garage doors are equipped with advanced safety features, including pinch-resistant panels and tamper-resistant hardware, which help to prevent accidents and unauthorized access to the garage. Furthermore, Clopay doors can be integrated with a variety of garage door openers, many of which offer additional safety features such as rolling code technology and motion detection sensors.

Clopay’s commitment to customer satisfaction is evident in their warranty offerings. Depending on the specific product, Clopay provides varying warranty coverage, demonstrating their confidence in the durability and performance of their garage doors. This level of support gives homeowners peace of mind knowing that they are investing in a reliable and long-lasting product.

Another noteworthy aspect of Clopay is their dedication to sustainability. They prioritize using environmentally friendly materials and manufacturing processes, ensuring that their products have a minimal impact on the environment. By choosing Clopay, homeowners can feel confident that they are making an eco-conscious choice for their garage doors.

While Clopay garage doors are generally considered to be of high quality, it is important to note that proper installation and regular maintenance are crucial for optimal performance and longevity. Hiring a professional installer and adhering to the recommended maintenance guidelines will ensure that your Clopay garage door continues to function smoothly and efficiently for years to come.

In conclusion, Clopay Garage Door Repair Temple TX have earned a solid reputation for their quality craftsmanship, diverse design options, and commitment to safety and sustainability. Whether you prioritize durability, aesthetics, energy efficiency, or all of the above, Clopay offers a range of garage doors to suit your needs. By choosing a Clopay garage door, you can enhance the curb appeal, security, and functionality of your home while enjoying the peace of mind that comes with investing in a reputable and reliable brand.

Temple Garage Doors & Gate

1410 W Ave C #6, Temple, TX 76504

1-254-221-8805

Page 3 of 5

Powered by WordPress & Theme by Anders Norén